Ready to make a splash with your drawing skills? 🐟 In this fun and easy tutorial, you’ll learn how to draw a shark step by step—even if you’re a complete beginner! Grab your pencils and dive into the deep blue with us. 🏝️
✨ Materials Needed:
Before we begin, here’s what you’ll need:
- Pencil ✏️
- Eraser 🩶
- Black marker or pen 🖊️
- Coloring pencils, crayons, or markers (gray, blue, white) 🎨
- Drawing paper 📄
Step-by-Step Instructions 🖼️
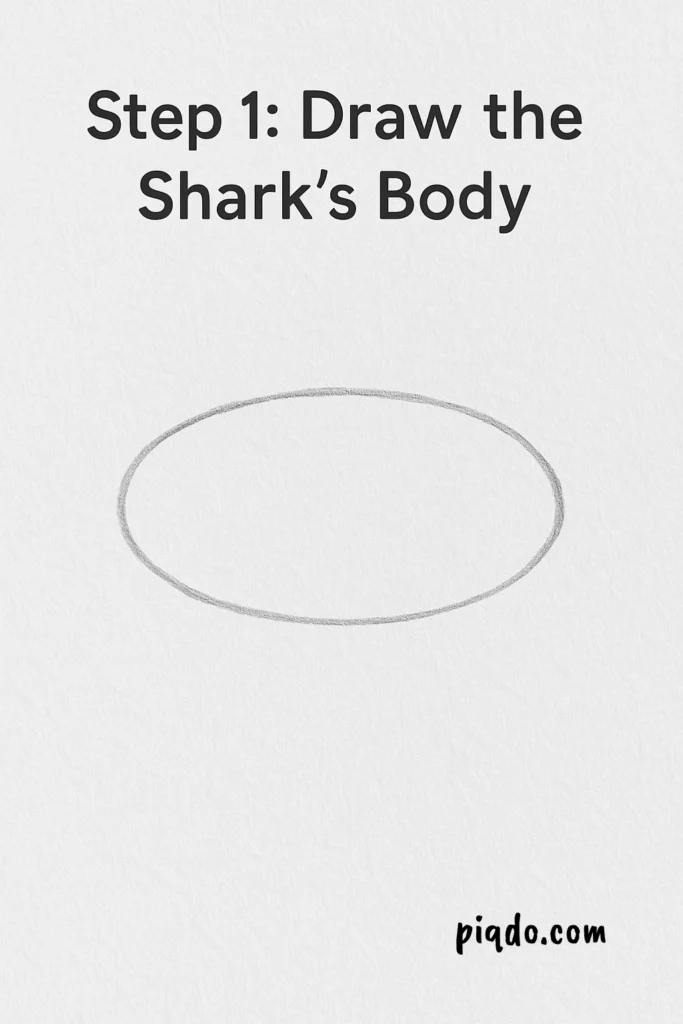
Step 1: Draw the Shark’s Body
Start by sketching a long, slightly curved oval shape. This will be the base of the shark’s body.
Step 2: Add the Tail
At the end of the oval, draw a “V” shape for the tail. Make sure the top part is a little bigger than the bottom.

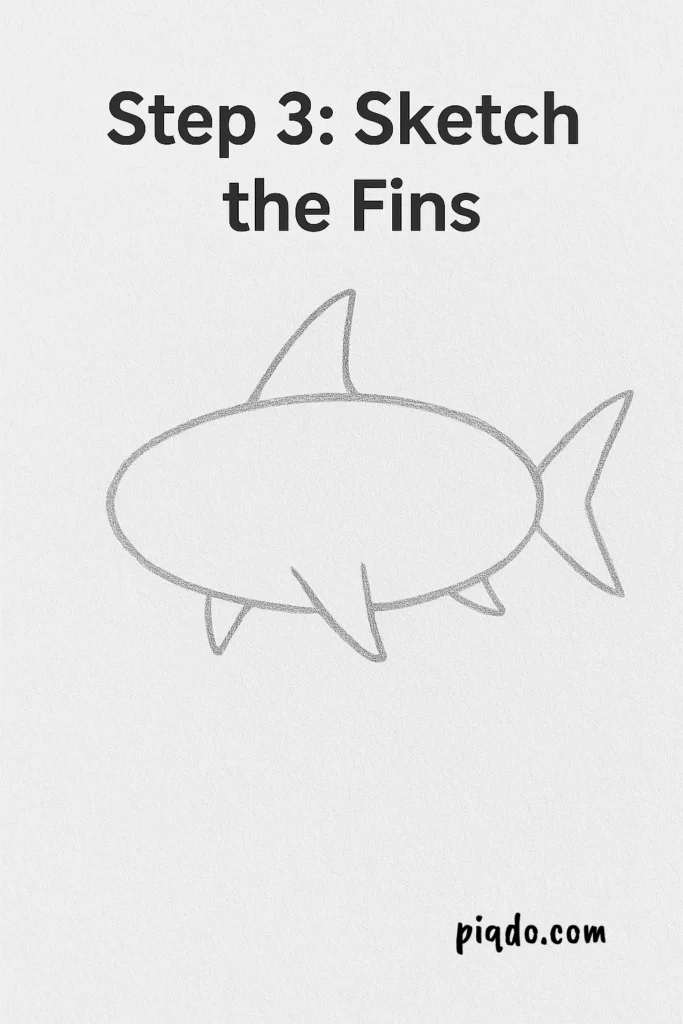
Step 3: Sketch the Fins
Draw a large dorsal fin on the shark’s back. Add two smaller fins on the sides and one on the bottom near the tail.
Step 4: Outline the Head and Snout
At the front of the oval, curve it to form the shark’s snout. Make it slightly pointy for that classic shark shape.

Step 5: Add the Eyes and Gills
Draw a small circle for the eye. Then, draw three short curved lines behind the head to create gills.

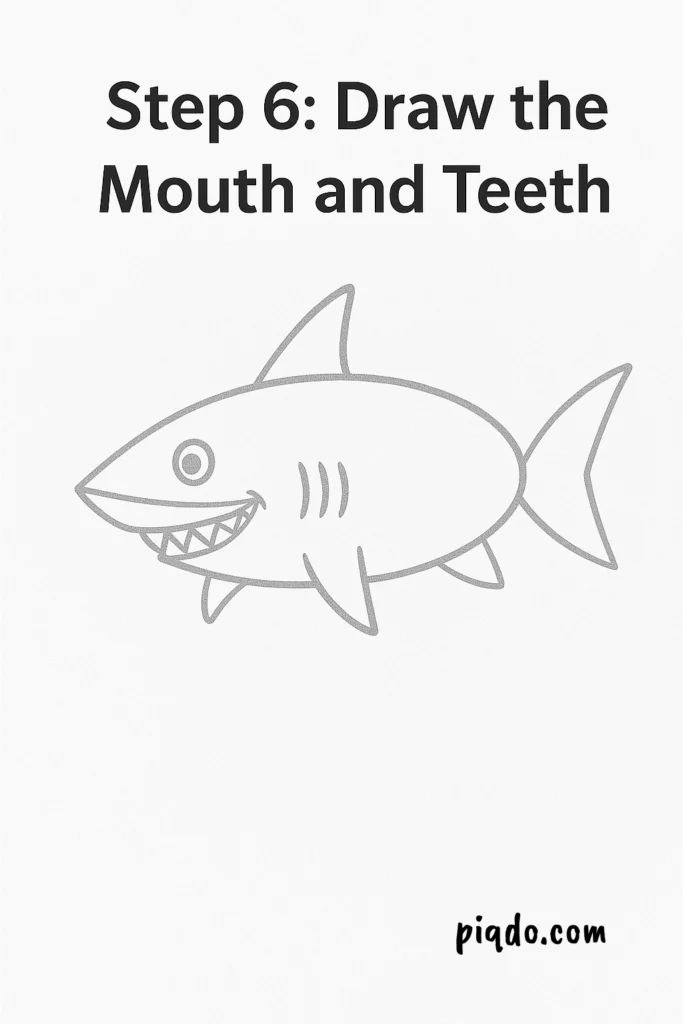
Step 6: Draw the Mouth and Teeth
Add a curved line for the smile, then fill it with tiny triangle shapes for teeth. Sharks have lots of sharp teeth! 😁
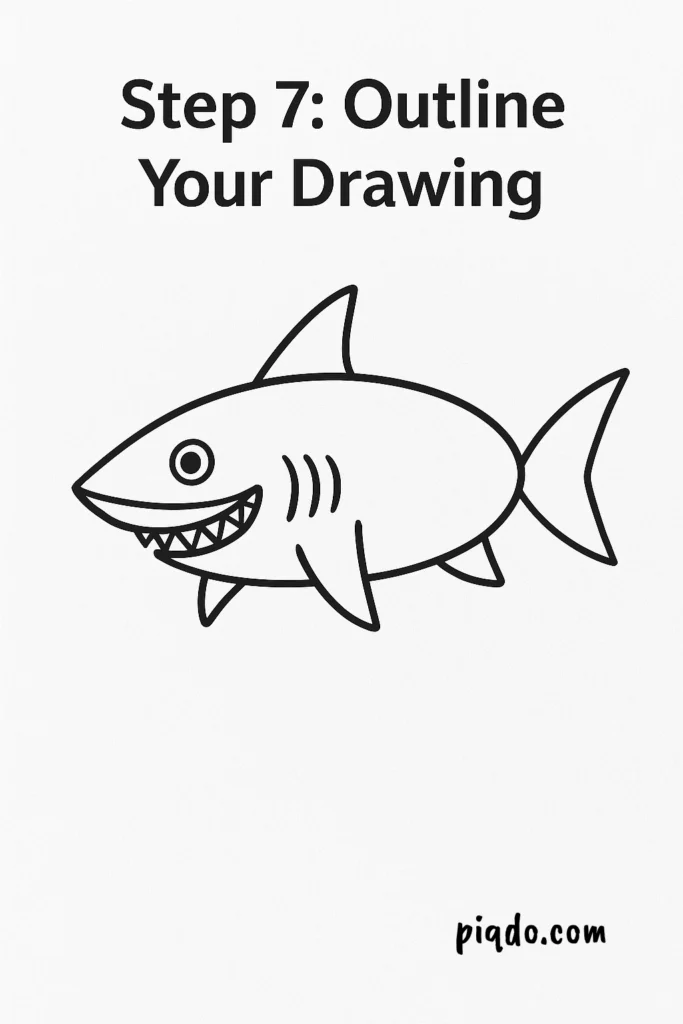
Step 7: Outline Your Drawing
Trace over your pencil lines with a black marker to make the shark pop. 🖍️
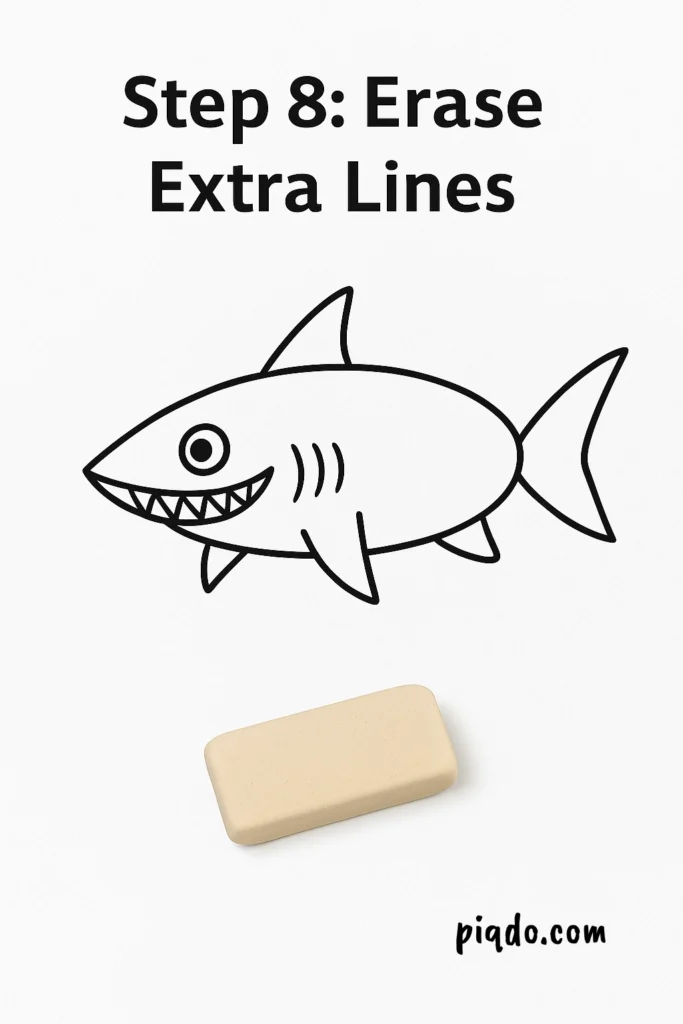
Step 8: Erase Extra Lines
Once the ink is dry, gently erase any pencil marks left behind. Your shark is taking shape now! ✨
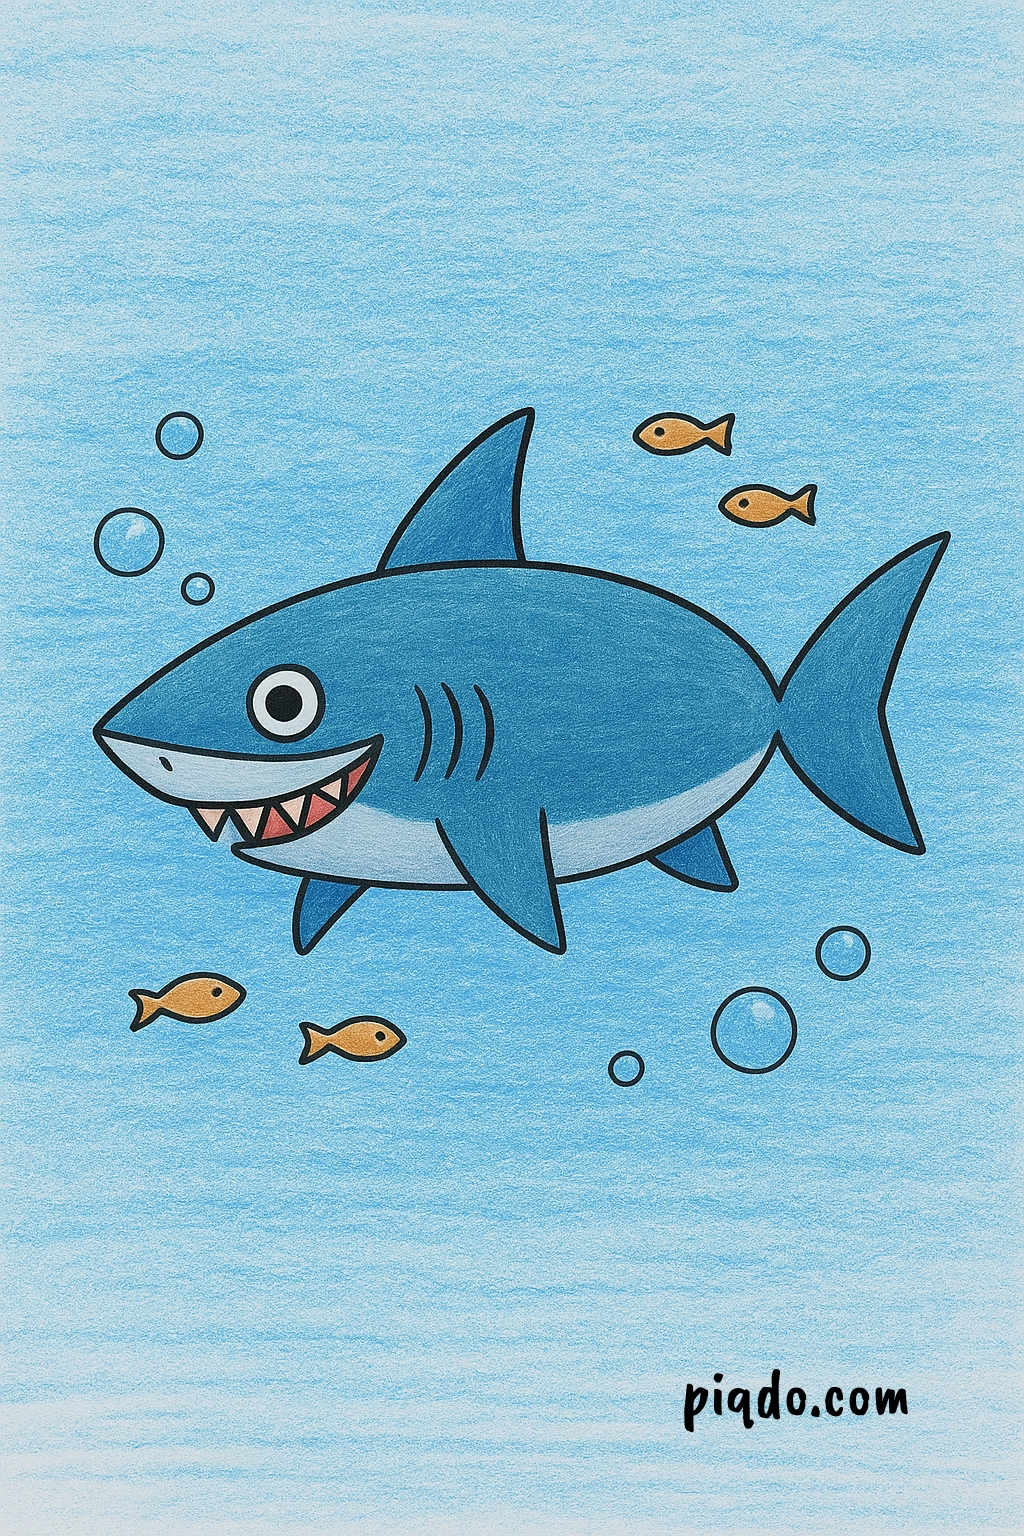
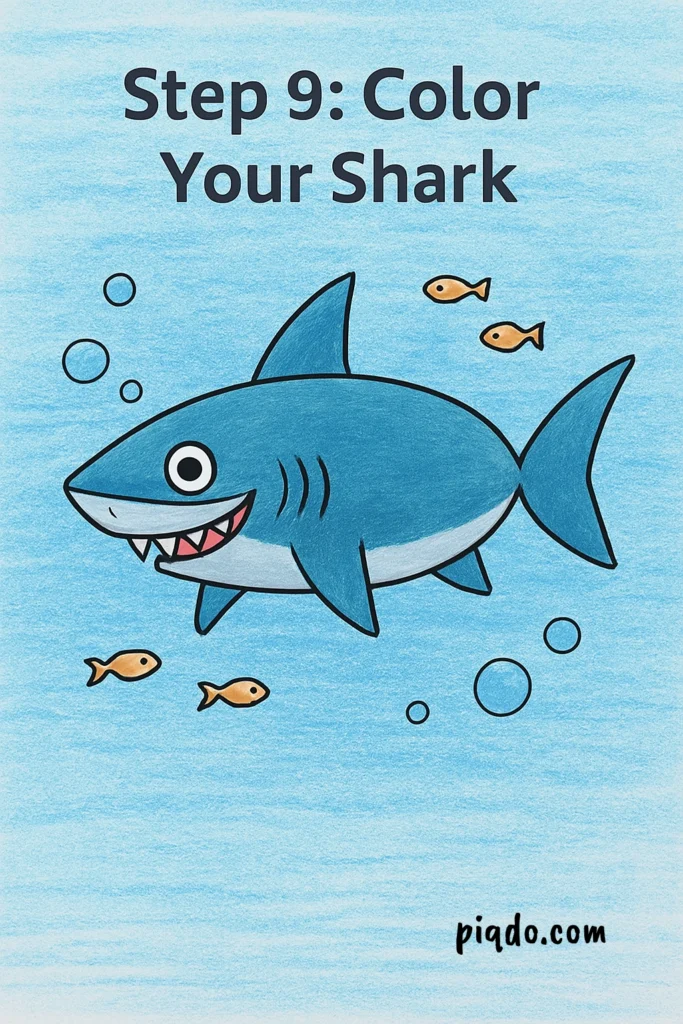
Step 9: Color Your Shark
Use shades of gray, blue, and white to color in your shark. Feel free to add bubbles or little fish around it for an underwater scene! 🌊🐠
🏁 Final Thoughts
Drawing a shark is easier than you think, and a lot of fun too! Whether you’re doing this for a school project, a marine life fan, or just love sea creatures, your shark is sure to impress. Keep practicing and try drawing different kinds of sea animals next!
Happy drawing! 🎉🦈