Drawing a bike might seem tricky at first, but don’t worry — with a few simple steps, you’ll be sketching a cute bicycle in no time! 🚴♂️ Whether you’re new to drawing or just looking for a fun project, this easy guide will help you create your own two-wheeled masterpiece. 🎨
Let’s grab our supplies and get started!
🖍️ Materials You’ll Need:
- Pencil ✏️
- Eraser 🩵
- Drawing paper 📄
- Black pen or marker (for outlining) 🖊️
- Colored pencils, markers, or crayons (optional for coloring!) 🎨
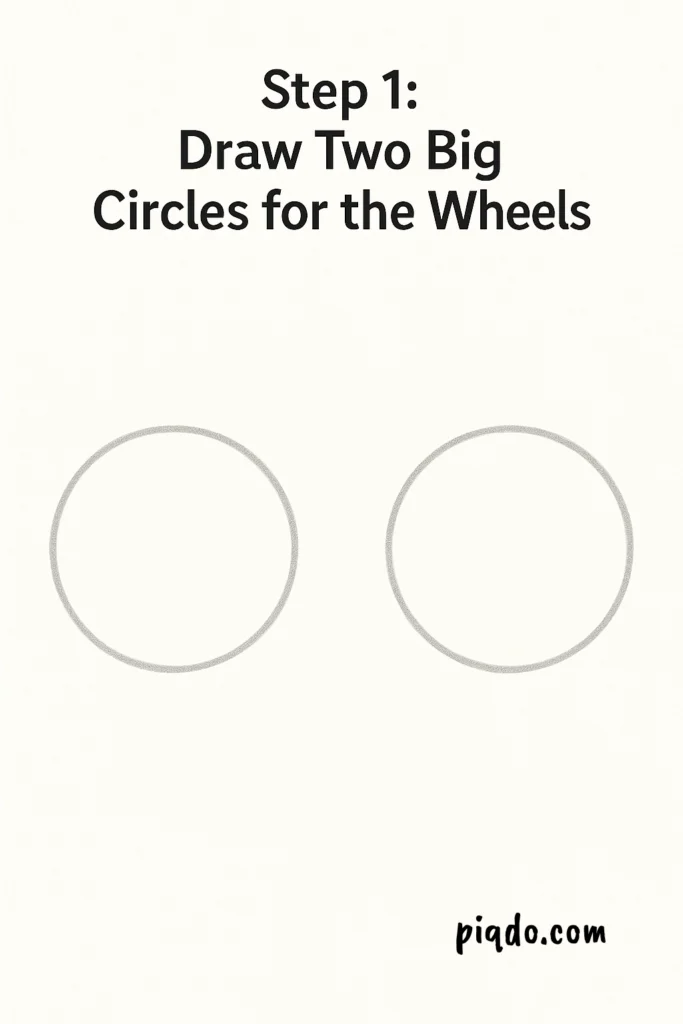
🛞 Step 1: Draw Two Big Circles for the Wheels
Start by drawing two large circles next to each other, but leave a little space between them. These will be the bike’s wheels! Try to make them about the same size — you can even trace around a cup or lid if you want perfect circles. 🥤
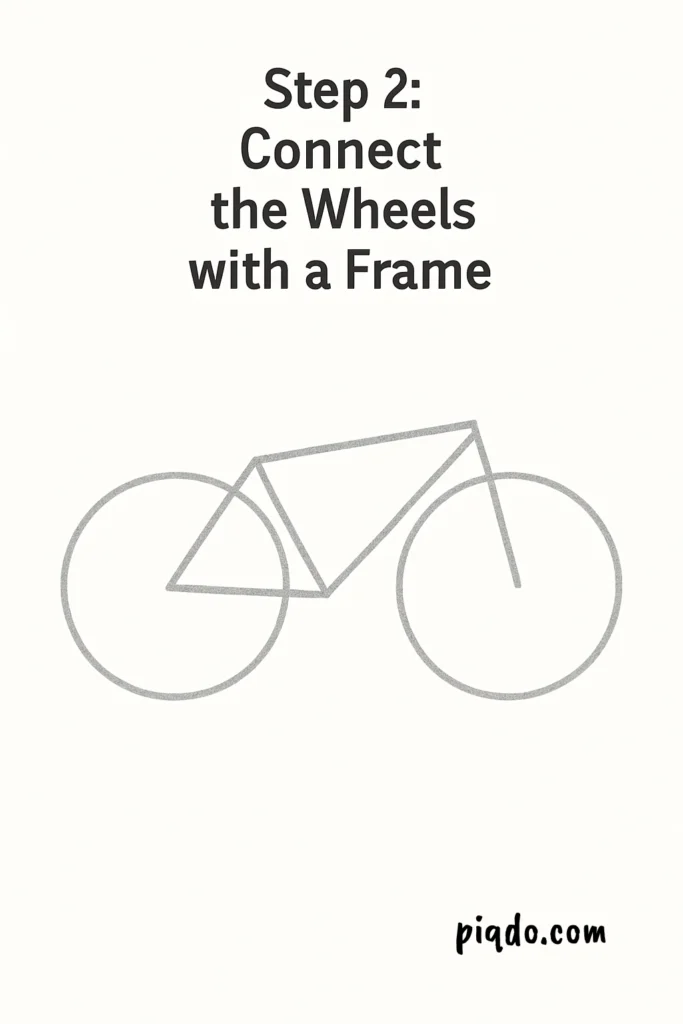
🔗 Step 2: Connect the Wheels with a Frame
Now, draw a slanted line connecting the top part of the front wheel to the back wheel. Then, draw two more lines: one straight across connecting the centers of both wheels, and another slanted line forming a triangle between the two wheels. This makes the main part of the bike’s frame! 📐
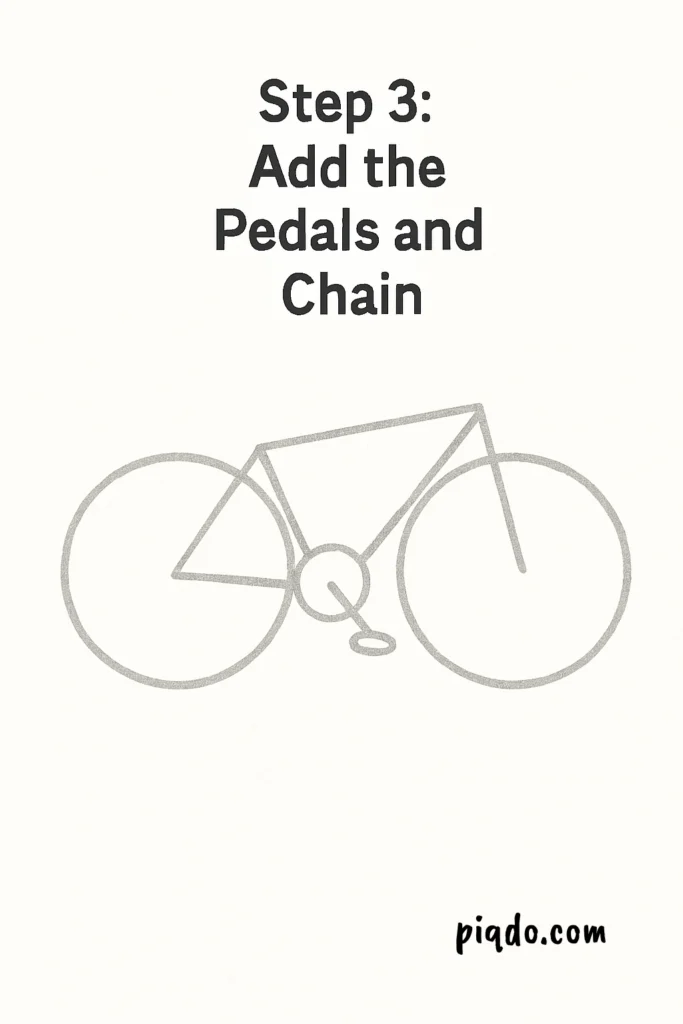
🛠️ Step 3: Add the Pedals and Chain
In the middle of the bike frame (where all the lines meet), draw a small circle — that’s the pedal hub. 🚴 From the circle, draw two little sticks going out: one forward, one backward. Add tiny ovals at the ends for the pedals!
Draw a chain guard by sketching a curve around the bottom part of the frame connecting the wheels.
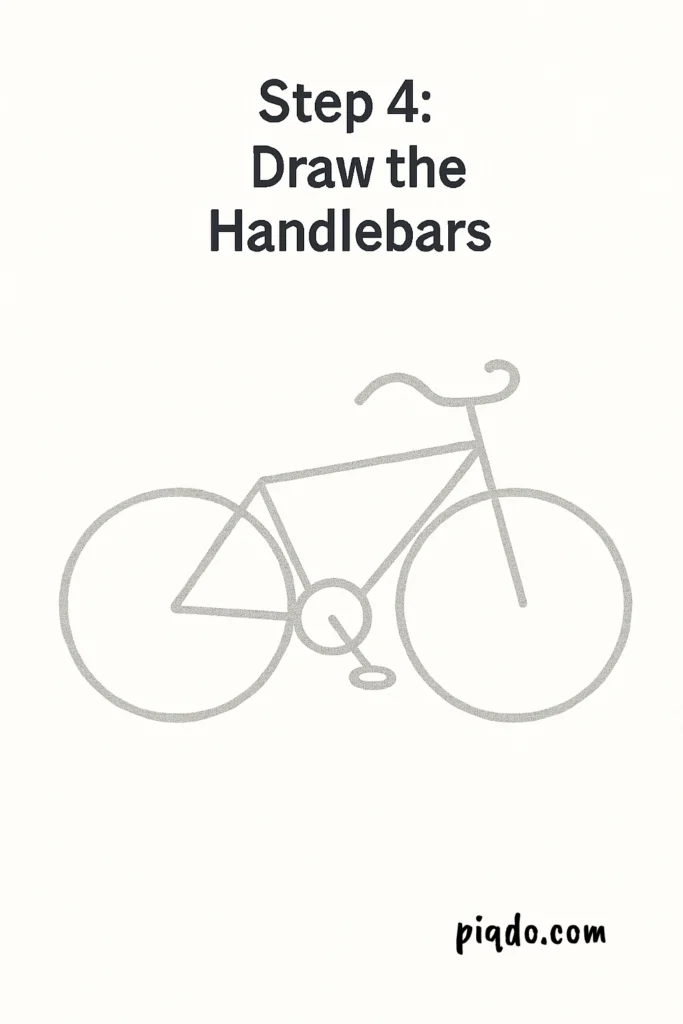
🚲 Step 4: Draw the Handlebars
Above the front wheel, sketch a short vertical line for the handlebar stem. Then, draw a horizontal line across the top for the handlebars themselves. You can make the ends curve upward for extra style! 🛠️
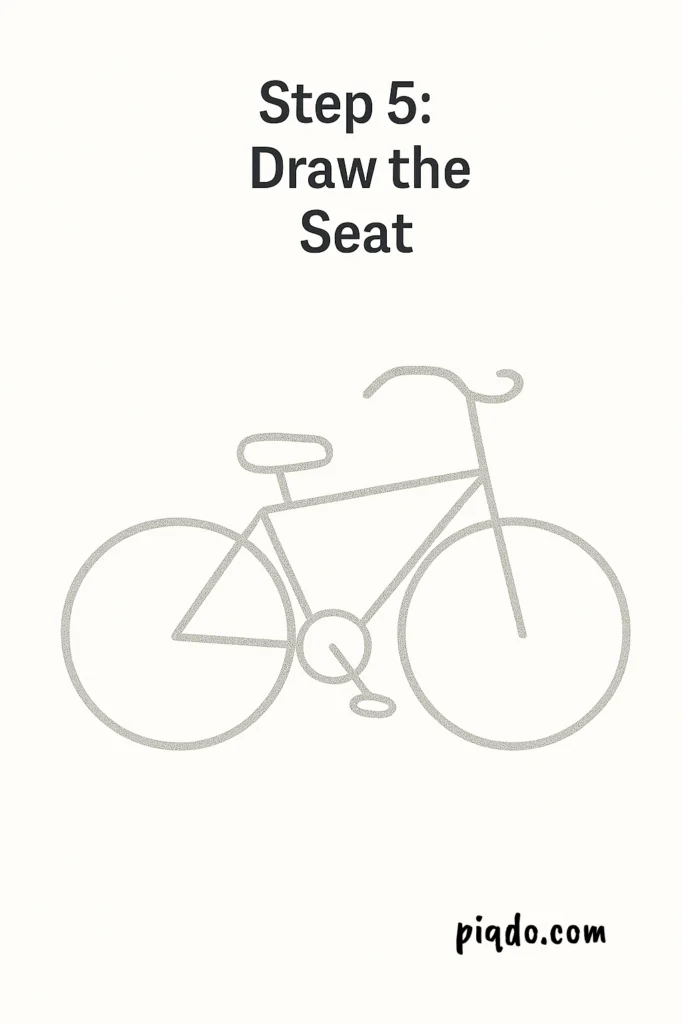
🪑 Step 5: Draw the Seat
Over the back wheel, draw a short vertical line and a small oval or rectangle on top — that’s the seat! Make it a little bit rounded for comfort. 🚴♀️
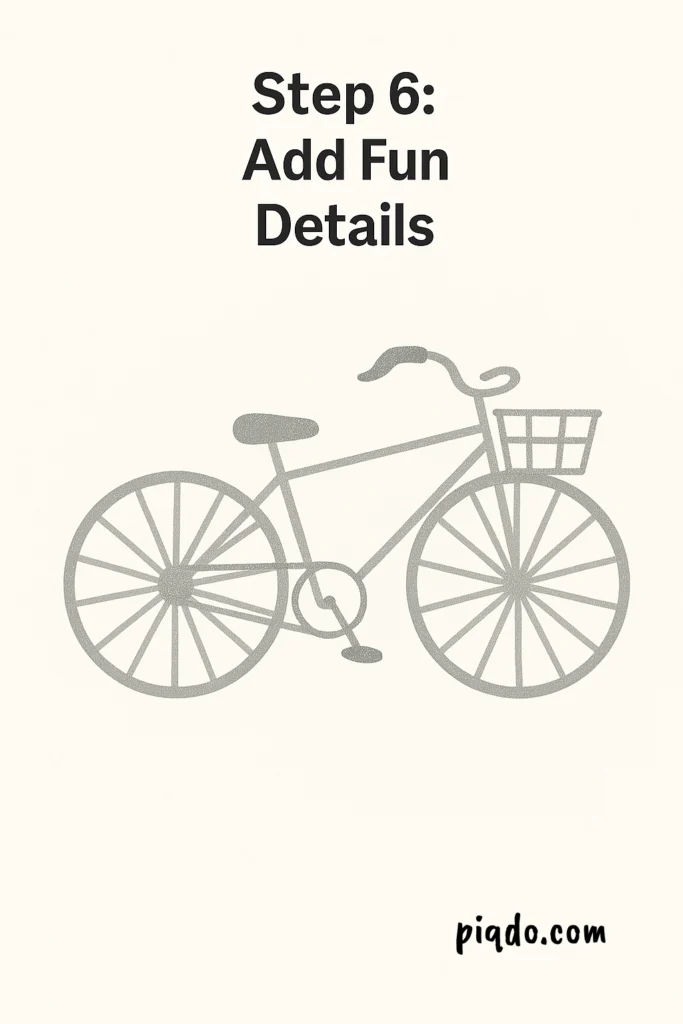
🎨 Step 6: Add Fun Details!
Now it’s time to personalize your bike! Add some spokes inside the wheels by drawing lines from the center outward like a pizza 🍕. You can also draw a little basket on the front, streamers on the handlebars, or even a bell! 🔔
🖍️ Step 7: Outline and Color
Go over your pencil lines with a black pen or marker to make your bike stand out! After the ink dries, gently erase any extra pencil lines. 🖊️✨
Now, get creative with color! You can make a bright red bike, a pastel pink cruiser, or even a rainbow bike! 🌈

🌟 Final Tips:
- If you make a mistake, no worries! That’s what your eraser is for.
- Bikes come in all shapes and sizes, so have fun and make yours unique!
- Practice makes perfect — the more you draw, the easier it gets!
Thanks for drawing with me today! 🎨🚲
I’d love to see your bike drawing — feel free to share it! 📸