Dreaming of peaceful fields, rustic barns, and winding dirt roads? This easy drawing tutorial is perfect for beginners who want to sketch a cozy country scene. Whether you’re looking to unwind or learn landscape basics, this guide will walk you through the steps from start to finish. 🎨
🎨 Materials Needed
Before we begin, gather these simple supplies:
- Drawing paper or a sketchbook 📄
- Pencils (HB for sketching, 2B–4B for shading) ✏️
- Eraser 🧽
- Fine liner or black pen (optional) 🖊️
- Colored pencils, crayons, or markers 🎨
- Ruler (optional for horizon lines) 📏
✏️ Step-by-Step Instructions
Step 1: Draw the Horizon Line
Start by drawing a light horizontal line across your page. This is your horizon, dividing the land from the sky. Make it slightly curved for a soft, rolling hill effect.

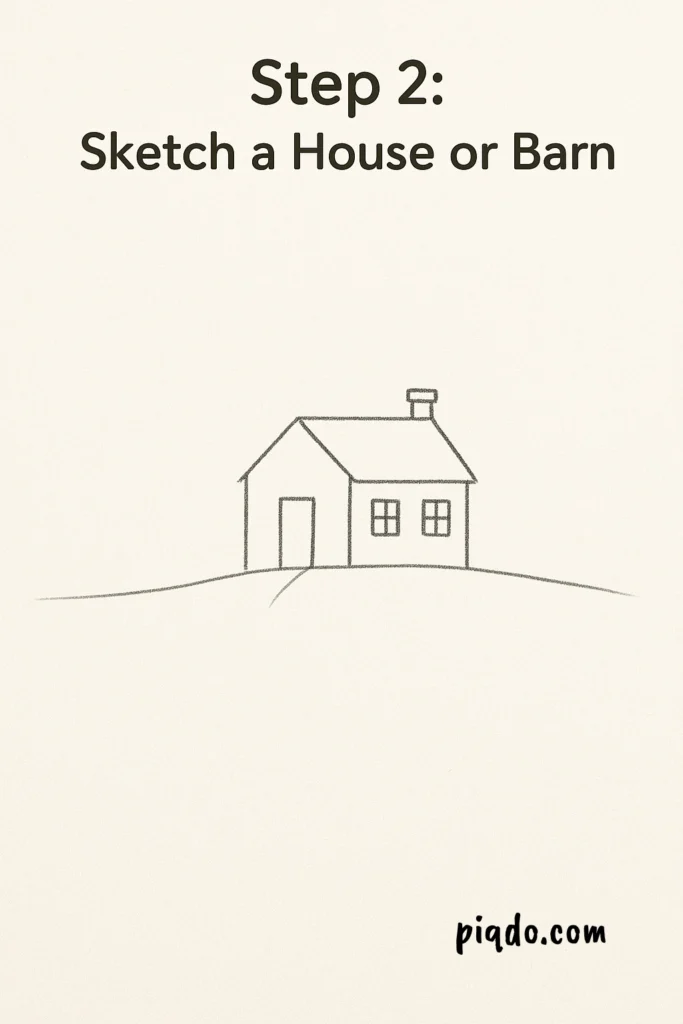
Step 2: Sketch a House or Barn 🏠
Draw a small house or barn slightly off-center to create visual interest. Use basic shapes—a rectangle for the base and a triangle or sloped roof. Add windows, a door, and maybe a chimney.
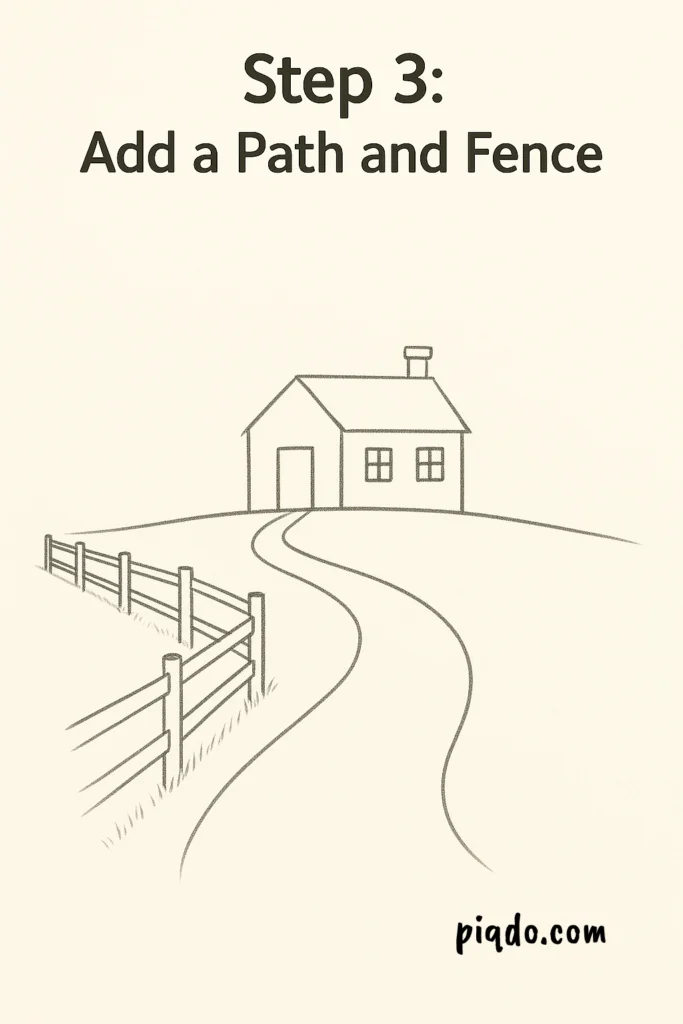
Step 3: Add a Path and Fence 🚪➡️
Sketch a winding path leading from the door into the foreground. Add a wooden fence with short vertical lines and two horizontal rails to guide the viewer’s eye through the landscape.
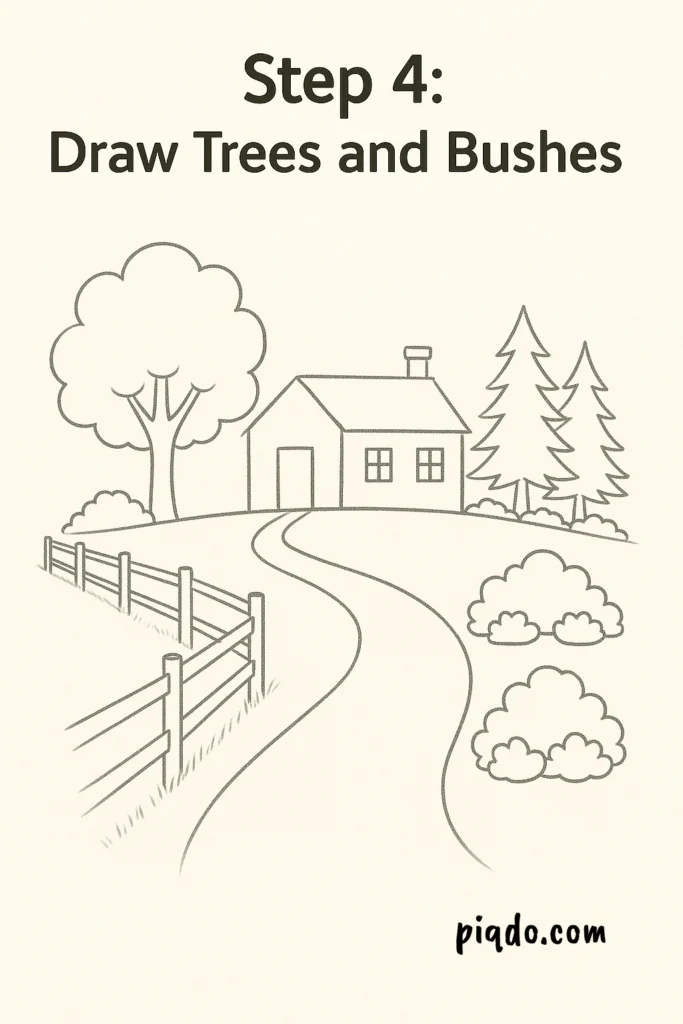
Step 4: Draw Trees and Bushes 🌳
Frame your scene with trees—use round shapes for leafy trees or zigzag lines for pines. Draw bushes using small, bumpy ovals. Vary the sizes for depth and layering.
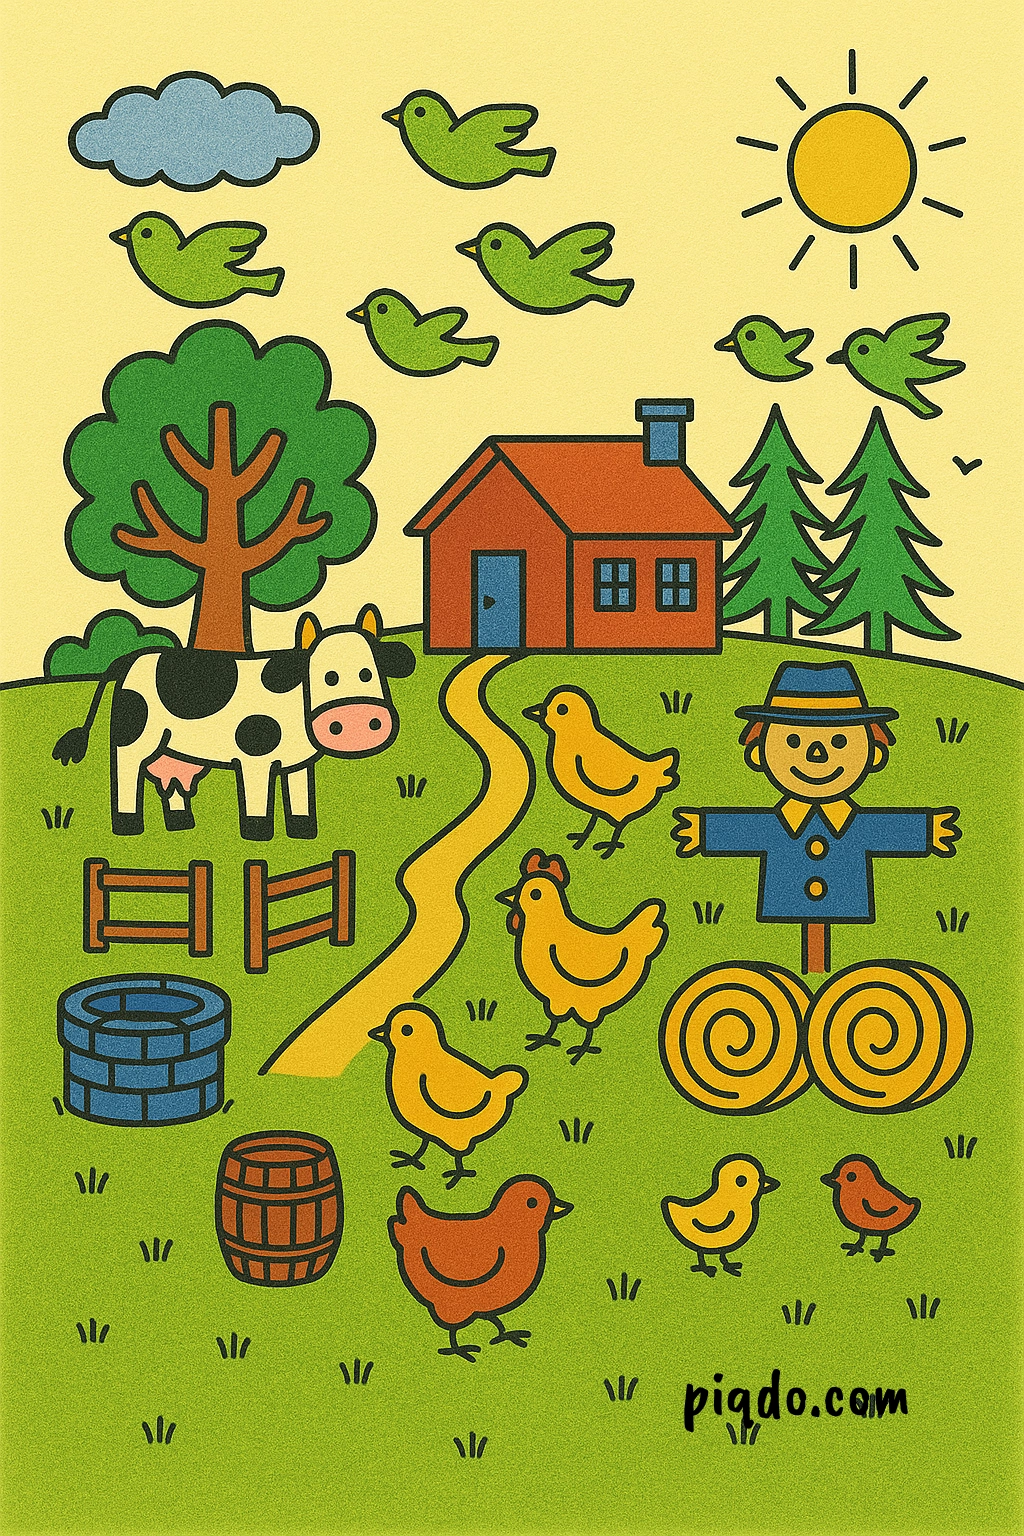
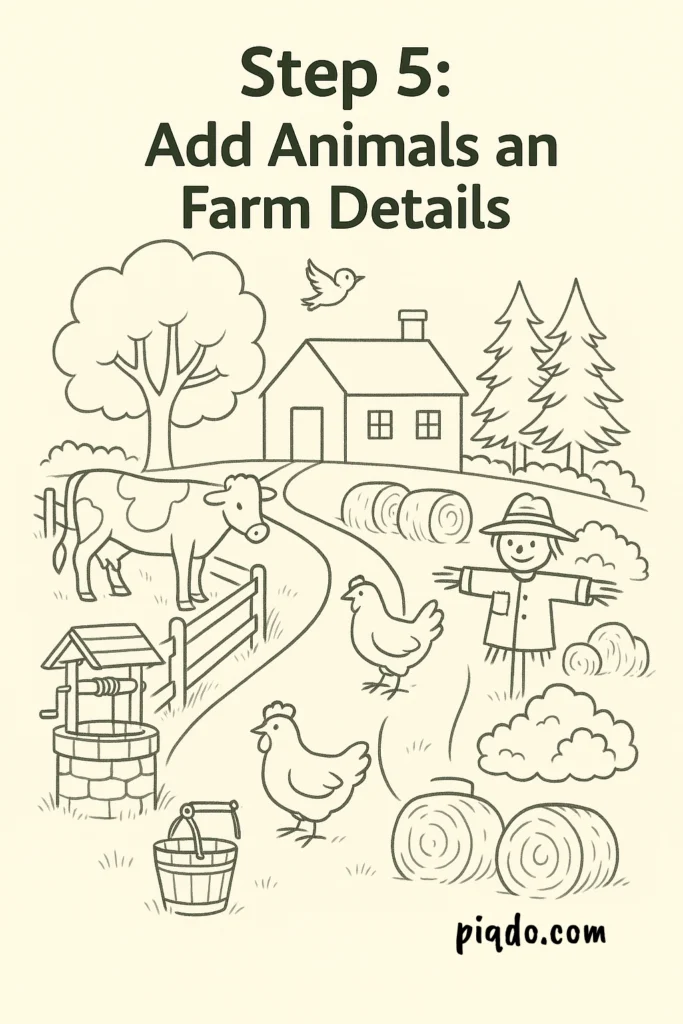
Step 5: Add Animals and Farm Details 🐄🐓
Bring your drawing to life by adding animals like cows, chickens, or birds. You can also sketch hay bales, a well, or a scarecrow to make the scene feel alive and cozy.
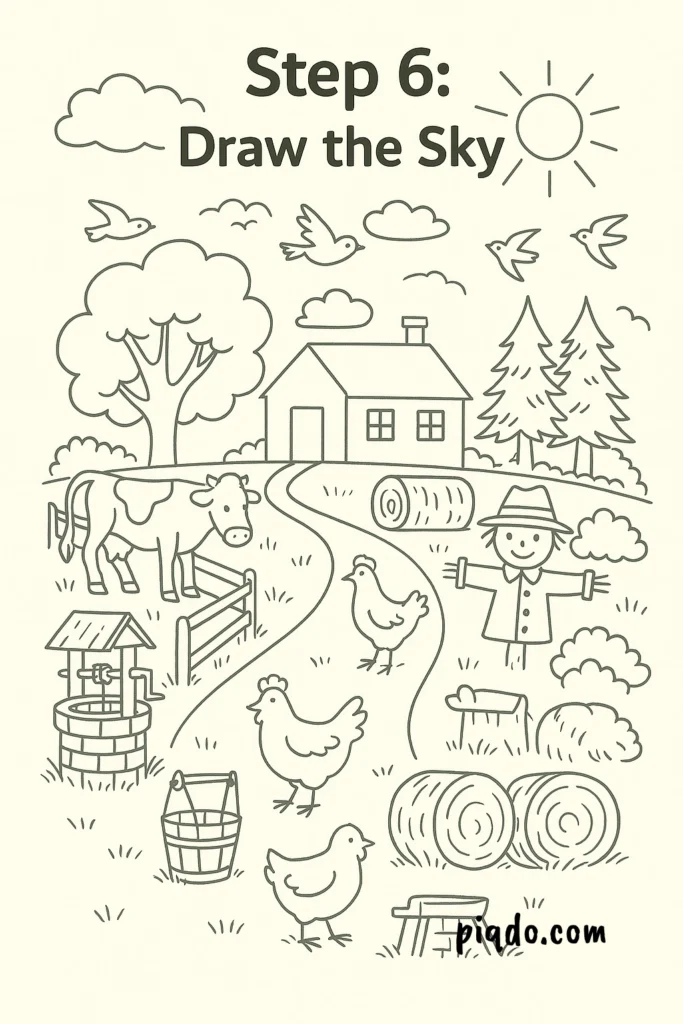
Step 6: Draw the Sky 🌞
Add sun, clouds, or flying birds in the sky. For a peaceful evening effect, you can shade in a soft sunset gradient or add stars for a nighttime vibe.
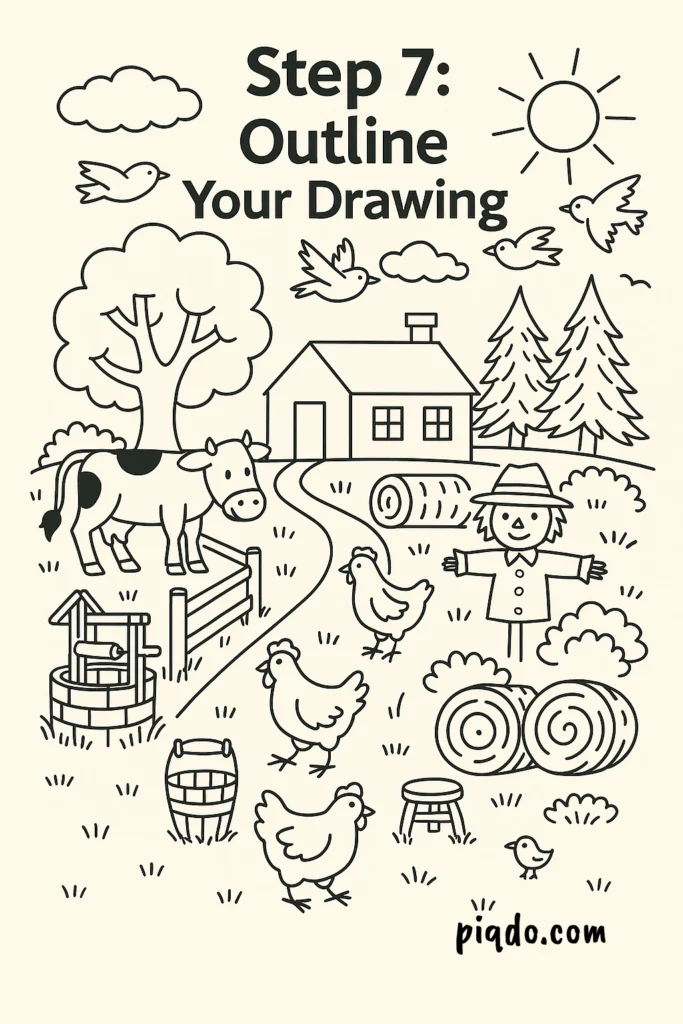
Step 7: Outline Your Drawing 🖋️
Once you’re happy with your sketch, trace over it using a black pen or fine-liner. This gives your drawing boldness and helps clean it up before coloring.
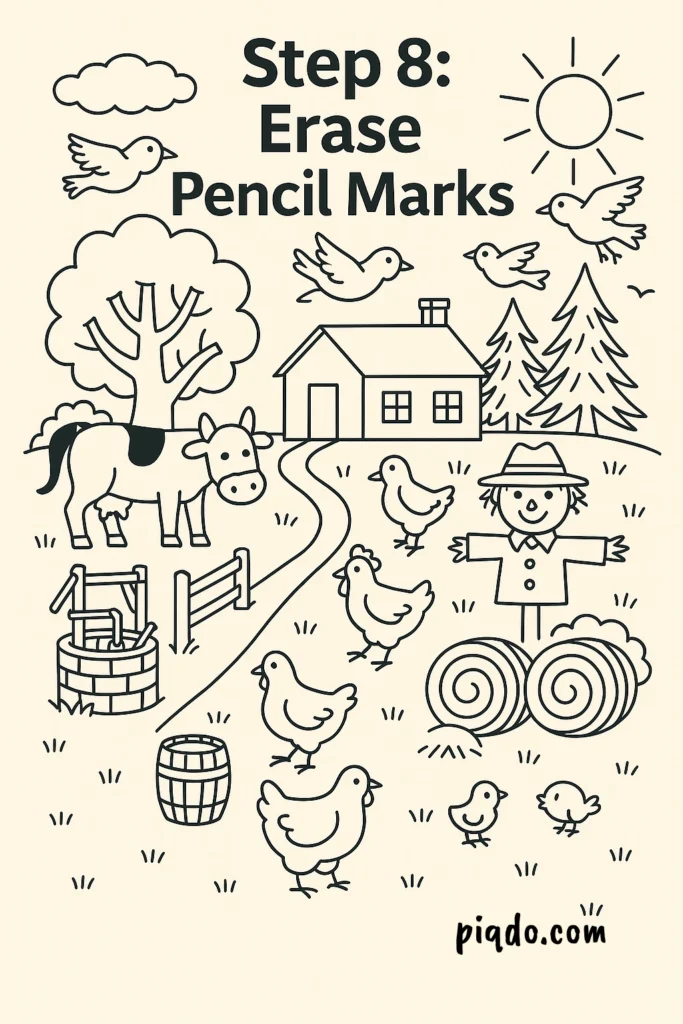
Step 8: Erase Pencil Marks
Gently erase all visible pencil lines, being careful not to smudge your ink outlines. This will make your drawing look crisp and clean.
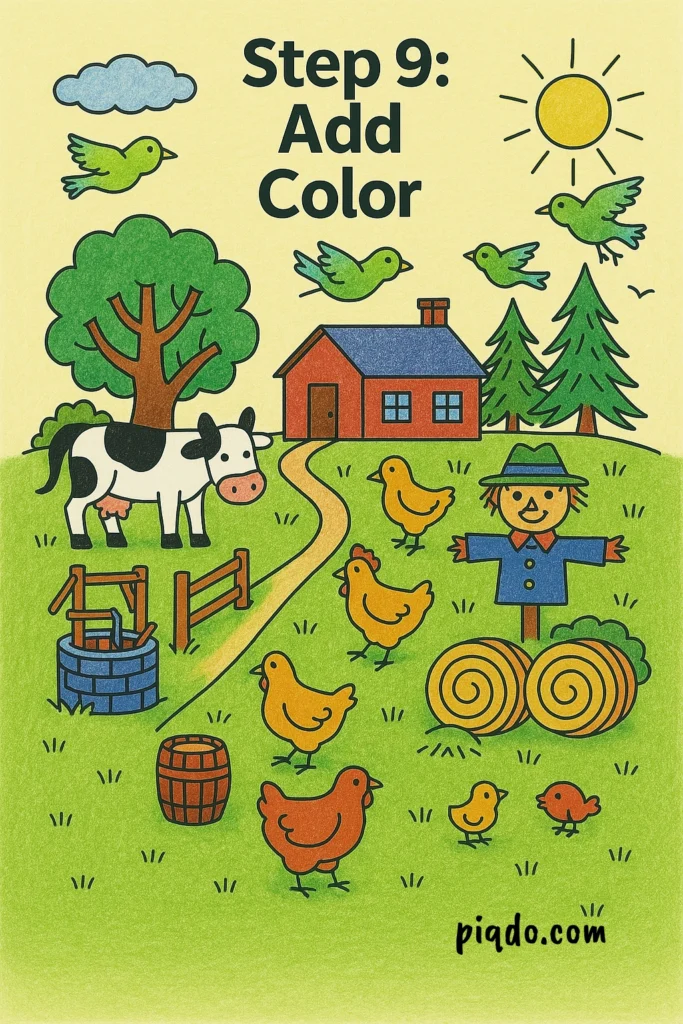
Step 9: Add Color 🎨
Time to get creative! Use colored pencils or markers to bring your country scene to life. Think green grass, blue skies, red barns, and bright flowers. 🌼
🌾 Final Tips
- Start with light pencil strokes so you can easily adjust as needed.
- Don’t worry about perfection—focus on capturing the feel of the countryside.
- Use photo references for inspiration if you’re stuck!
🧡 Conclusion
Drawing a country scene is a relaxing and rewarding project. With just a few basic shapes and your imagination, you can create your own rustic masterpiece. 🌻
Happy drawing! ✏️ Let us know in the comments what elements you added—did your scene have a windmill? A duck pond? A sunflower field?