If you’re looking for a fun winter-themed drawing project, learning how to draw a snowflake is the perfect place to start! ❄️ Whether you’re decorating greeting cards, making DIY crafts, or just want to doodle something frosty, this beginner-friendly tutorial will guide you every step of the way.
✏️ Materials Needed
Before we get started, gather these simple supplies:
- Blank drawing paper 📄
- Pencil ✏️
- Eraser 🧼
- Ruler (optional but helpful) 📏
- Black pen or fine liner 🖊️
- Colored pencils, markers, or glitter pens (optional) 🎨
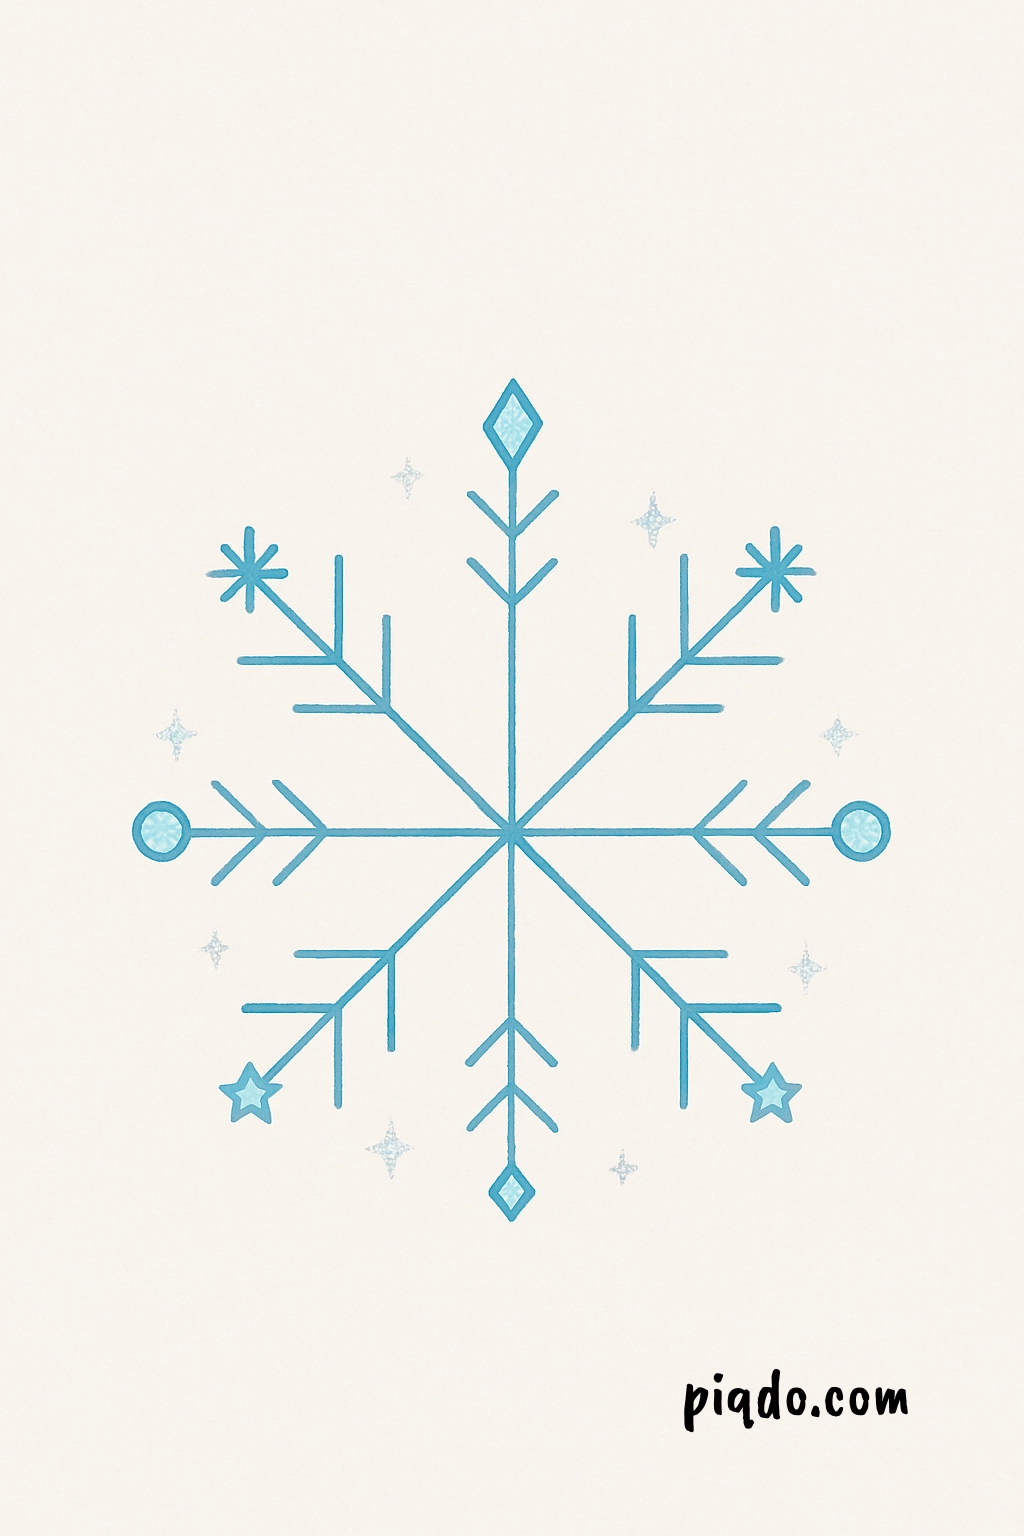
🧊 Step-by-Step Snowflake Drawing Instructions
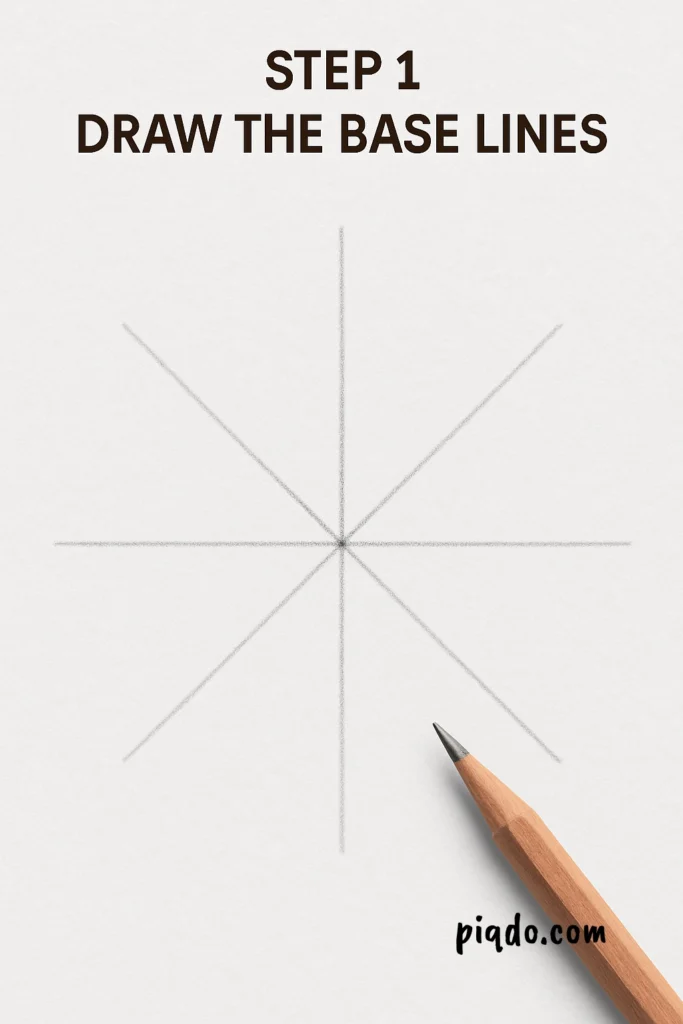
Step 1: Draw the Base Lines
Start by drawing a big “X” on your paper. Then, add a vertical line that cuts through the center of the “X.” You should now have six evenly spaced lines, like snowflake arms.
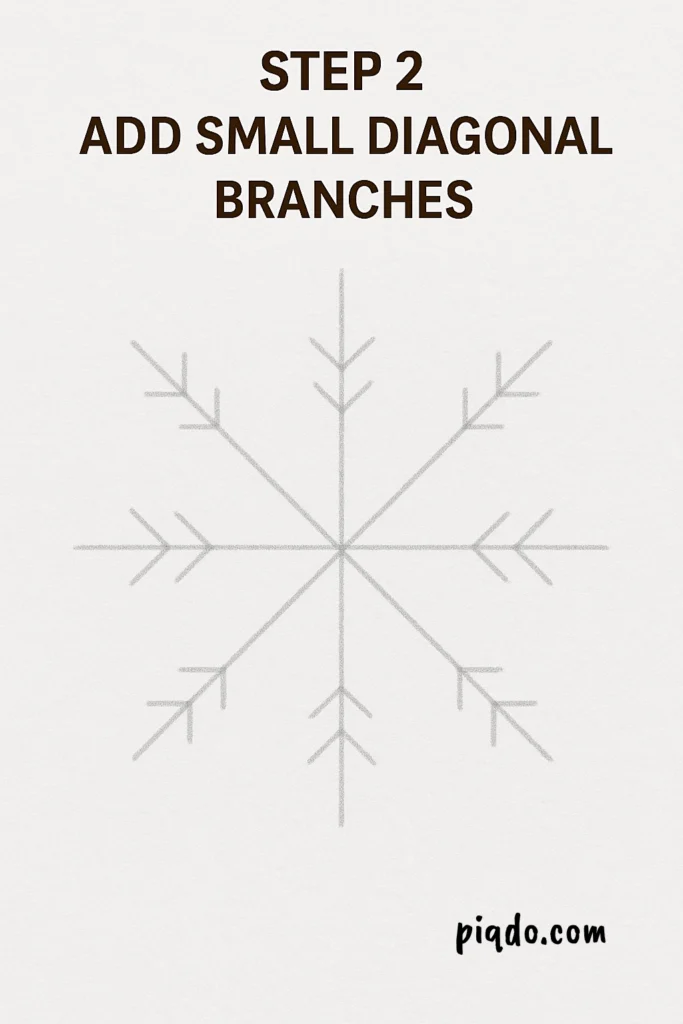
Step 2: Add Small Diagonal Branches
On each of the six lines, draw two small diagonal lines near the middle that point outward. These look like tiny branches and start forming the snowflake’s structure.
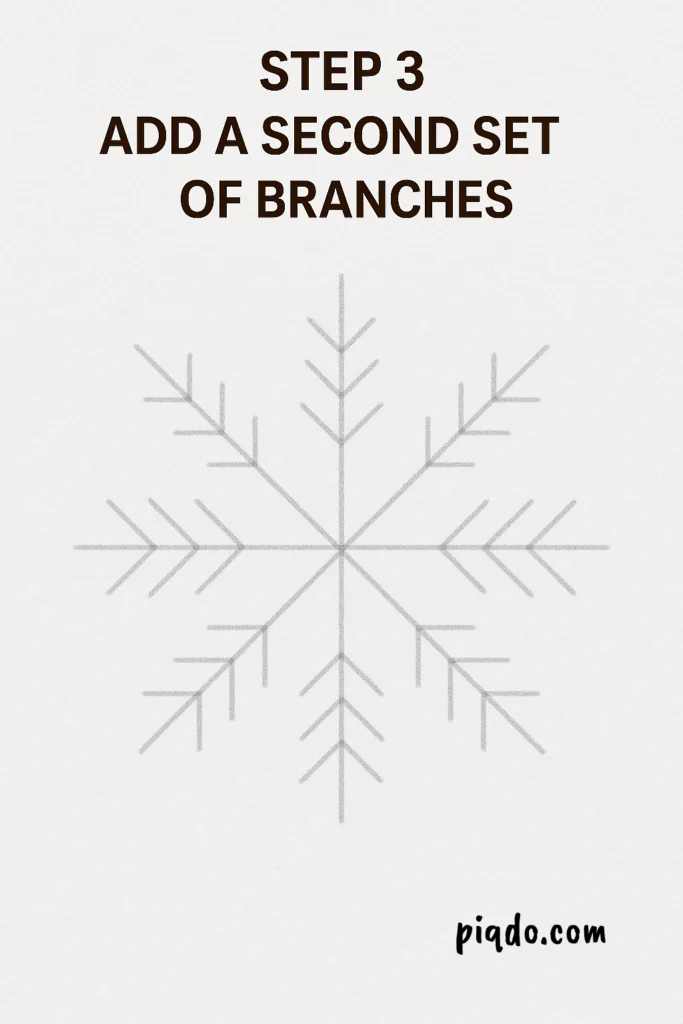
Step 3: Add a Second Set of Branches
Repeat the previous step a little farther out on each line. Keep your design balanced by placing the diagonal lines at the same angle and distance on each arm.
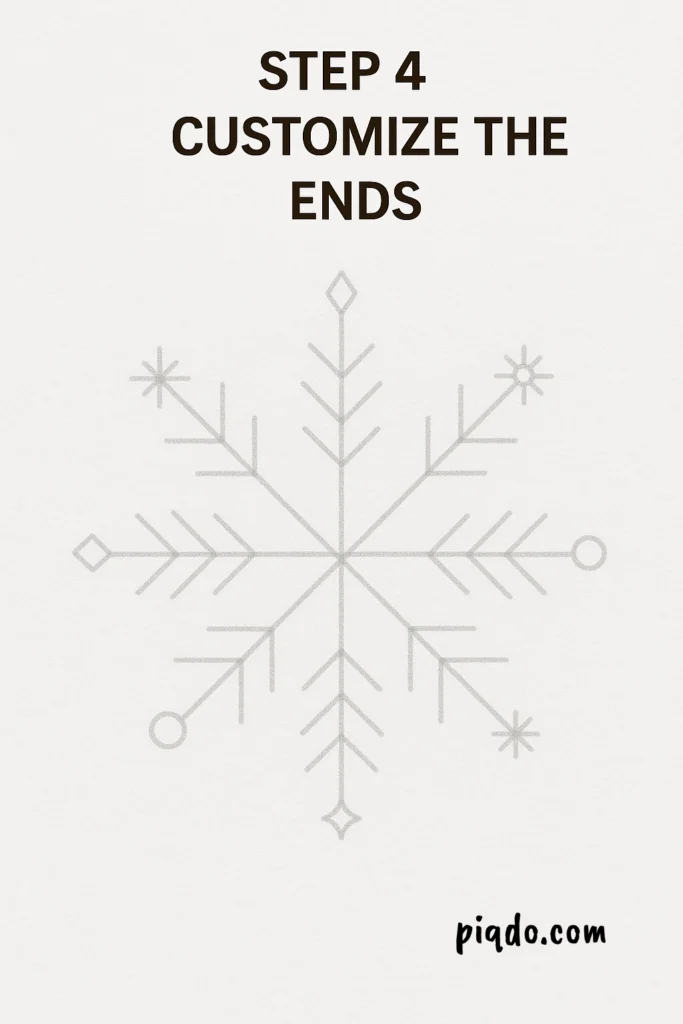
Step 4: Customize the Ends
Add creative details to the tips of each snowflake arm — like diamonds, circles, or tiny stars. ✨ This gives your snowflake its own unique personality!
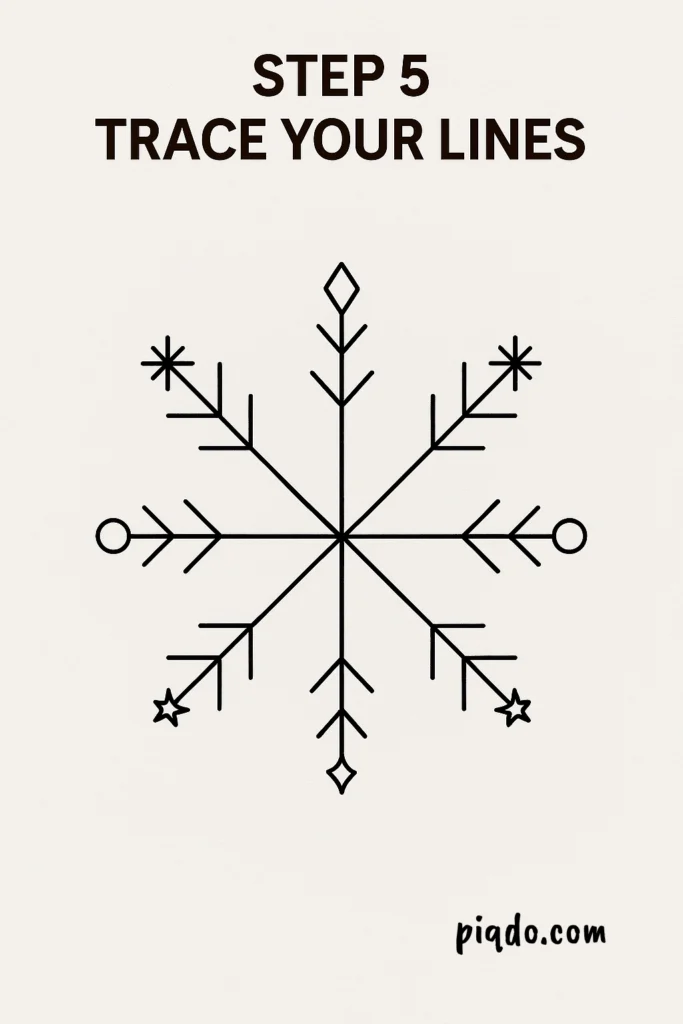
Step 5: Trace Your Lines
Once your snowflake design is complete, trace over your pencil lines using a black pen or marker for a bold, clean look. Let it dry completely.
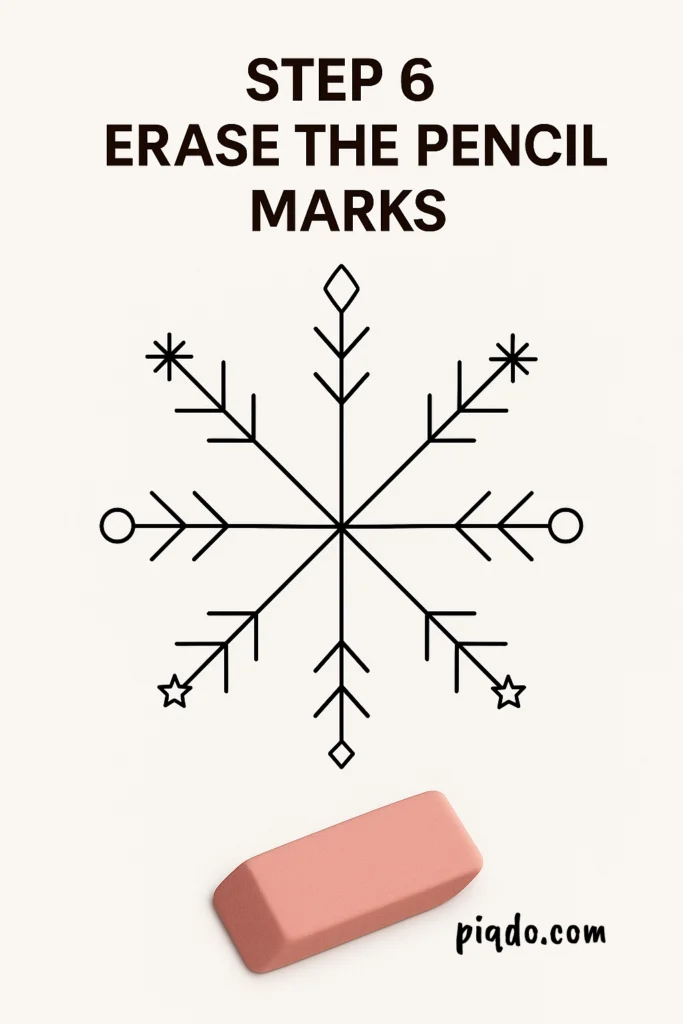
Step 6: Erase the Pencil Marks
Carefully erase the remaining pencil marks so that only the inked design is visible.
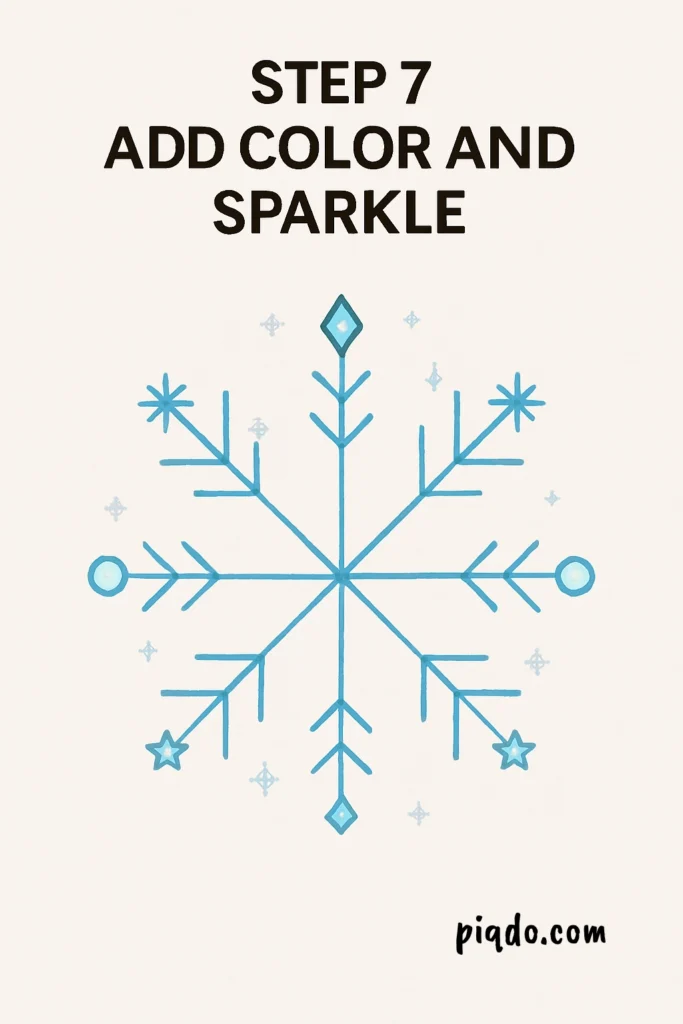
Step 7: Add Color and Sparkle (Optional)
Now it’s time to decorate! Use icy colors like light blue, silver, and white. You can even use glitter pens to make your snowflake shimmer! 💙❄️
💡 Snowflake Drawing Tips
- ❄️ No two snowflakes are the same — feel free to experiment with different designs!
- 📏 Use a ruler if you want perfectly straight lines.
- 🧘♀️ Take your time! Drawing symmetrical designs can be relaxing and meditative.
🖼️ What to Do With Your Snowflake Drawing
- Hang it on the fridge or bulletin board
- Use it as a winter-themed greeting card
- Make it part of a snowflake garland
- Turn it into a printable for friends to color!
❄️ Final Thoughts
Drawing snowflakes is a fun and calming activity that anyone can enjoy — no artistic experience needed! With just a few simple lines and a little creativity, you can create a magical winter wonder right on your paper. Stay cozy and keep drawing! ☕🖌️❄️