Drawing a beautiful rose might seem tricky at first, but don’t worry — with a little patience and some simple steps, you’ll be sketching lovely roses in no time! 🌟 Whether you want to create a handmade card, decorate your notebook, or just have some fun, this beginner-friendly guide will help you. Let’s get started!
🌟 Materials Needed
Before we begin, gather these simple materials:
- ✏️ Pencil
- 🧽 Eraser
- 📄 Drawing paper
- 🖍️ Colored pencils, markers, or crayons (optional)
- 🖊️ Black pen for outlining (optional)
Ready? Let’s draw! 🎨
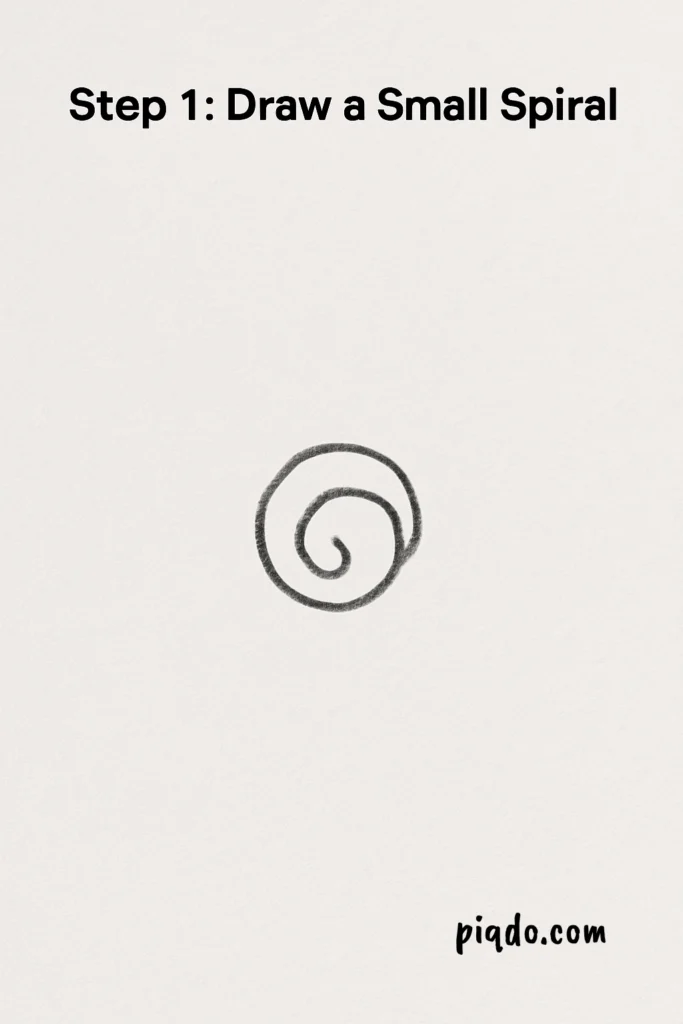
Step 1: Draw a Small Spiral 🌀
Start by drawing a tiny spiral in the center of your paper. This will be the heart of your rose! It doesn’t have to be perfect — just a small, loose swirl will do.
Step 2: Add Curved Petals Around the Spiral 🌸
Around the spiral, draw a few small, curved shapes that look like “C”s and “U”s. These will be the inner petals, gently wrapping around the center of the rose.

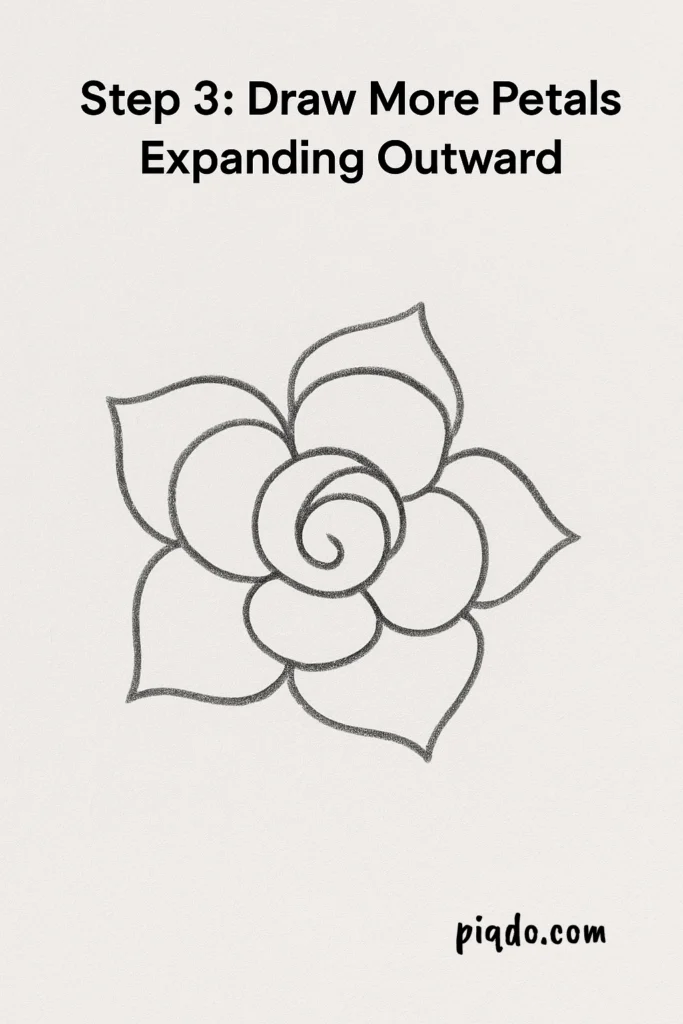
Step 3: Draw More Petals Expanding Outward 🌺
Now, continue adding larger petals around the smaller ones. Let the petals overlap slightly and vary their shapes — some can be pointy, and some can be round. This will make your rose look more natural and full.
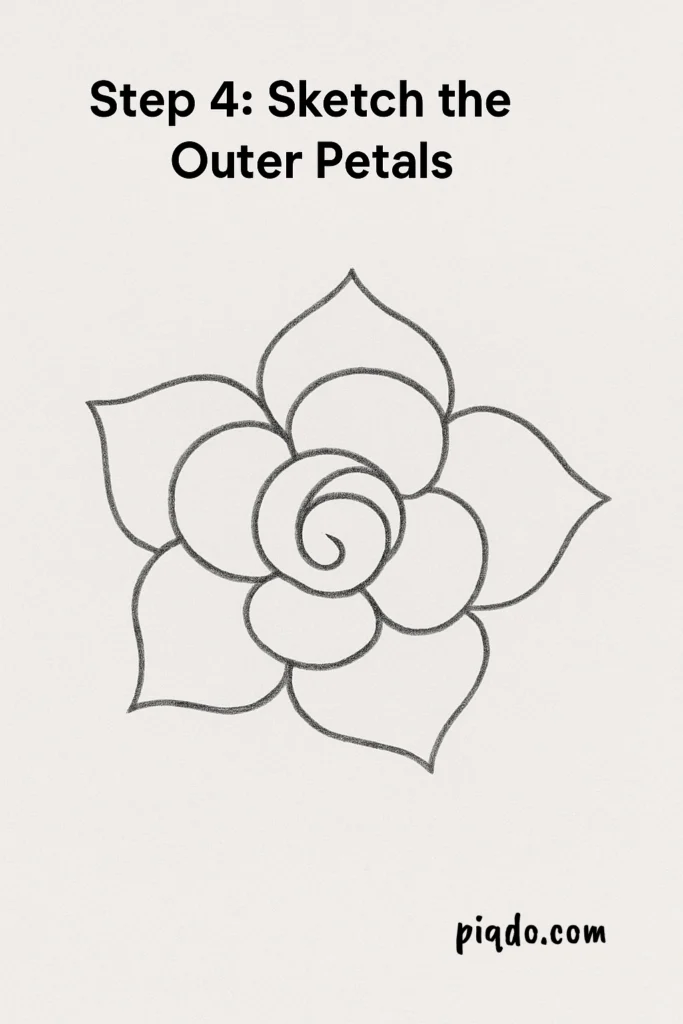
Step 4: Sketch the Outer Petals 🌹
Draw even bigger petals around the whole rose. These should open up more, like the rose is blooming! Think of wide, wavy shapes that circle your earlier layers.
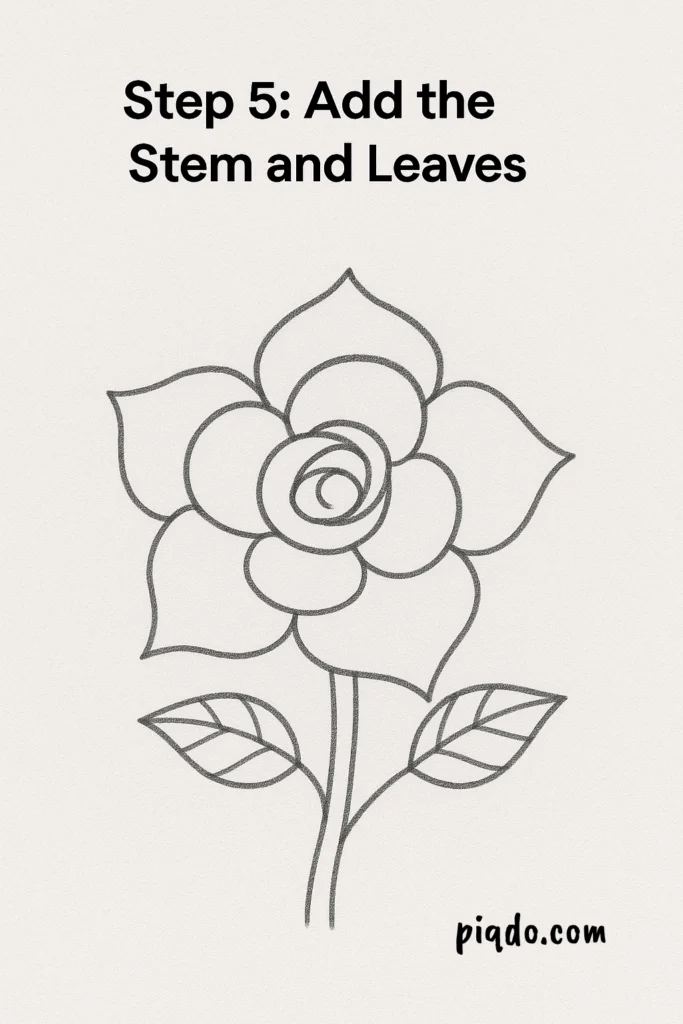
Step 5: Add the Stem and Leaves 🌿
From the bottom of the rose, draw two lines going down for the stem. Then, sketch a few simple leaves on each side. Leaves can be oval-shaped with a little point at the end and a line in the middle for the vein.
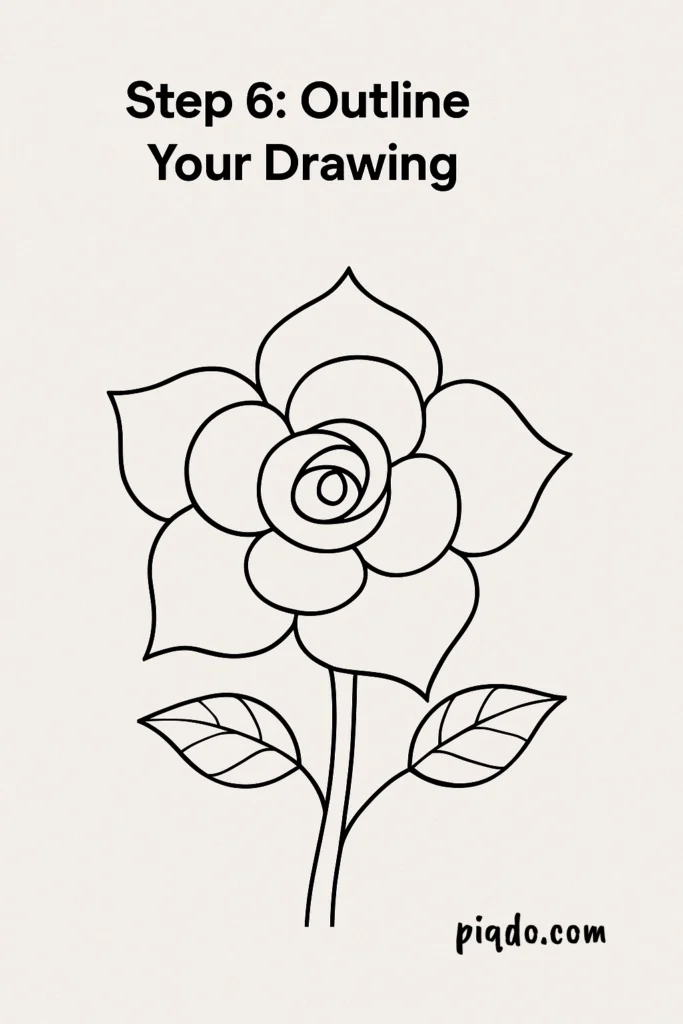
Step 6: Outline Your Drawing 🖊️
Once you’re happy with your rose sketch, carefully go over your lines with a black pen or a darker pencil. This will make your drawing pop!
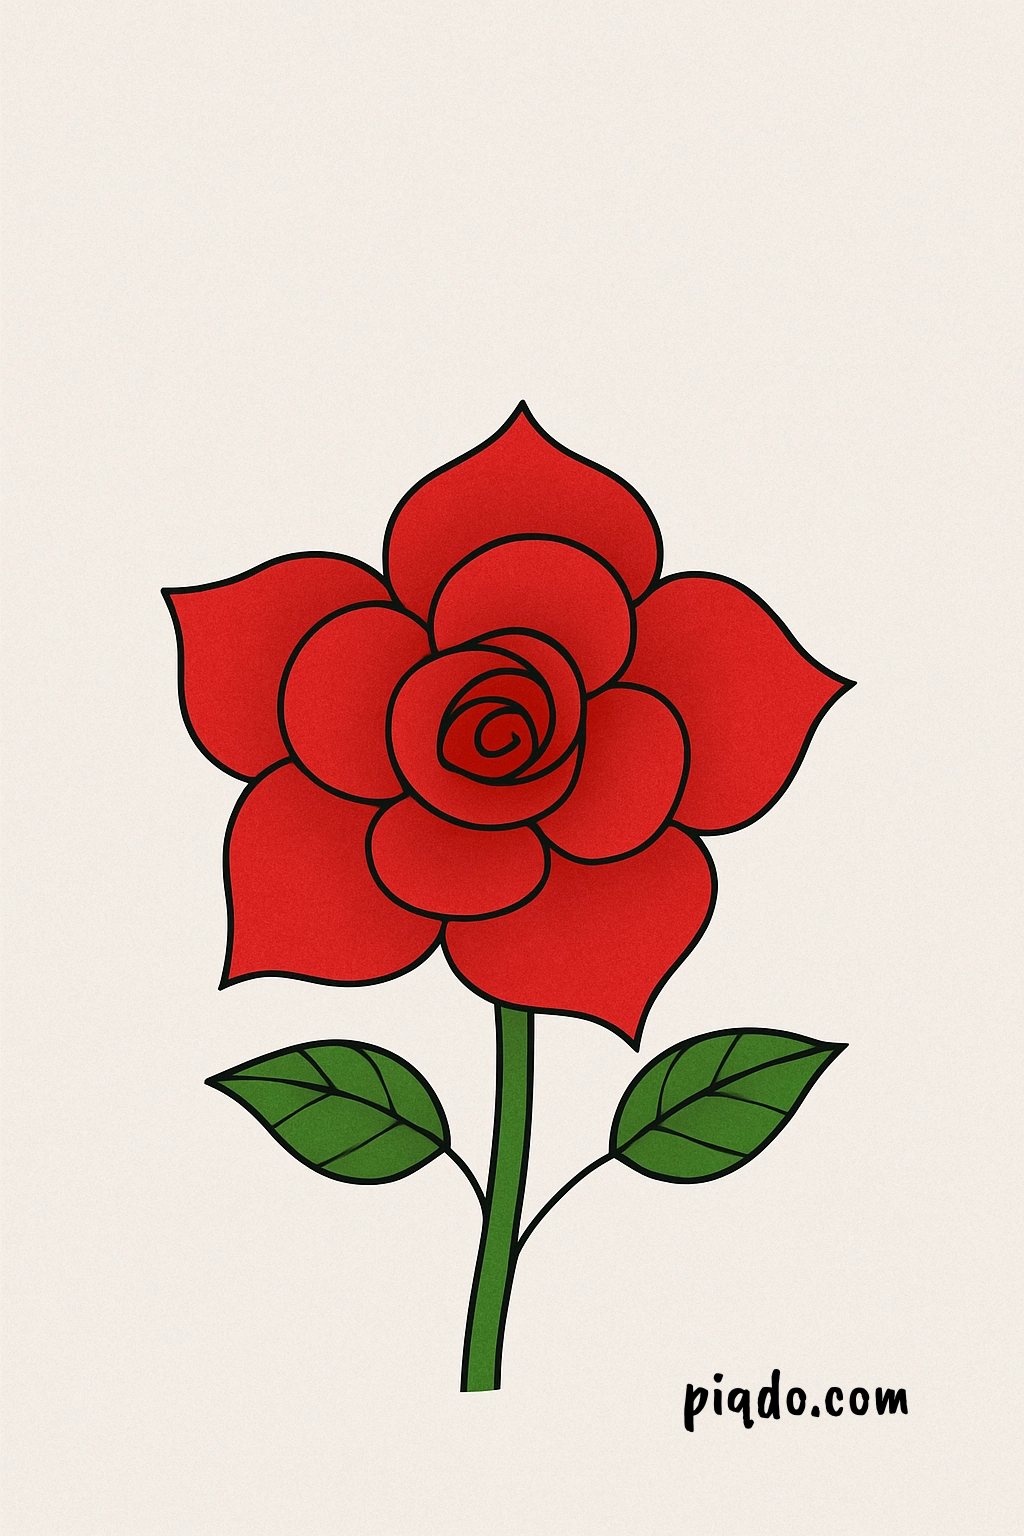
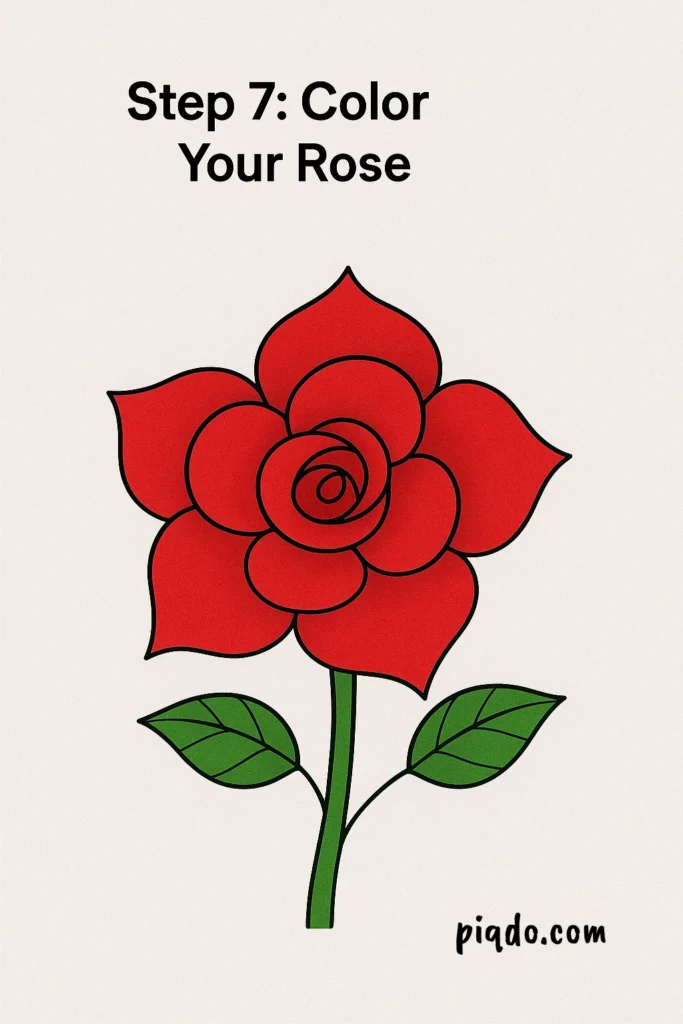
Step 7: Color Your Rose 🎨
Now the fun part — coloring! 🌈
Use red, pink, yellow, or even blue for your rose petals. Color the stem and leaves with different shades of green. Feel free to get creative with your color choices!
🌟 Final Tips
- Don’t rush — drawing petals can take a little practice.
- Add some light shading to make your rose look even more realistic.
- Experiment with different shapes and sizes for a whole rose garden!
Thank you for drawing along with me today! 🌹✨
Keep practicing, and soon you’ll be drawing gorgeous roses effortlessly.
Happy drawing! 🎉