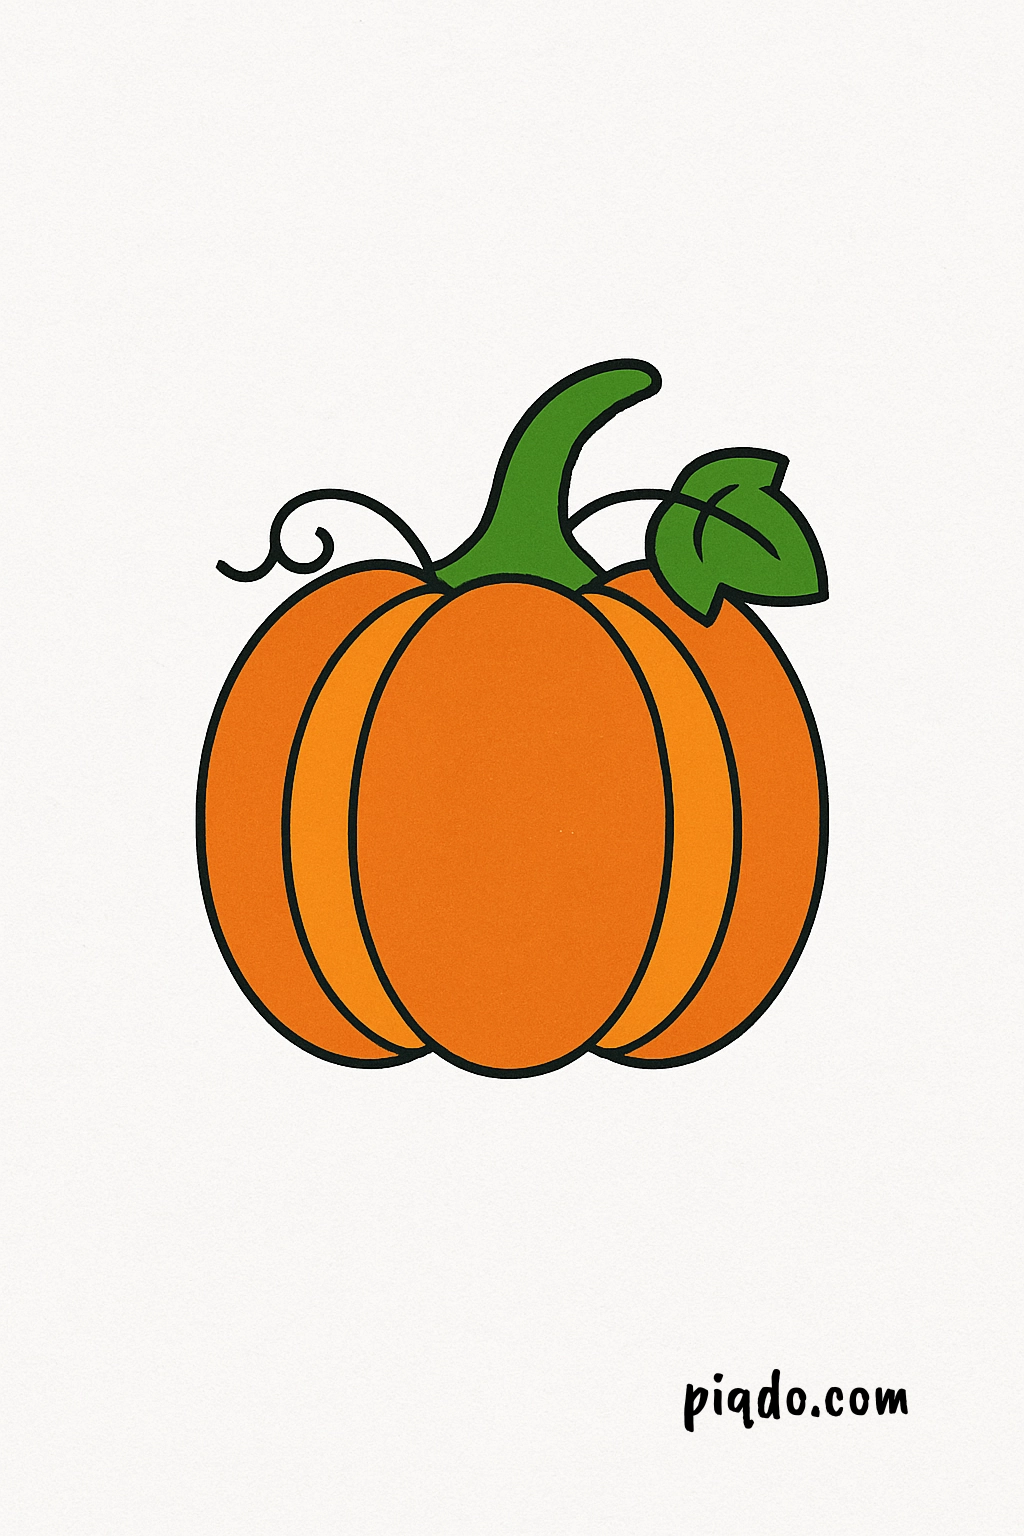
Pumpkins are the ultimate fall icon — perfect for Halloween, Thanksgiving, or simply adding some autumn flair to your sketchbook. 🍁 Whether you’re new to drawing or just want a fun seasonal project, this tutorial is designed to guide you step-by-step.
Grab your pencil and let’s get drawing! ✏️🎨
🧰 Materials You’ll Need
Before we begin, make sure you have the following materials ready:
- ✏️ Pencil
- 🧽 Eraser
- 🖊️ Black pen or marker
- 🎨 Colored pencils, crayons, or markers
- 📄 Drawing paper
✍️ Step-by-Step Instructions
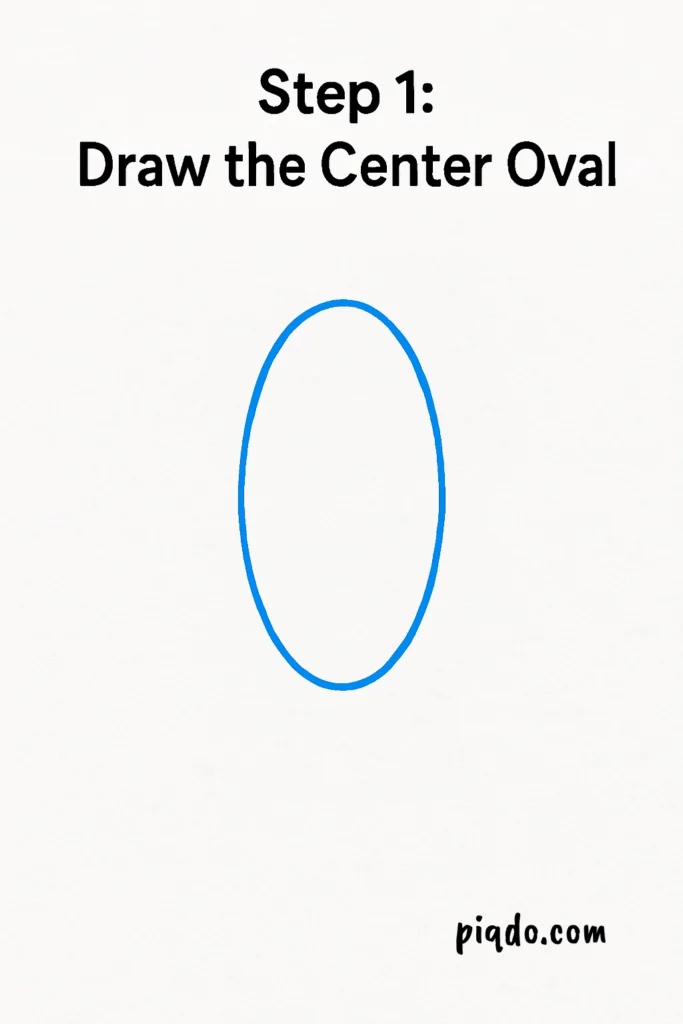
✅ Step 1: Draw the Center Oval
Begin by drawing a tall, vertical oval in the center of your paper. This forms the core shape of your pumpkin.
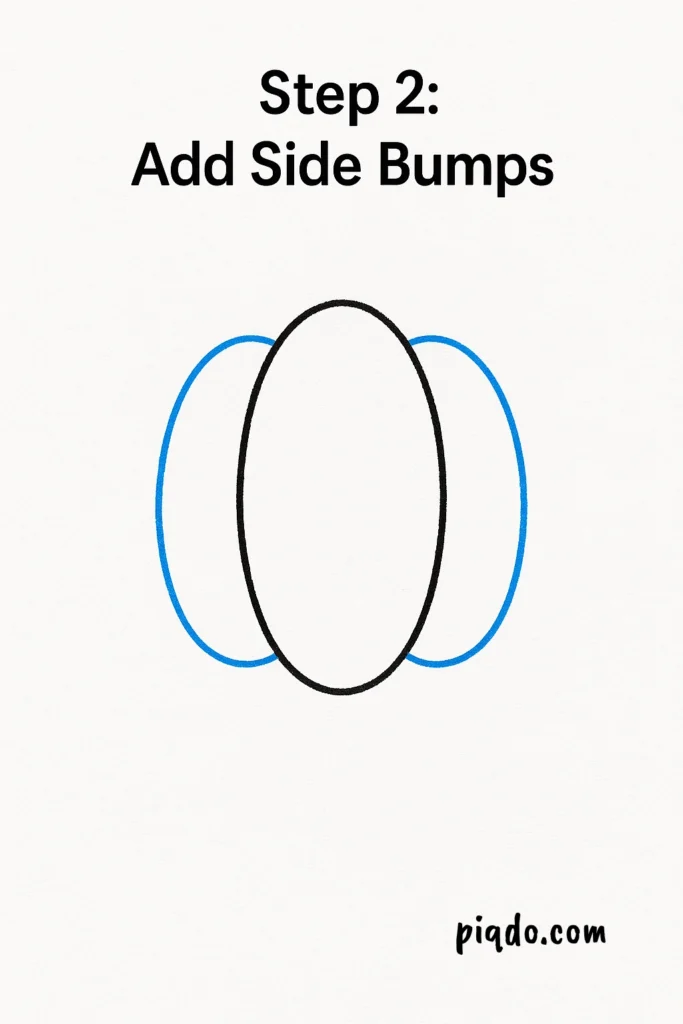
✅ Step 2: Add Side Bumps
Draw two curved lines on either side of the oval. These should resemble “C” shapes, giving your pumpkin some roundness.
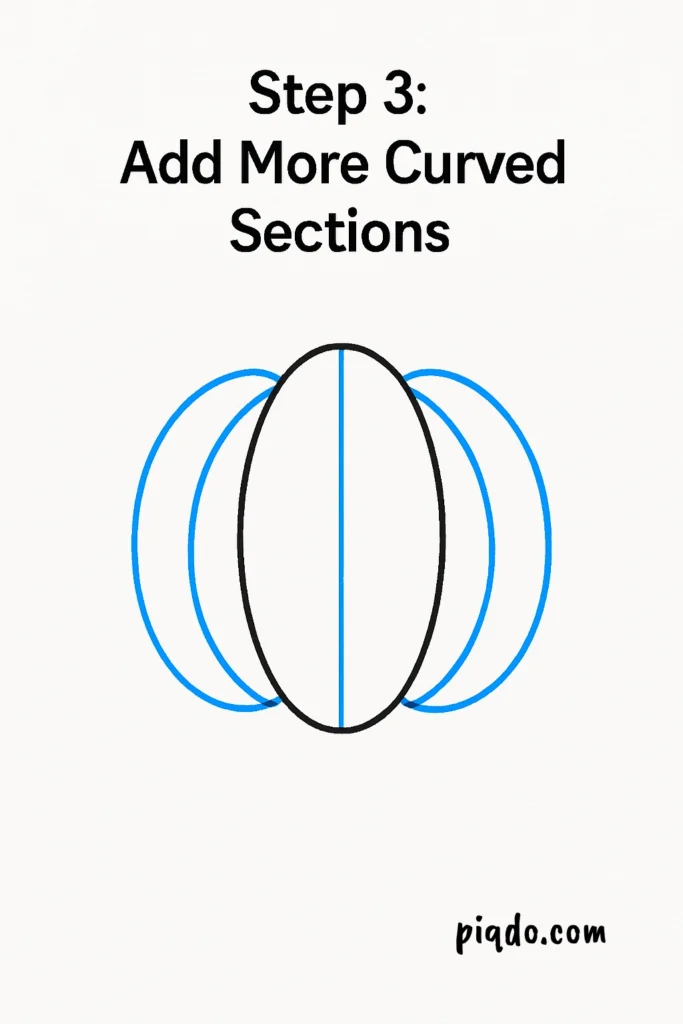
✅ Step 3: Add More Curved Sections
Add two more curved lines on each side to create a total of five sections. Now your pumpkin looks nice and plump!
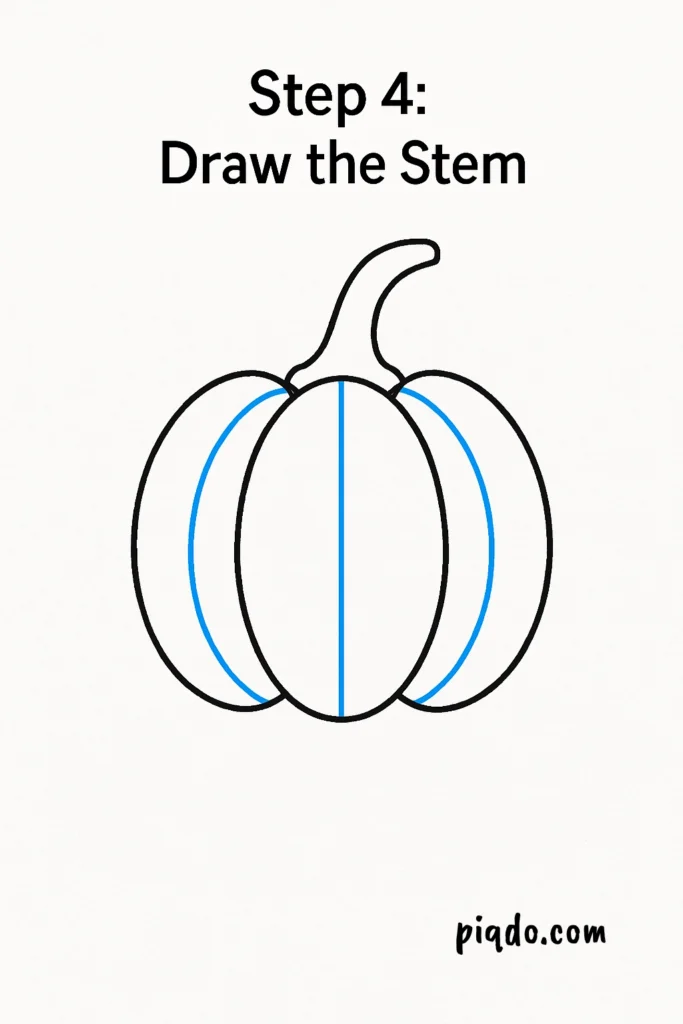
✅ Step 4: Draw the Stem
On top of the pumpkin, draw a short, thick stem. Feel free to make it a bit wavy or bent to add character.
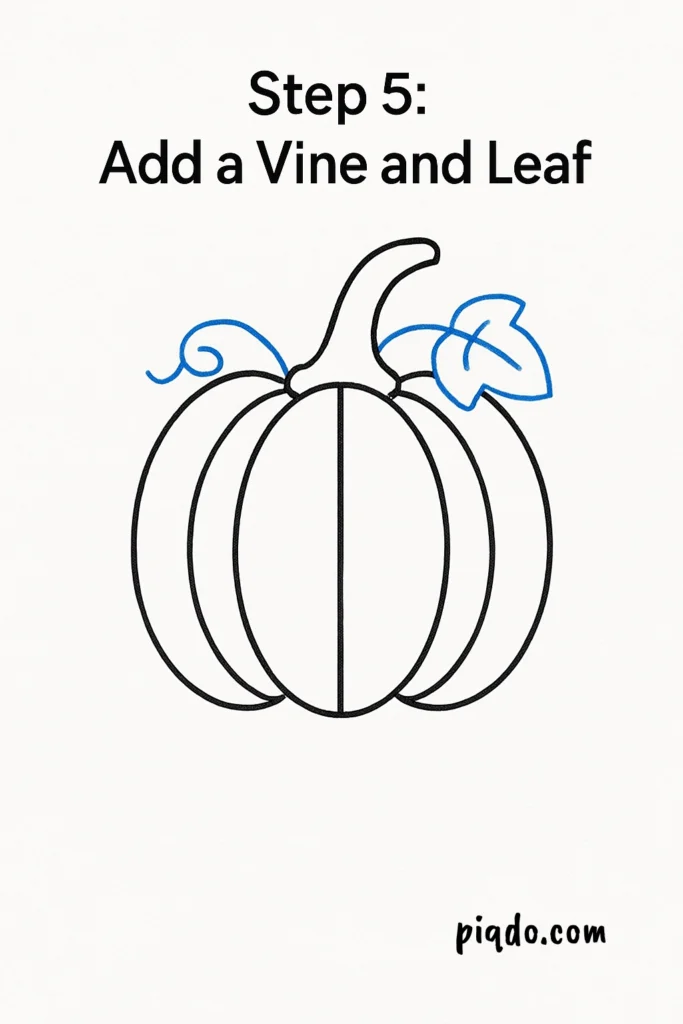
✅ Step 5: Add a Vine and Leaf (Optional 🍃)
Want a little extra charm? Add a curly vine and a small leaf near the stem.
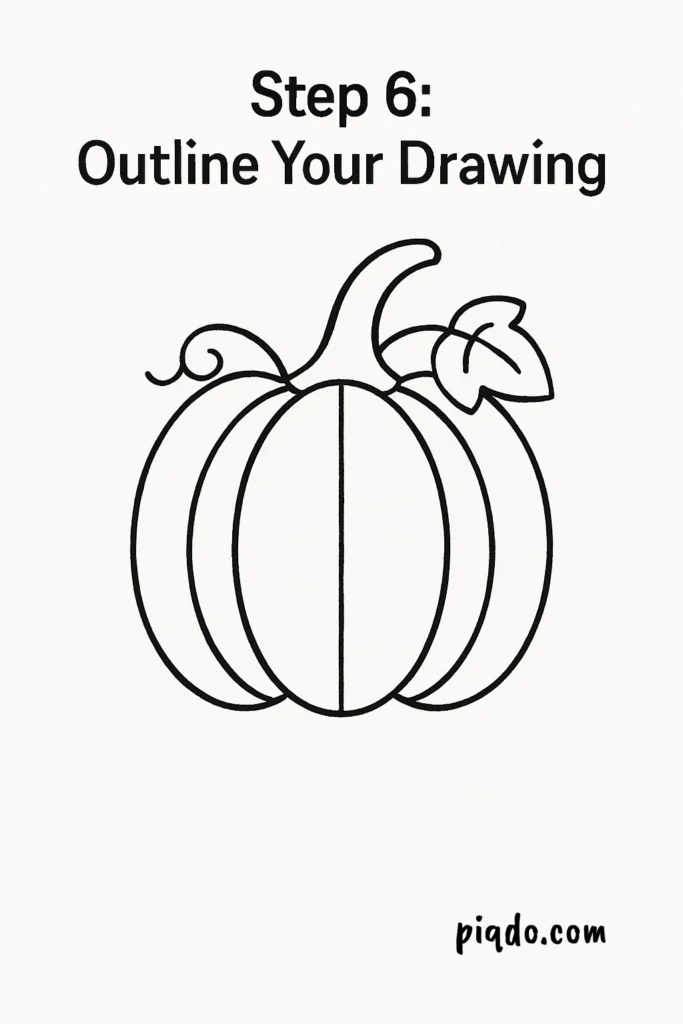
✅ Step 6: Outline Your Drawing
Trace over your final pencil lines using a black pen or marker. Once the ink is dry, erase any leftover pencil marks for a clean look.
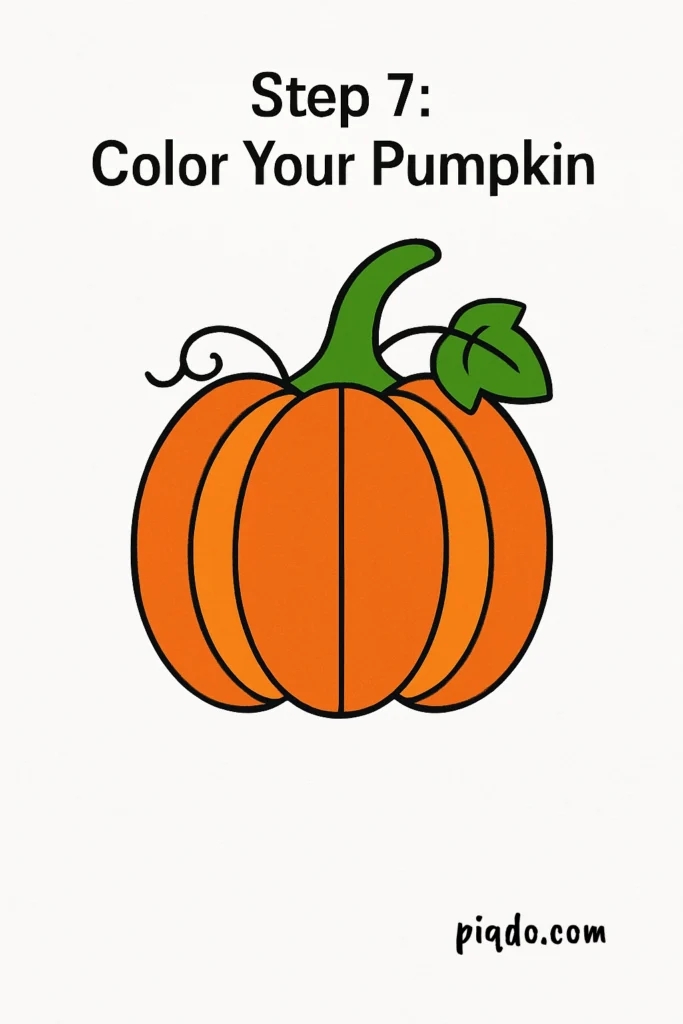
✅ Step 7: Color Your Pumpkin
Now for the fun part! Color your pumpkin orange, the stem green or brown, and add shading or highlights for extra depth.
🧡 Final Thoughts
You did it — your pumpkin is complete! 🎉 Whether you’re decorating your notebook, creating a fall-themed card, or just enjoying a cozy drawing session, this little pumpkin is sure to impress.
Keep practicing, and try drawing a whole pumpkin patch next! 🌿✨
Happy drawing! 🎃🍂