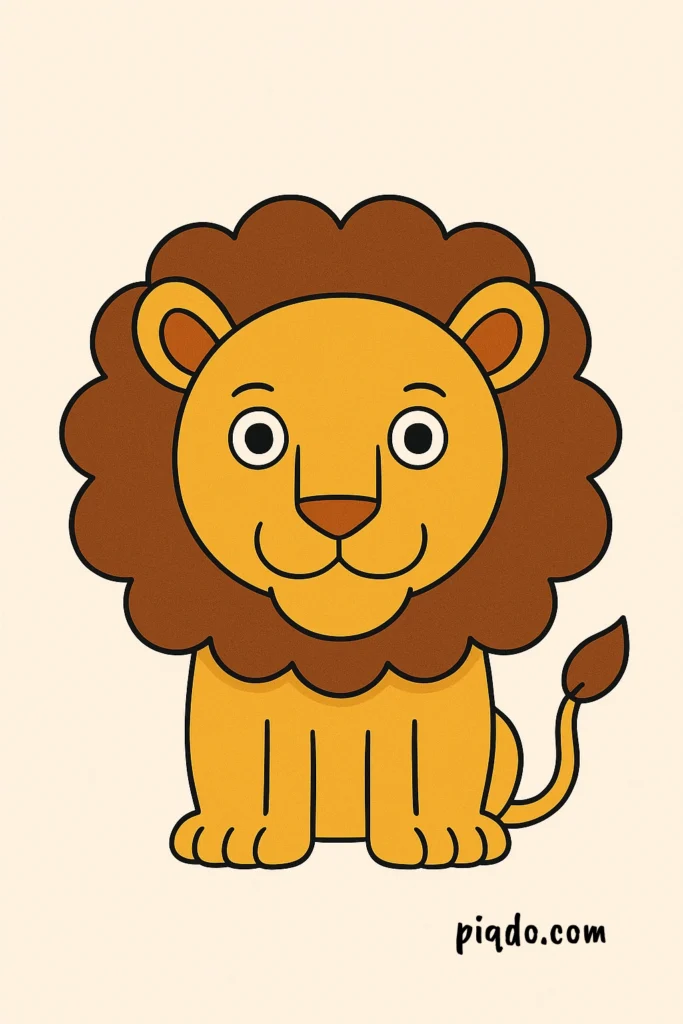
Have you ever dreamed of sketching the majestic King of the Jungle? Whether you’re a budding artist or just looking for a fun creative activity, this beginner-friendly lion drawing tutorial is for you! Follow along and learn how to draw a cute and simple lion step by step. ✏️🎨
✨ Materials Needed
Before we begin, make sure you have these supplies ready:
- ✏️ Pencil (HB or 2B recommended)
- 🗒️ Drawing paper or sketchbook
- 🖊️ Black pen or fine liner (for outlining)
- 🧽 Eraser
- 🖍️ Colored pencils, markers, or crayons
Now let’s bring your lion to life! 🦁
📝 Step-by-Step Guide
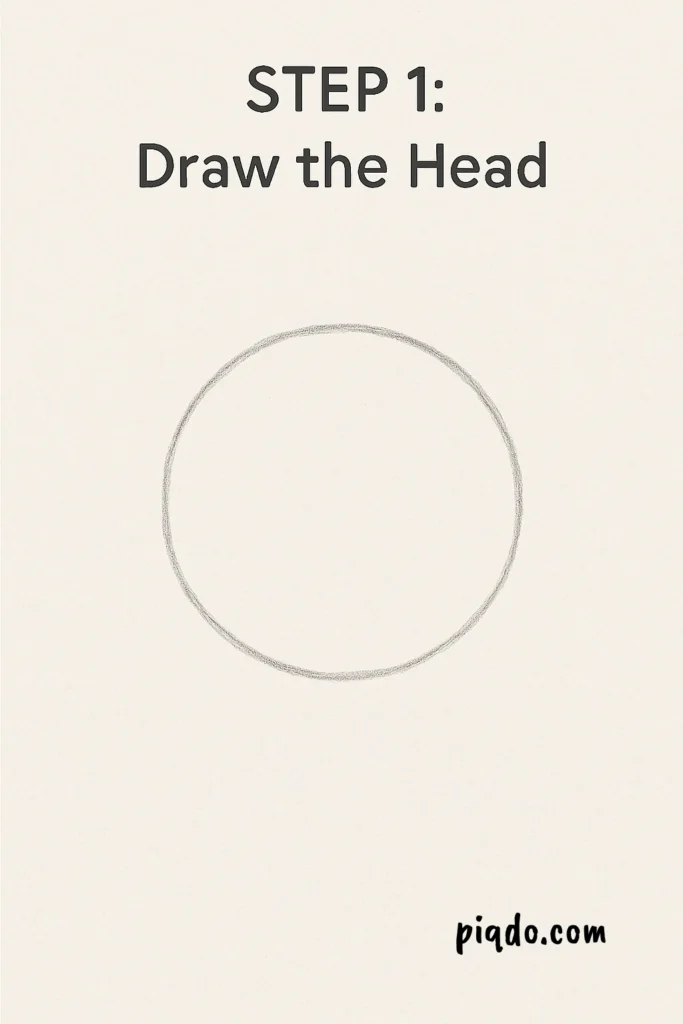
Step 1: Draw the Head 🟡
Start with a large circle in the middle of your paper. This will be your lion’s head. No need to make it perfect — it’s just a sketch!
Step 2: Add Face Guidelines ➕
Lightly draw one vertical and one horizontal line across the circle. These will help place the lion’s eyes, nose, and mouth.

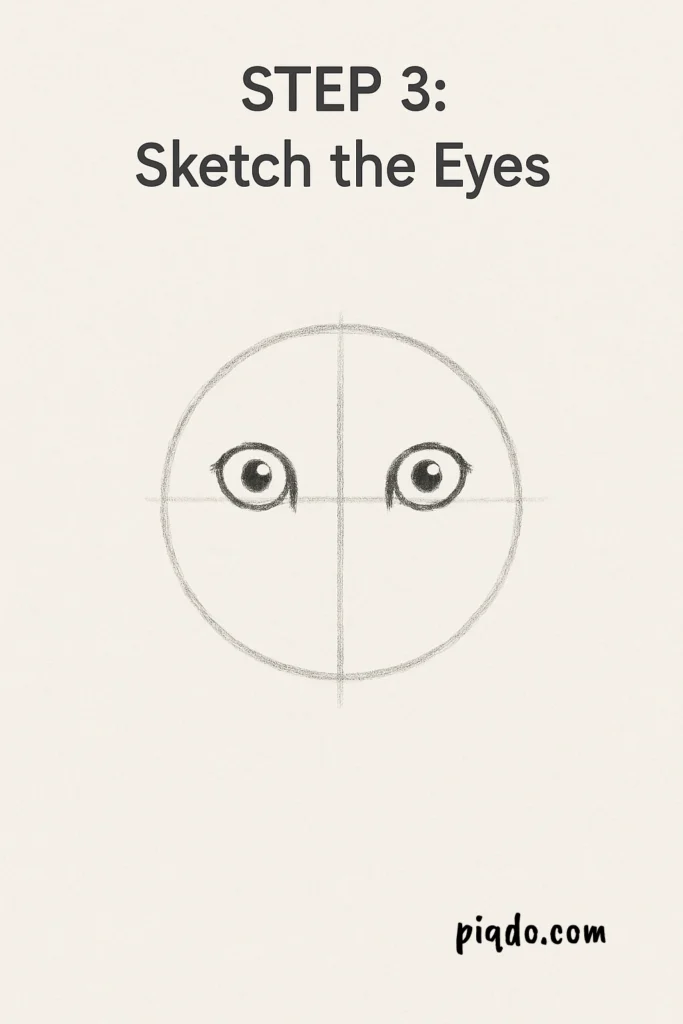
Step 3: Sketch the Eyes 👀
On the horizontal line, draw two ovals for eyes. Add smaller circles inside them for pupils, leaving a white spot for a shiny effect.
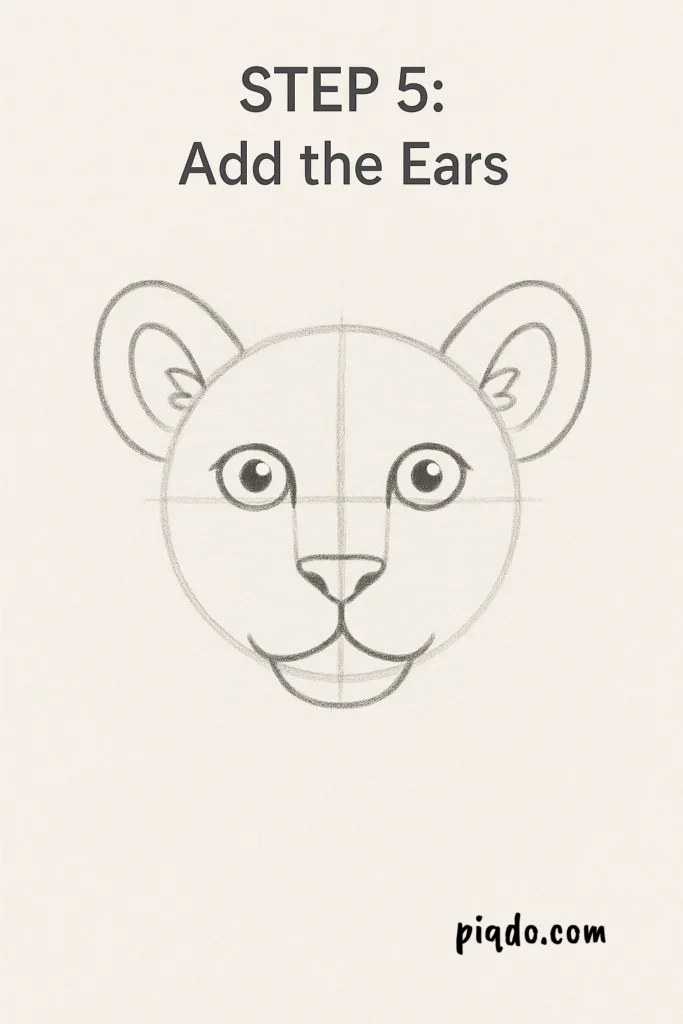
Step 4: Draw the Nose and Mouth 🐽
Below the eyes, draw a small triangle for the nose. From the bottom of the nose, curve two lines downward into a soft “W” shape for the mouth.

Step 5: Add the Ears 👂
Draw two half-circles on either side of the head. Add a smaller curved line inside each ear for extra detail.
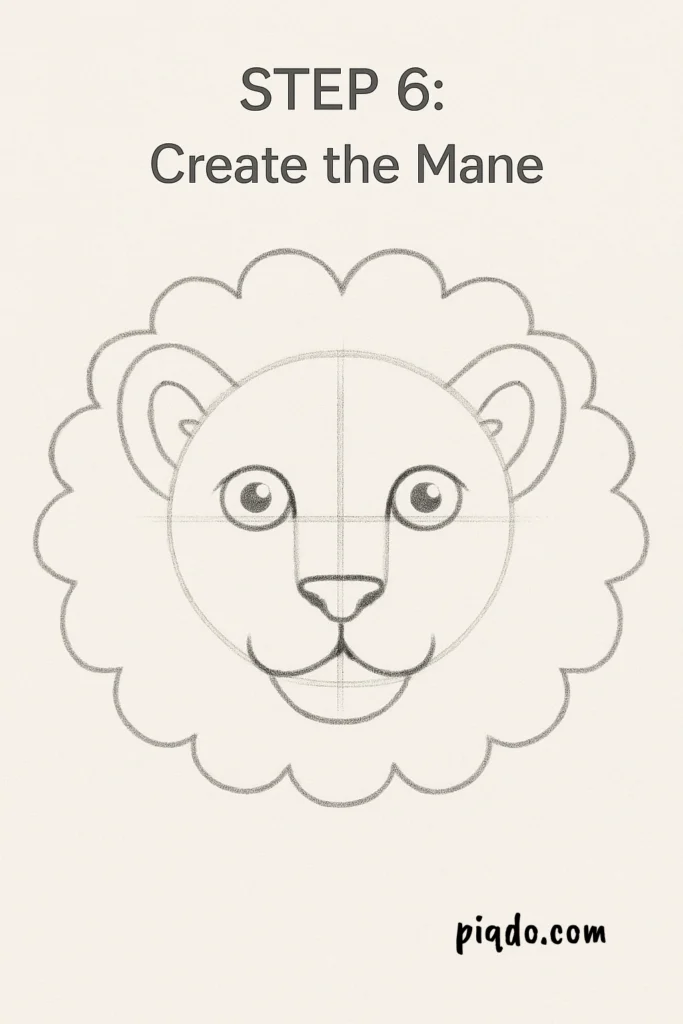
Step 6: Create the Mane 🌟
Around the head, draw bumpy or zigzag lines to form the lion’s thick, wild mane. Think of it like drawing a fluffy cloud!
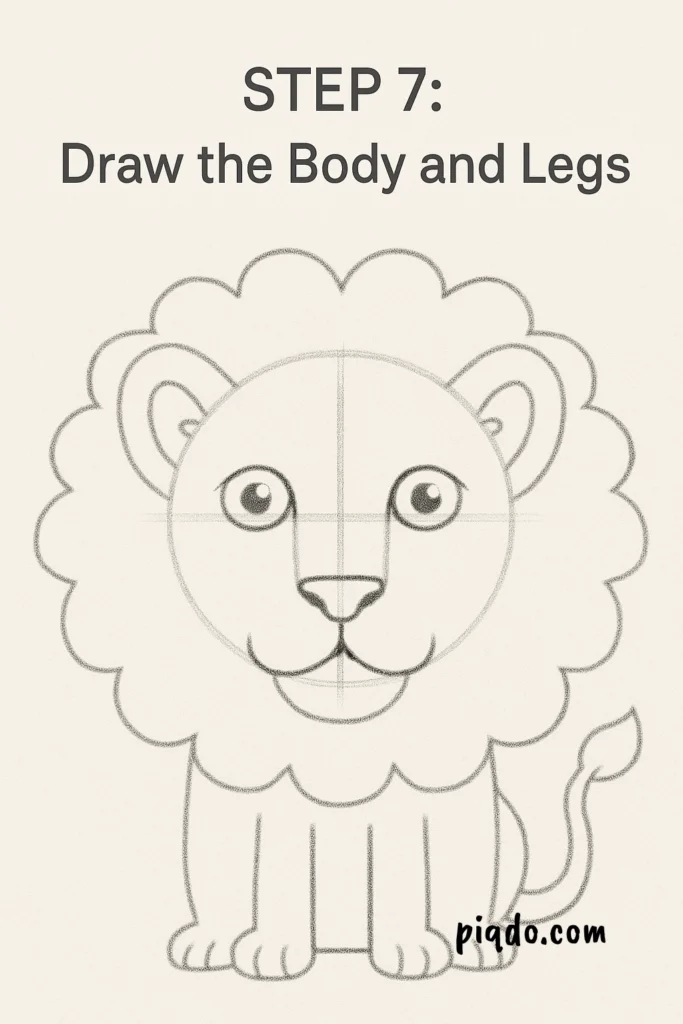
Step 7: Draw the Body and Legs 🐾
Draw a rounded shape beneath the head for the body. Add four simple legs — just long rectangles with round paws at the ends. Don’t forget a tail with a tuft at the end!
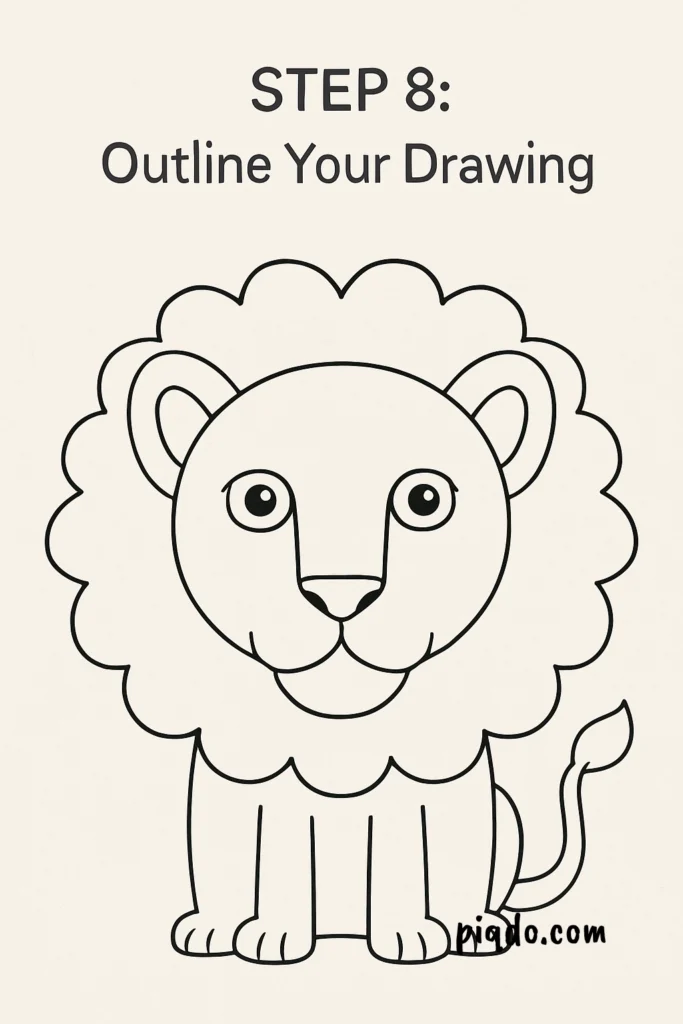
Step 8: Outline Your Drawing 🖊️
Using a black pen or fine liner, trace over your final lines. Let the ink dry completely before erasing the pencil marks underneath.
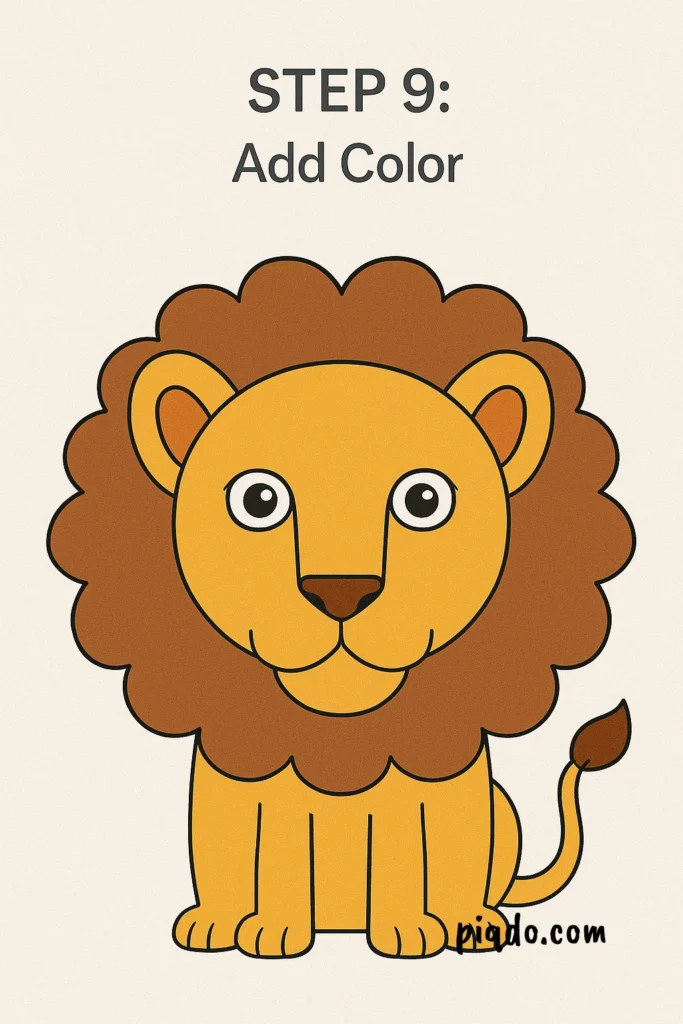
Step 9: Add Color 🎨
Now the fun part — coloring! Use golden yellow or orange for the lion’s body, brown for the mane, and add cute touches like pink ears or a blue background.
🌟 Extra Tips
- Want to make it cuter? Add a crown, bow tie, or hearts around your lion! 👑💛
- Practice drawing baby lion cubs by keeping the body small and the head big for extra cuteness. 🐣
🎉 You’re Done!
Congratulations! You’ve just drawn an adorable lion step by step. 🦁 Keep practicing and try making a whole jungle scene. Drawing can be relaxing, creative, and a lot of fun — so keep that pencil moving!
Did you enjoy this tutorial? Let us know in the comments and tag us if you share your drawing on social media! 💬📸
Happy drawing! ✨