Ever wanted to draw a cute little house but didn’t know where to start? You’re in the right place! This beginner-friendly tutorial will walk you through each step in a simple and fun way. Whether you’re drawing for school, for fun, or just want to improve your skills, you’ll be amazed at how easy it is to create your own cozy home sketch. Let’s get drawing!
✏️ What You’ll Need:
- A pencil (HB or 2B works great)
- An eraser
- Colored pencils (optional but fun!)
- Paper
- A ruler (optional for straight lines)
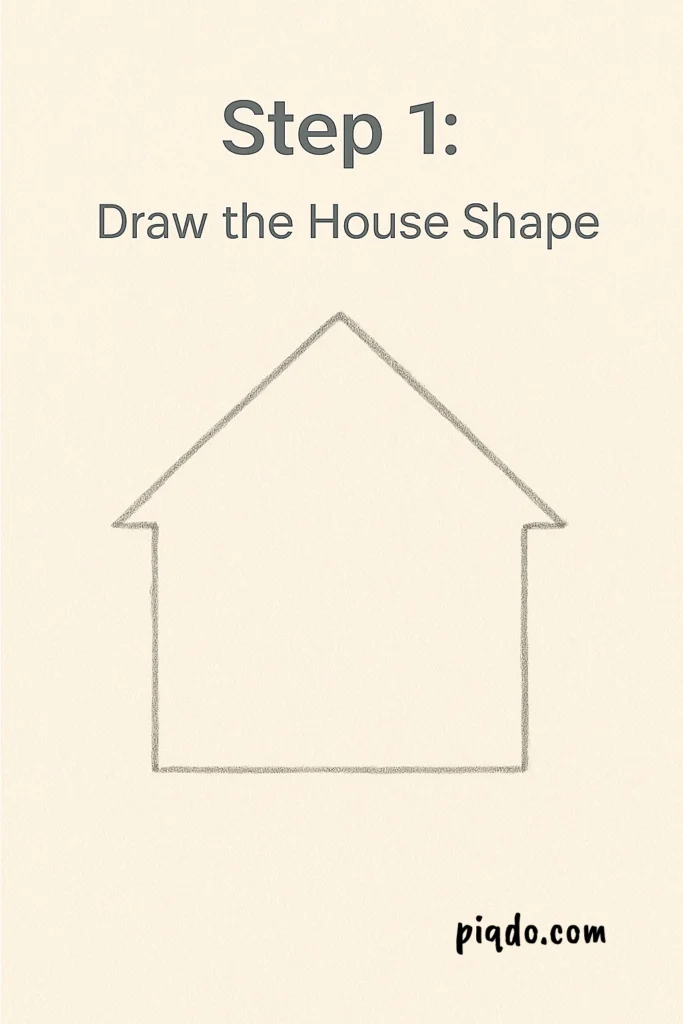
🏠 Step 1: Draw the House Shape
Start with a large rectangle in the center of your paper—this is the main part of your house.
Then, draw a triangle on top for the roof. This simple shape will give your house its basic structure.
Tip: Keep your lines light so you can easily erase and adjust as you go.
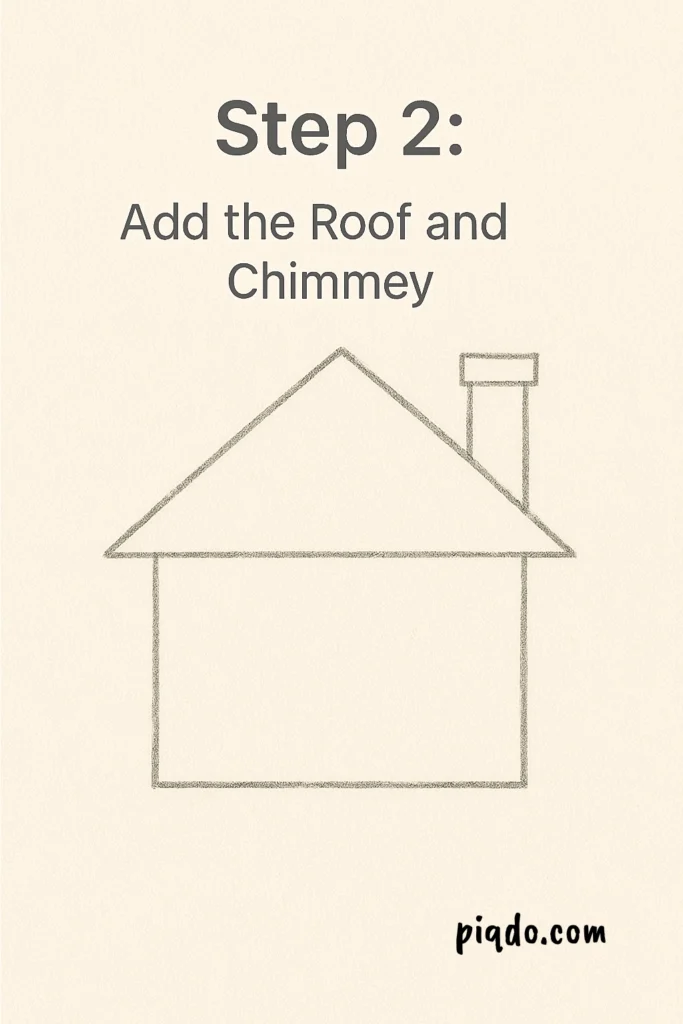
🚪 Step 2: Add the Roof and Chimney
- Trace over the roof lines to make them stand out more.
- On one side of the roof, draw a small rectangle for a chimney, and add a little cap on top.
- Want to get fancy? Add tiny lines on the roof to look like tiles!
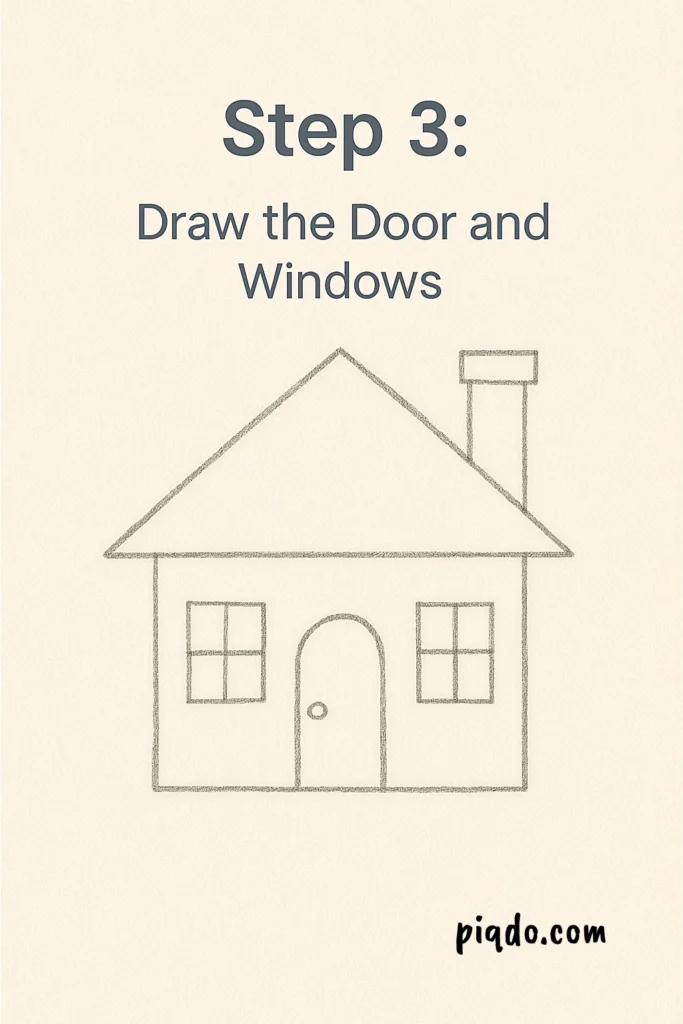
🪟 Step 3: Draw the Door and Windows
- In the middle (or side) of the house, draw a tall rectangle for the door.
- Add one or two square windows next to it.
- You can split each window into four small panes by drawing a vertical and a horizontal line.
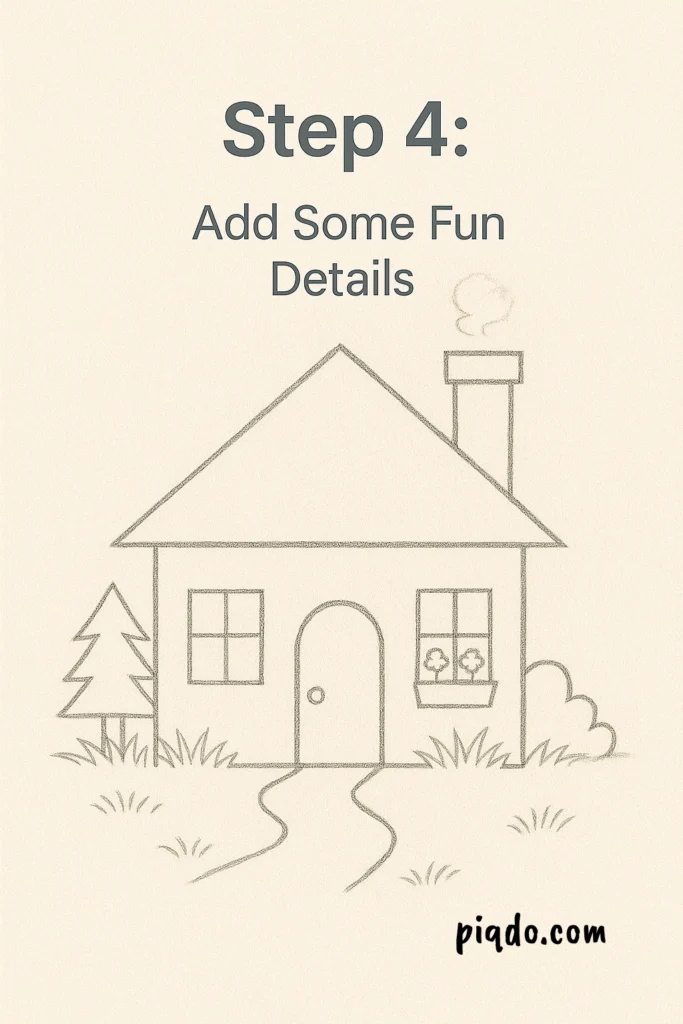
🌿 Step 4: Add Some Fun Details
Now let’s bring it to life:
- Draw a path leading from the door.
- Sketch some grass or bushes along the bottom.
- You can even add curtains in the windows or a little flower box.
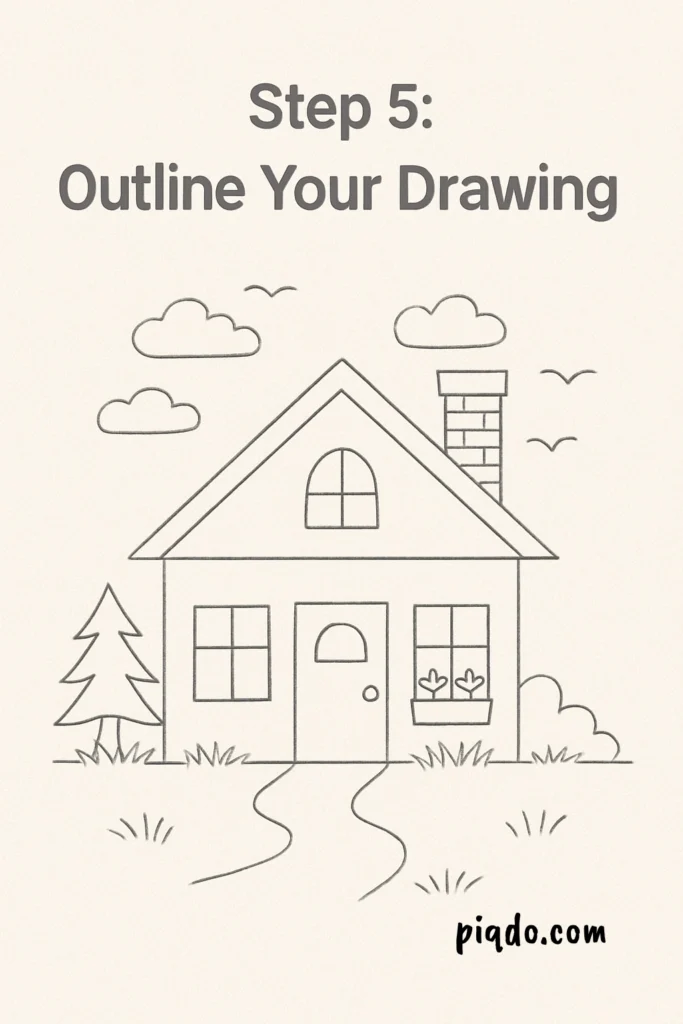
✍️ Step 5: Outline Your Drawing
- Go over the final lines with a darker pencil stroke.
- Erase any extra lines from earlier.
- You’ll now see your cute little house coming together clearly!
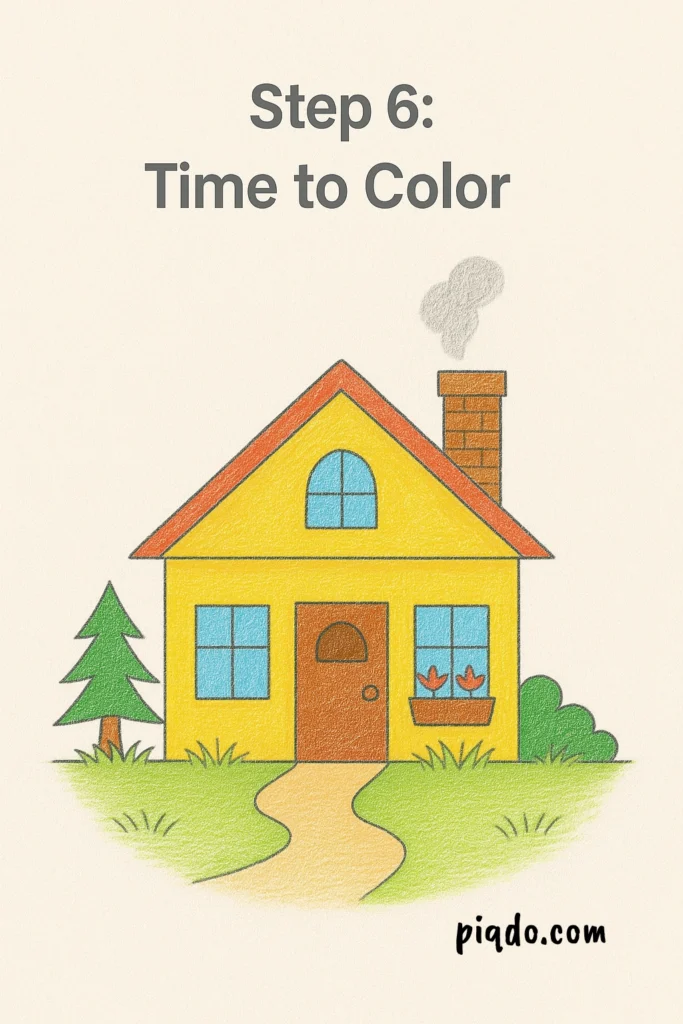
🎨 Step 6: Time to Color! (Optional)
- Use colored pencils to fill in your house.
- Try a red roof, yellow walls, and blue windows—or whatever colors you love!
- Use light layers and build up color slowly for a soft, shaded look.
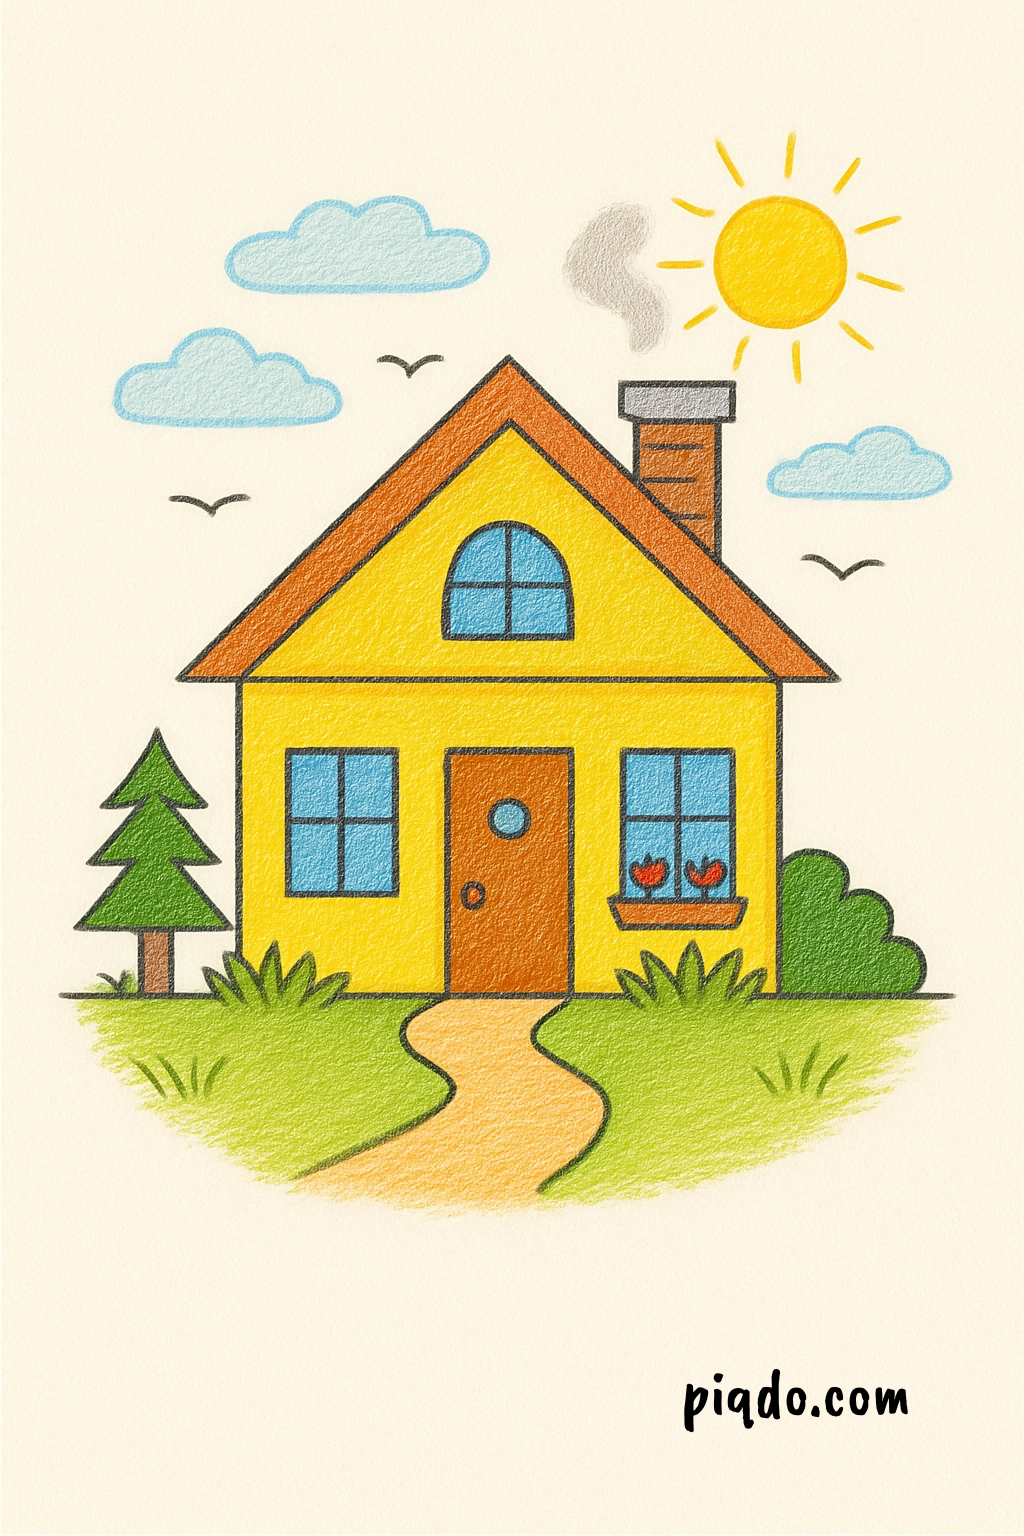
🌈 Final Touches
- Add some smoke coming out of the chimney.
- Draw birds, clouds, or a sun in the background.
- The more you play, the more personality your house will have!
You Did It!
Give yourself a high five—you just drew a house from scratch! Keep practicing and try different styles: a tall house, a tiny cottage, or even a treehouse next time. The more you draw, the more your imagination will grow.