Learning how to draw a face may seem challenging, but it’s actually super fun once you break it down into easy steps! Whether you’re just starting out or want to refresh your skills, this step-by-step guide will help you create your first face sketch with confidence. Let’s grab those pencils and start drawing! 🎨
✏️ Materials Needed
Before we begin, make sure you have the following:
- Pencil
- Eraser
- Drawing paper
- Ruler (optional)
- Black pen or fineliner
- Colored pencils or markers (optional)
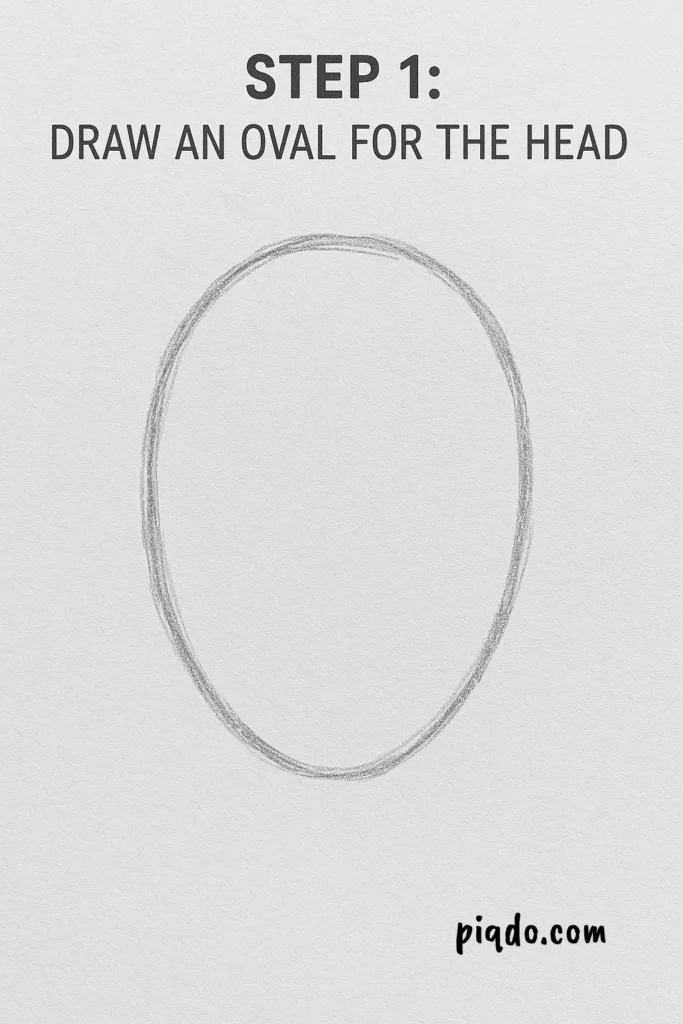
🟠 Step 1: Draw an Oval for the Head
Start by lightly drawing an oval shape. Think of it as an egg turned upside down — this will be the base shape for the face. Keep your lines soft so you can erase and adjust as needed.
➕ Step 2: Add Guideline Lines
Draw a vertical line down the center of the oval to divide the face into two equal parts. Then add a horizontal line through the middle of the oval — this will help you place the eyes. Add two more horizontal lines for the nose (midway between eyes and chin) and mouth (between nose and chin).

👀 Step 3: Sketch the Eyes
On the eye line, draw two almond shapes for the eyes, evenly spaced on either side of the vertical line. Leave about an eye’s width between them. Add a circle inside each eye for the iris, and a smaller circle for the pupil. Don’t forget to leave a small white circle for the highlight!

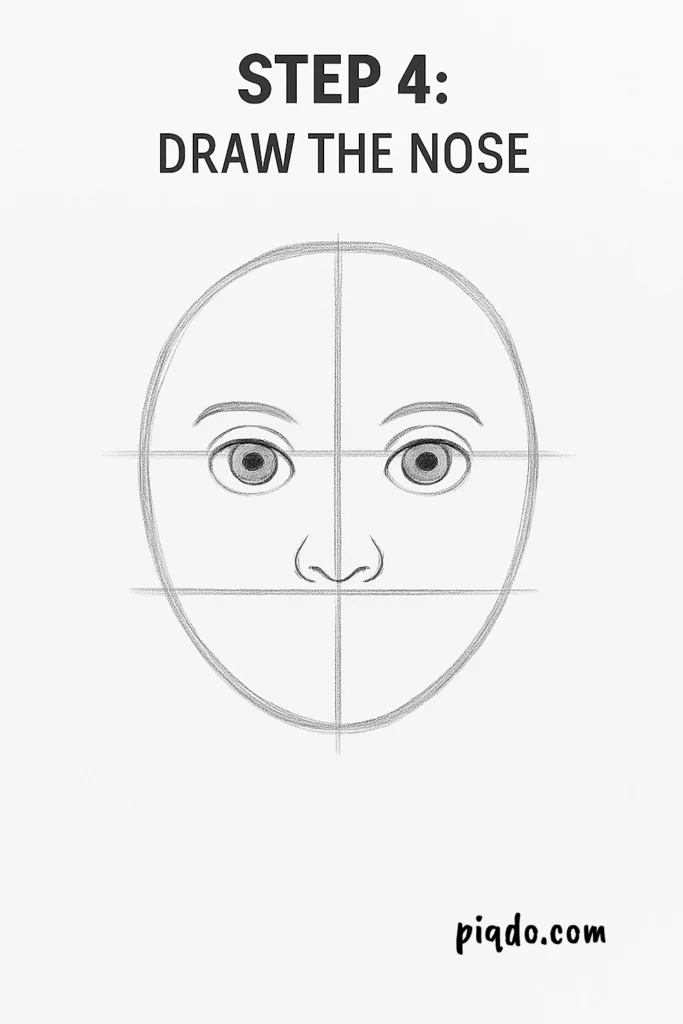
👃 Step 4: Draw the Nose
Using the nose guideline, draw a simple nose shape. You can start with a small “U” shape or curved lines for the nostrils. Keep it simple while you’re learning — less is more!
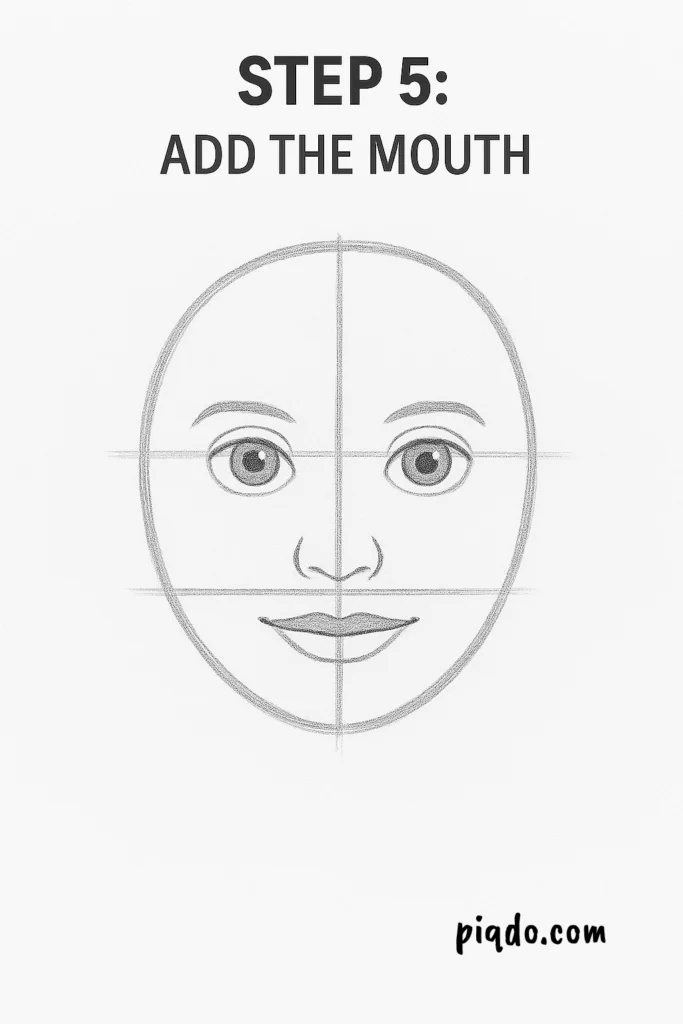
😊 Step 5: Add the Mouth
On the mouth guideline, sketch a light horizontal line for the basic mouth shape. Then draw the upper and lower lips using soft curves. A slight upward curve at the ends gives a gentle smile.
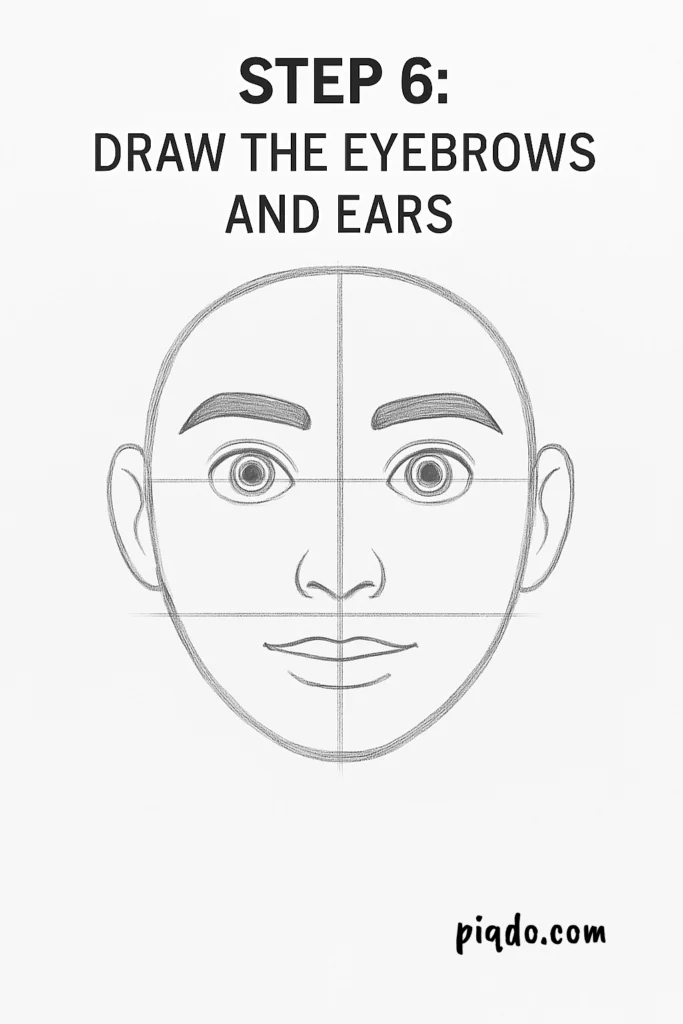
🧏 Step 6: Draw the Eyebrows and Ears
Just above each eye, draw a curved or angled eyebrow depending on the expression you want. For the ears, place them between the eye and nose lines, on each side of the face oval.
💇♀️ Step 7: Add Hair
Sketch the hair starting from the top of the head. You can choose any hairstyle you like — straight, curly, long, short, or spiky. Be playful and let the hair flow naturally from the scalp.

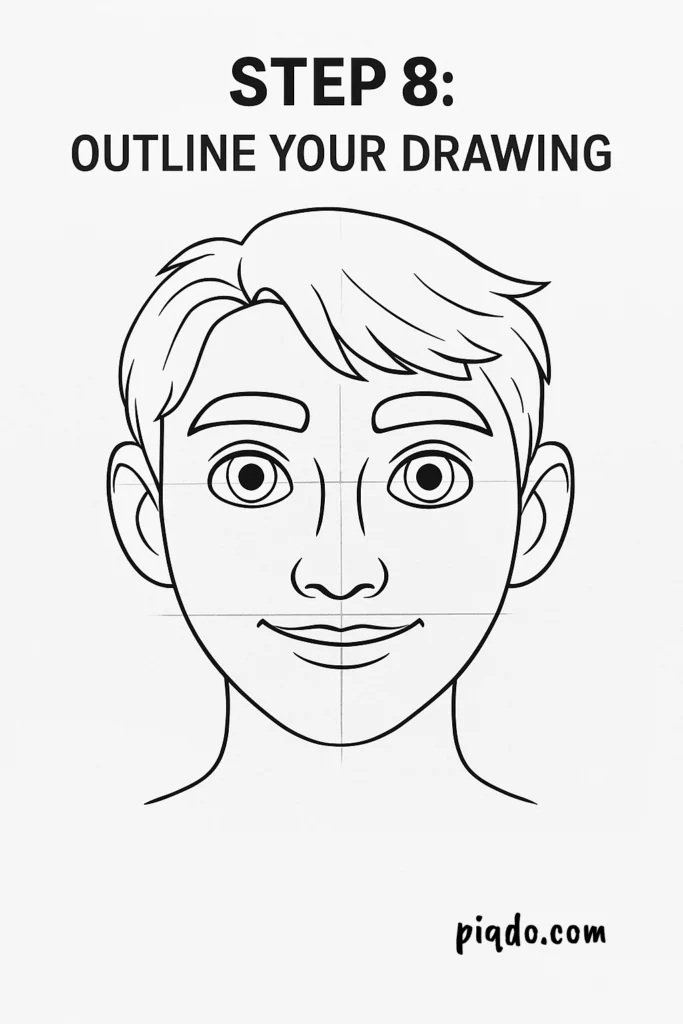
✒️ Step 8: Outline Your Drawing
Once you’re happy with your sketch, go over the final lines with a black pen or fineliner. This helps clean up your drawing and make it pop!
🧽 Step 9: Erase the Guidelines
Gently erase all the pencil guidelines and any extra sketch marks. Be careful not to erase your pen lines.

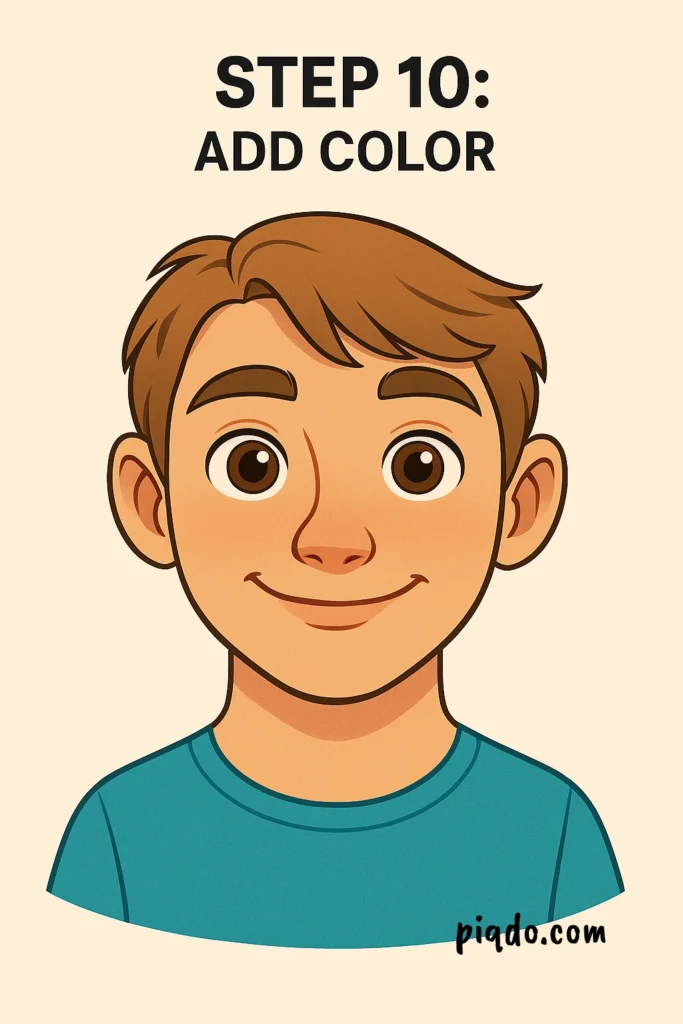
🎨 Step 10: Add Color (Optional)
Now for the fun part! Color in the eyes, skin, lips, and hair using colored pencils or markers. You can also add fun details like freckles, blush, or accessories like earrings or glasses.
🎉 Final Thoughts
Drawing faces is a great way to build your art skills and express your creativity. Don’t worry about perfection — just enjoy the process and keep practicing. Every face you draw will be better than the last!