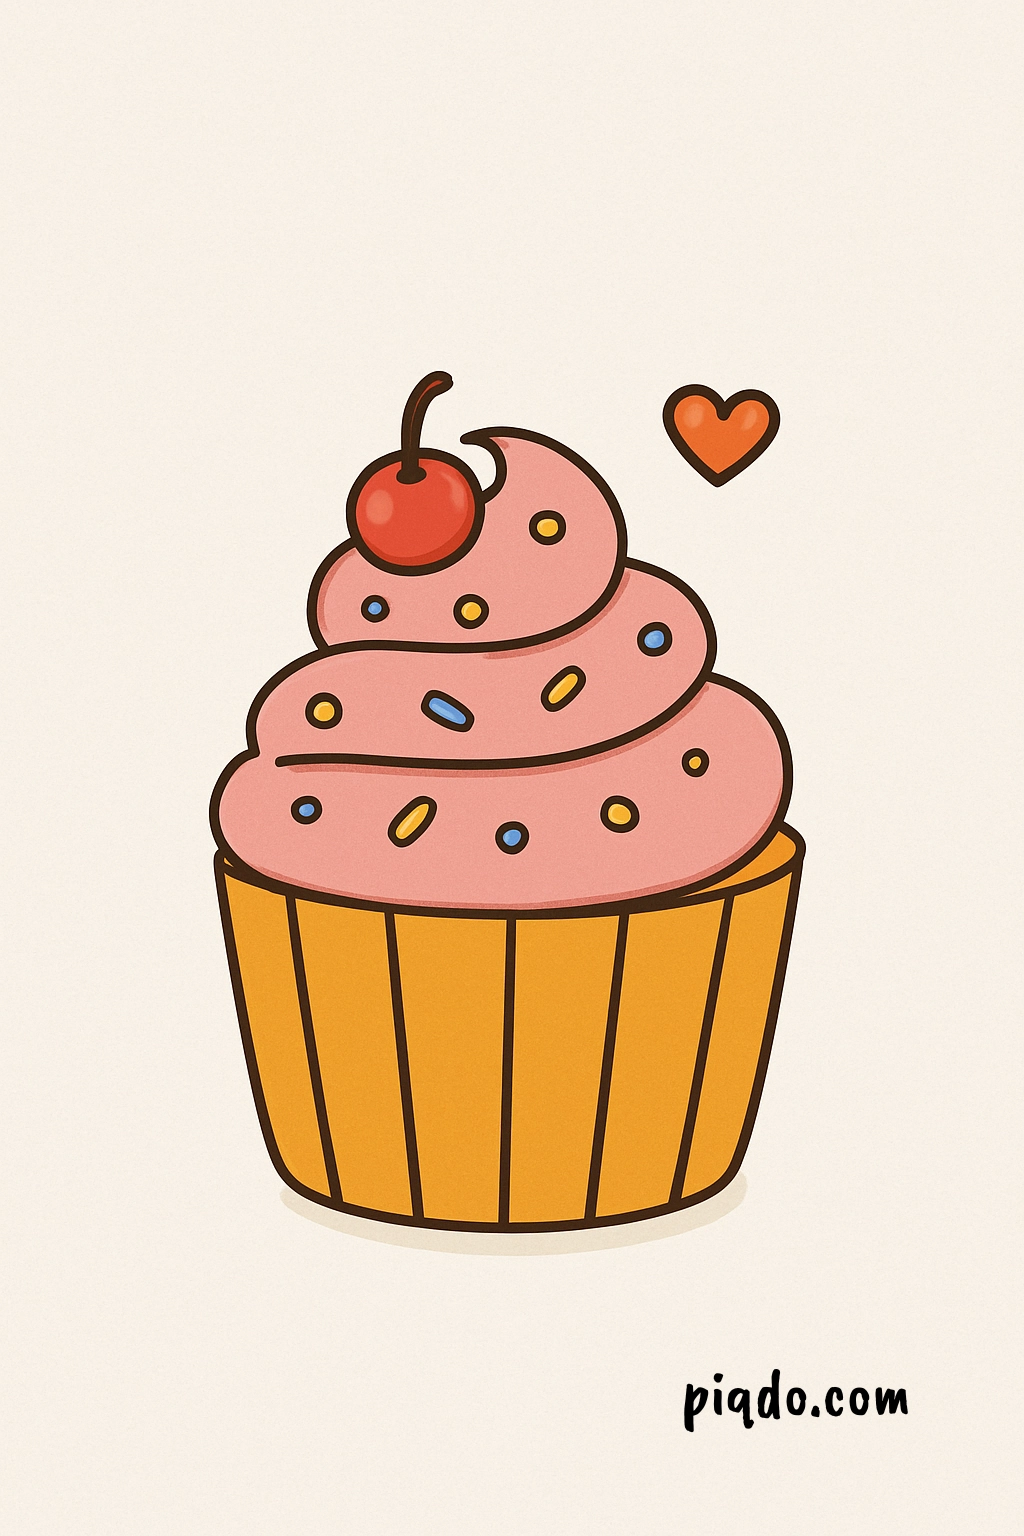
Who doesn’t love a cute, fluffy cupcake? 🍰 Today, I’ll show you how to draw a cupcake step-by-step — even if you’re a complete beginner! With just a few simple shapes and a little creativity, you’ll have an adorable cupcake drawing in no time. Let’s get started!
✨ Materials Needed:
Before we dive into the steps, make sure you have these supplies ready:
- ✏️ Pencil
- 🖊️ Eraser
- 📝 Drawing paper
- 🖍️ Colored pencils, markers, or crayons (for coloring!)
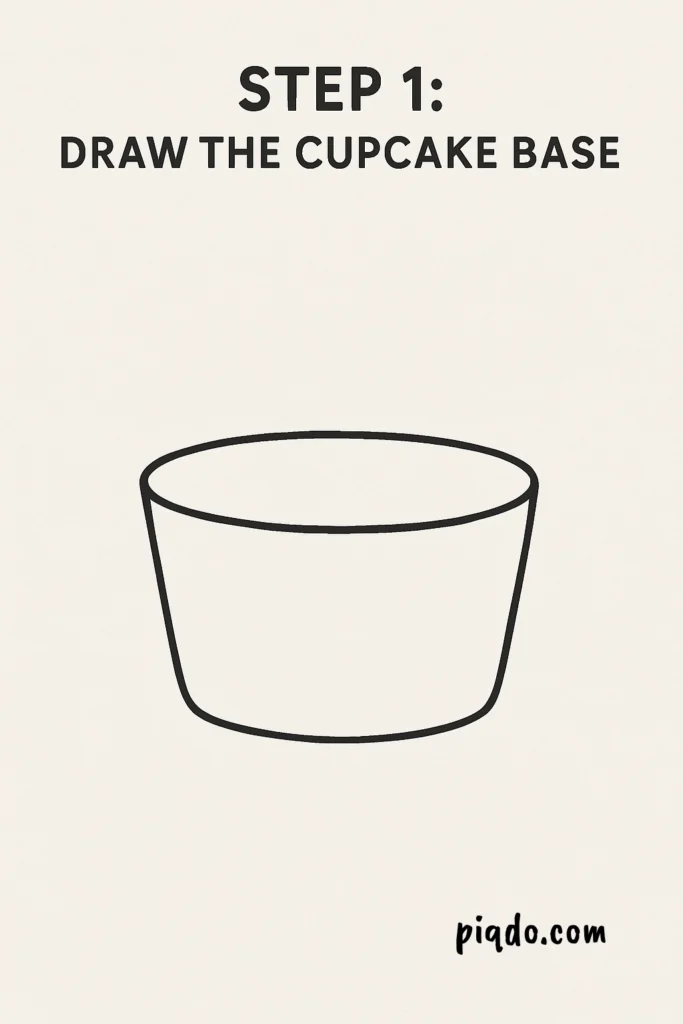
Step 1: Draw the Cupcake Base 🧁
Start by drawing a slightly wide U-shape — this will be the bottom part of the cupcake liner. Then, connect the top ends with a slightly curved line. Now you have the base!
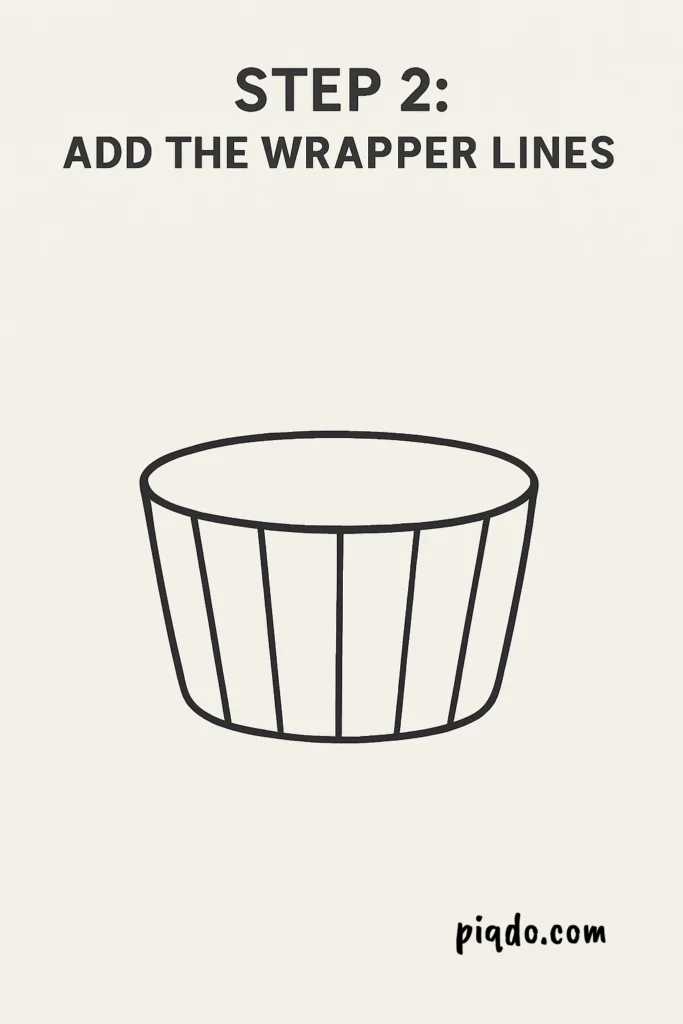
Step 2: Add the Wrapper Lines 📏
Inside the cupcake base, draw a few vertical lines from top to bottom to create the folds of the cupcake wrapper. Keep the lines slightly curved to match the shape.
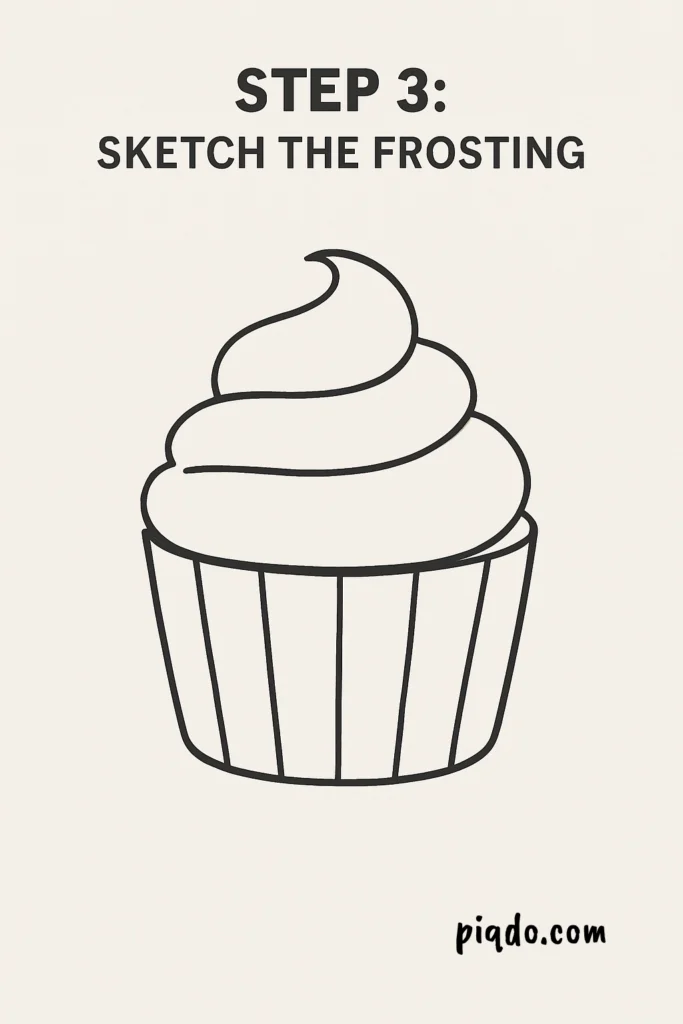
Step 3: Sketch the Frosting 🍦
Time for the yummy part! From the top of the base, draw a large, fluffy swirl of frosting. Think of it like drawing soft, wavy clouds stacking on each other!
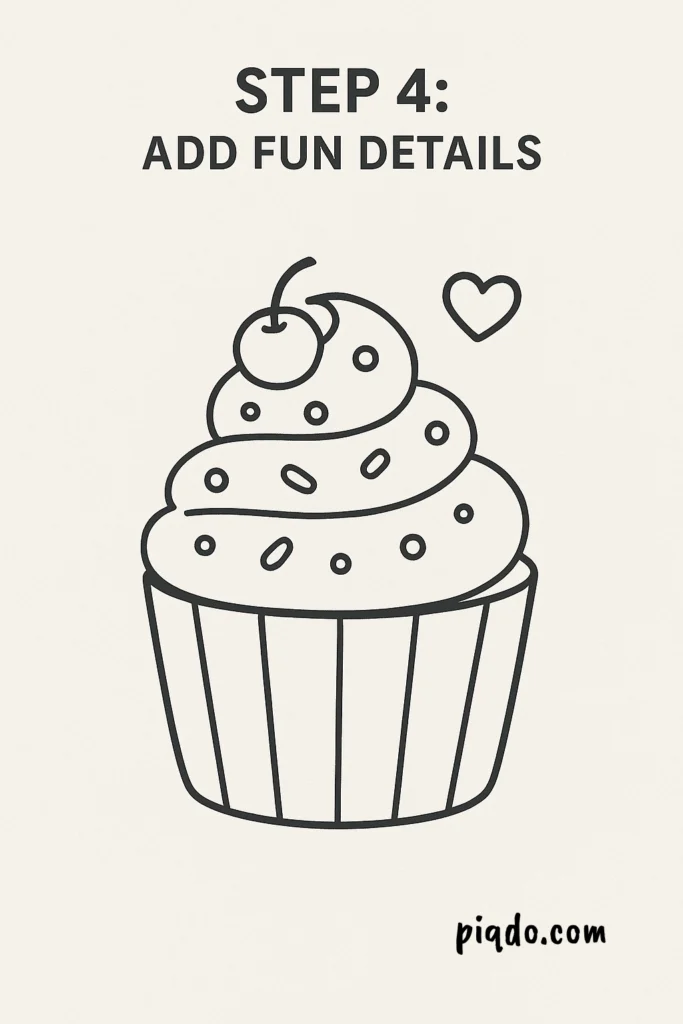
Step 4: Add Fun Details 🎉
Decorate your frosting with tiny circles for sprinkles or a cute cherry 🍒 on top! You can also add a little heart or star if you like.
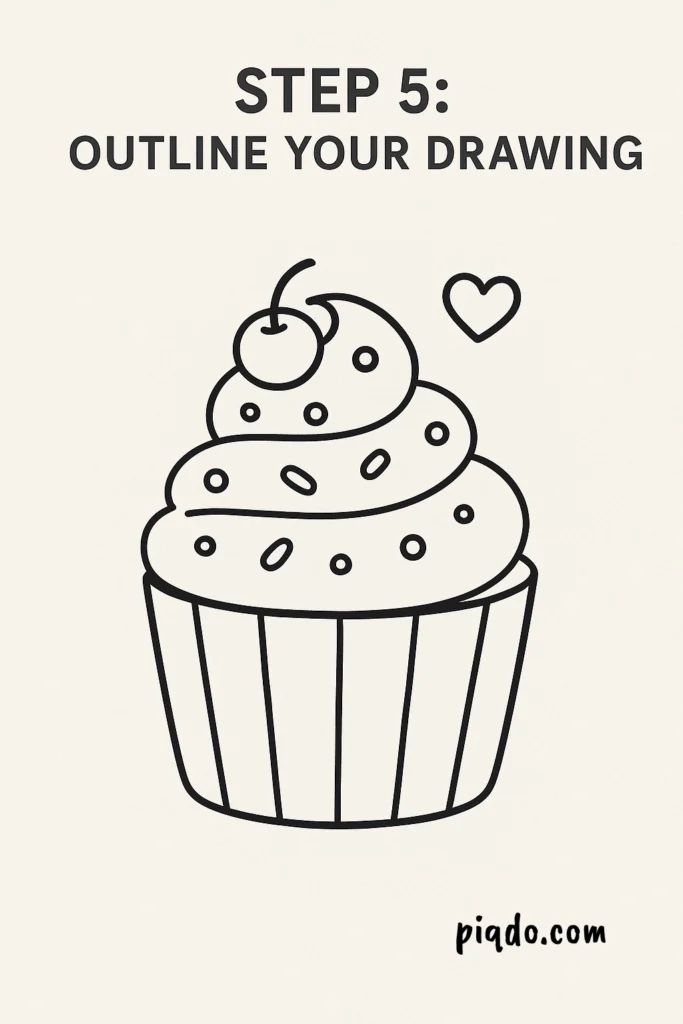
Step 5: Outline Your Drawing 🖊️
Once you’re happy with your sketch, trace over your lines with a black pen or a darker pencil to make everything stand out.
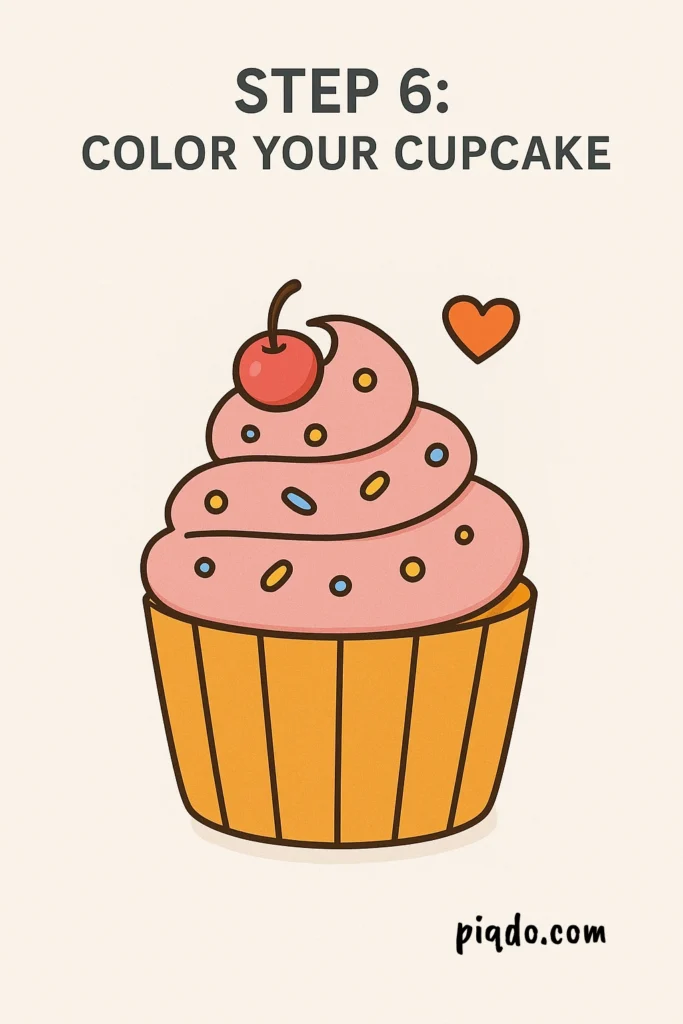
Step 6: Color Your Cupcake 🌈
Now it’s time to bring your cupcake to life! Color the liner any shade you want — maybe a bright pink or sky blue? 🌸🎨 Then make your frosting colorful and sweet-looking with your favorite colors!
🥳 Final Tips:
- Don’t worry about making it perfect — cupcakes come in all shapes and styles!
- Try adding different toppings like a cookie, candy, or extra sprinkles.
- Practice drawing a few different cupcakes and create your own cupcake shop collection!
There you have it — a deliciously cute cupcake drawing! 🎂🖍️
Have fun creating, and don’t forget to show off your sweet masterpiece!