Want to draw a beautiful butterfly but not sure where to start? This beginner-friendly tutorial will guide you through each step with easy instructions and helpful tips. Whether you’re sketching for fun or teaching a child, this project is both creative and rewarding!
✏️ What You’ll Need
- Pencil
- Eraser
- Black pen or marker
- Colored pencils, crayons, or markers
- Drawing paper
🦋Step-by-Step Butterfly Drawing Tutorial
Step 1: Draw the Body
Start by drawing a vertical oval in the center of your paper. This will be the butterfly’s body. Then, add a small circle on top for the head.

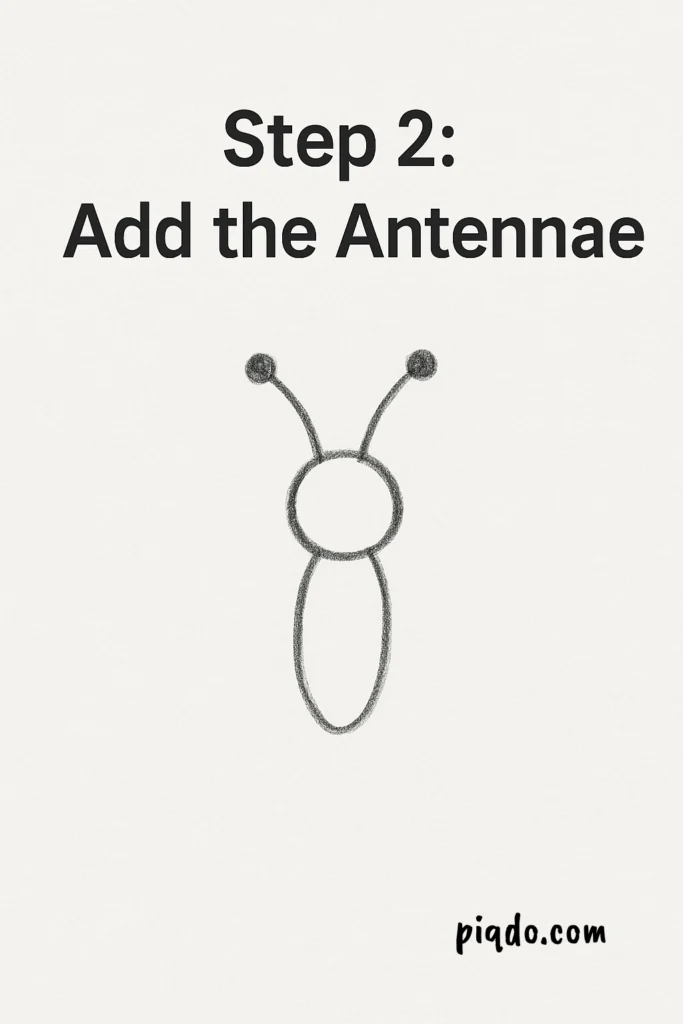
Step 2: Add the Antennae
Draw two curved lines extending from the top of the head. Finish each one with a small dot to form the butterfly’s antennae.
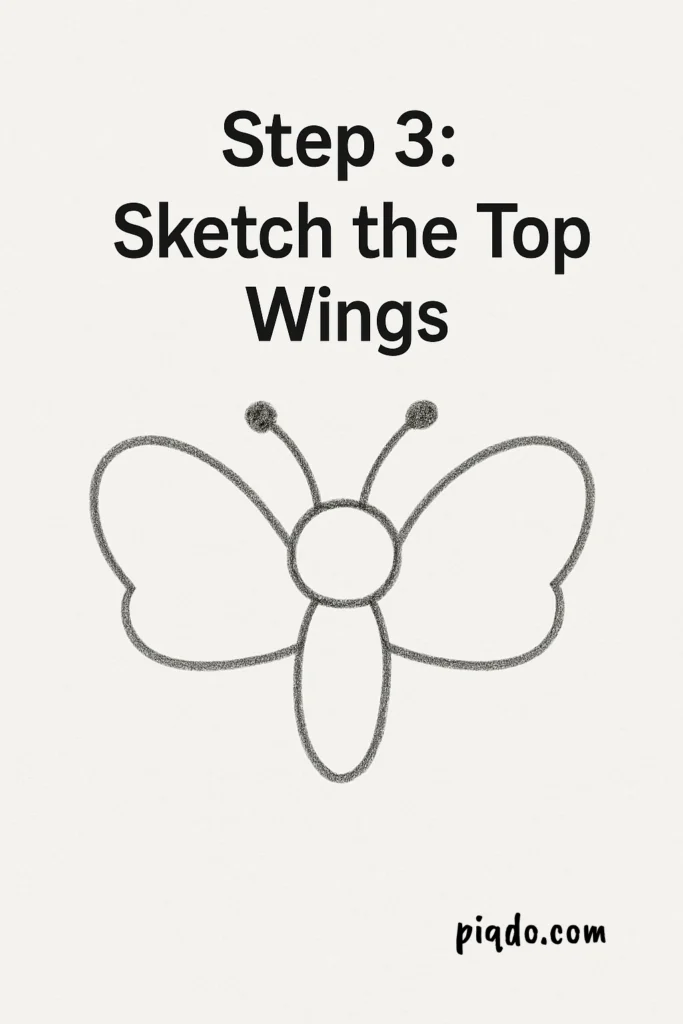
Step 3: Sketch the Top Wings
On both sides of the body, draw two large curved shapes, like a number “3” on its side. These are the top wings.
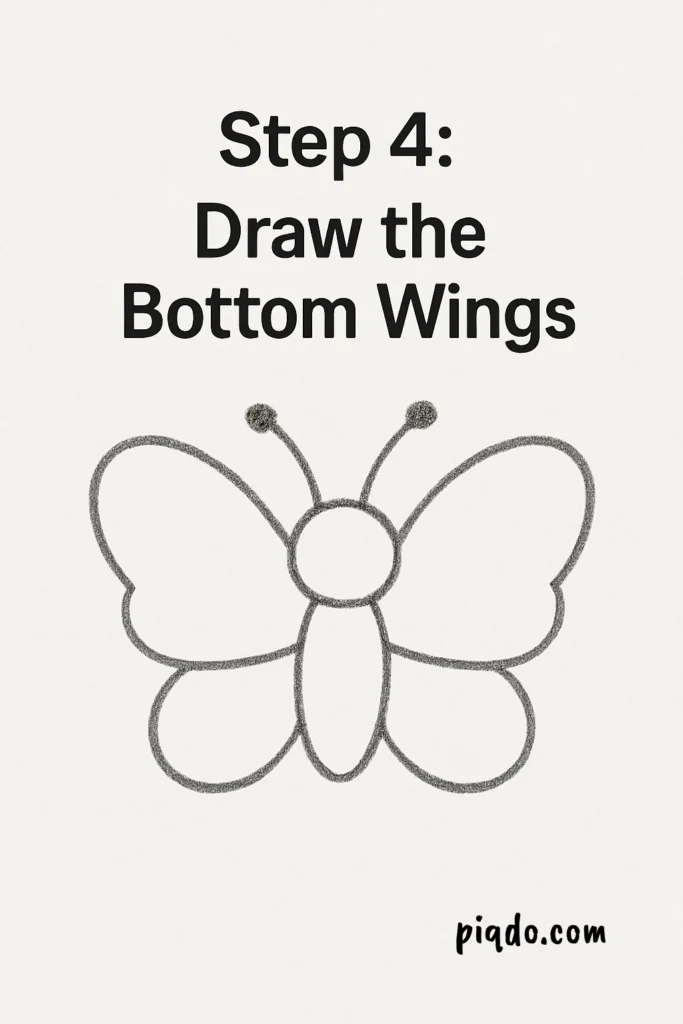
Step 4: Draw the Bottom Wings
Beneath the top wings, draw two smaller curved shapes. Let them overlap the body slightly—they’re the lower wings.
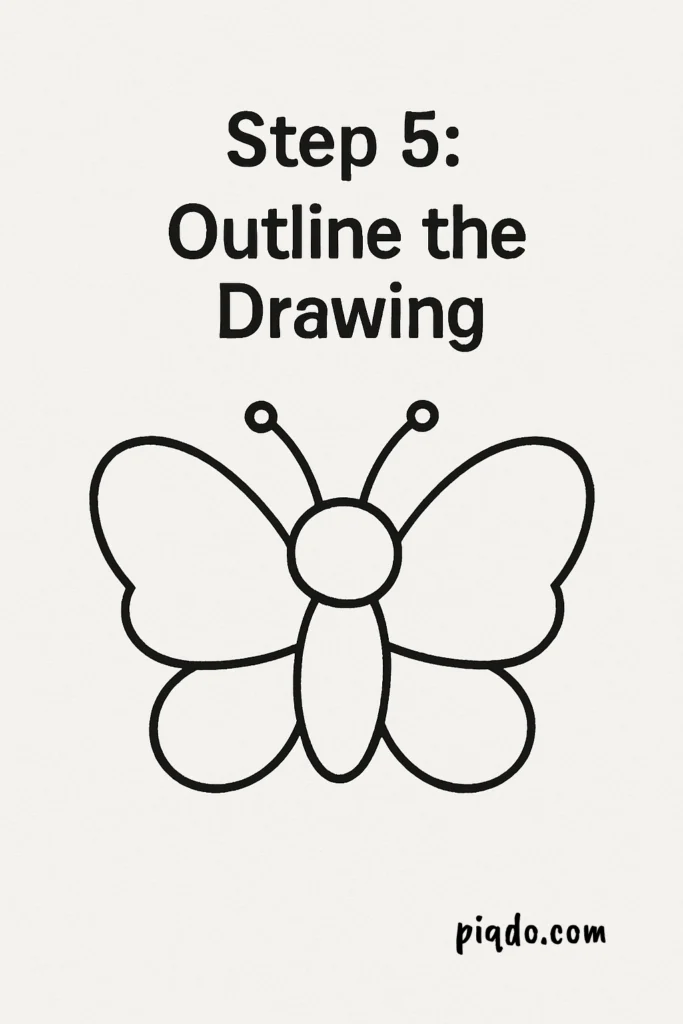
Step 5: Outline the Drawing
Trace over your pencil lines with a black pen or marker. Wait for the ink to dry, then gently erase the pencil.
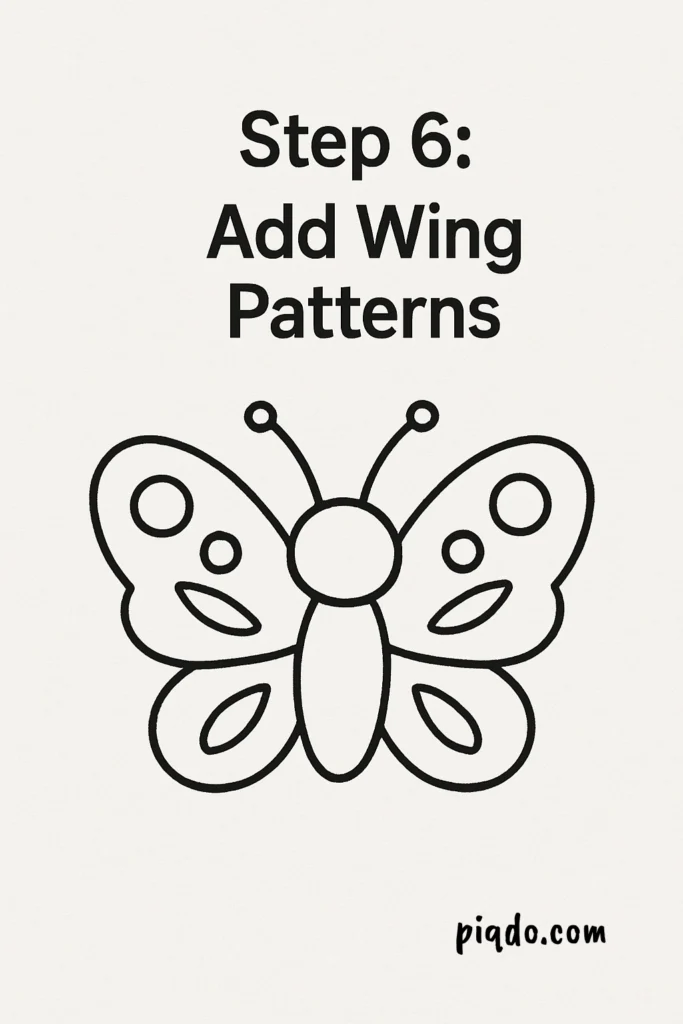
Step 6: Add Wing Patterns
Inside each wing, draw shapes like circles, lines, or teardrops to decorate. Try to keep the patterns symmetrical for a natural look.
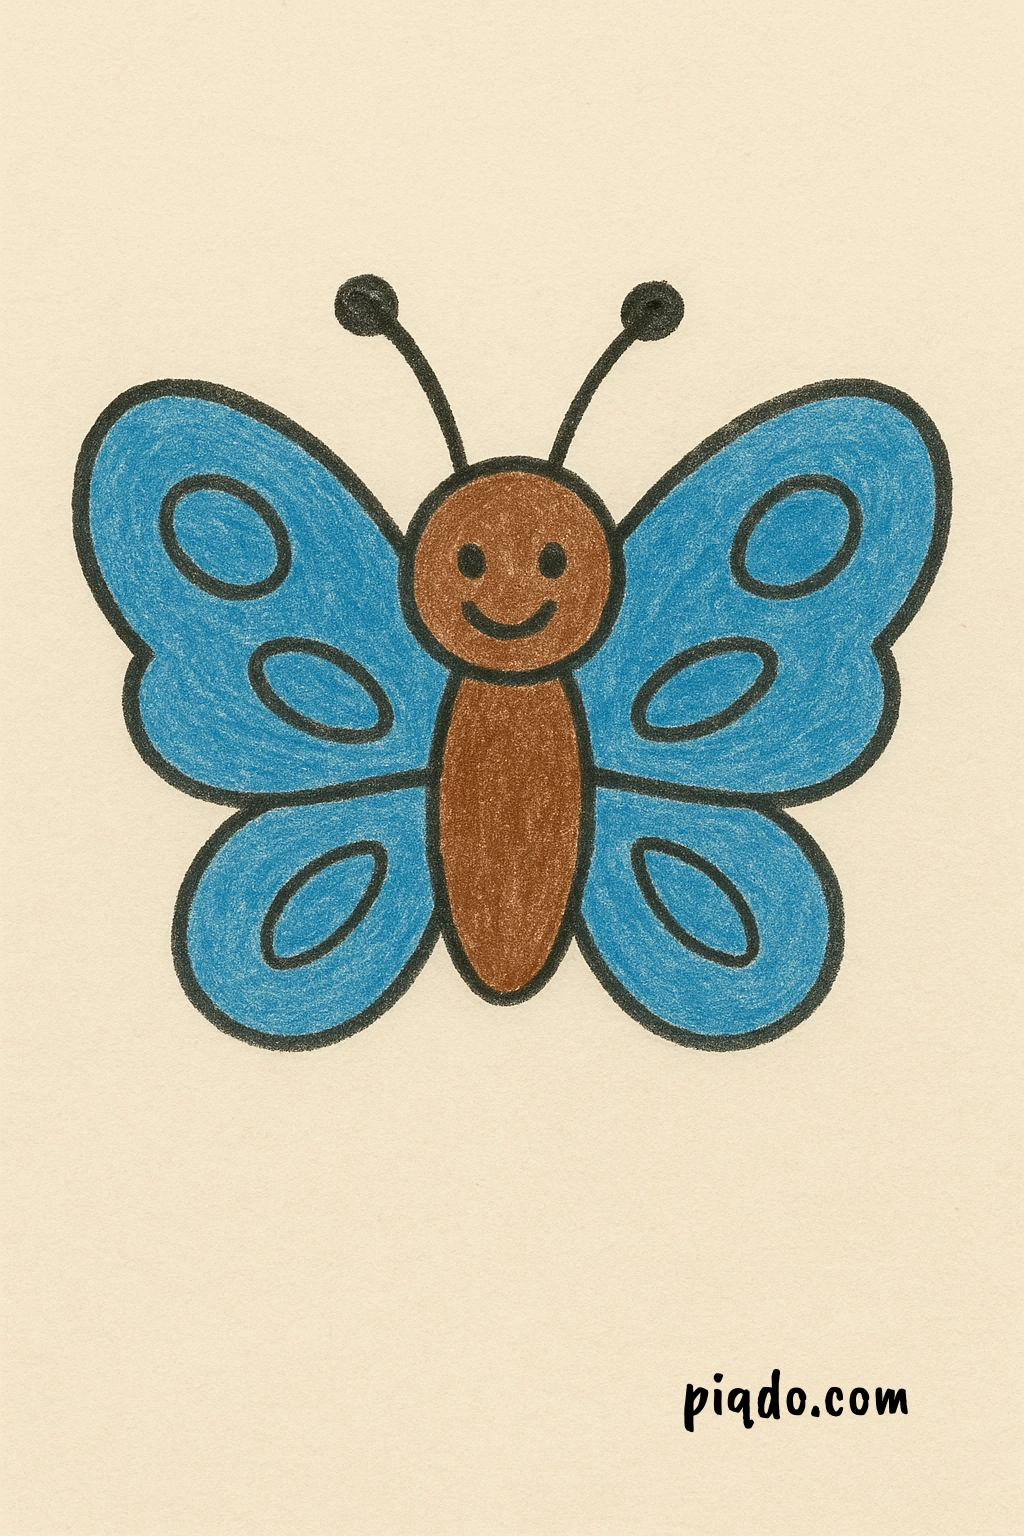
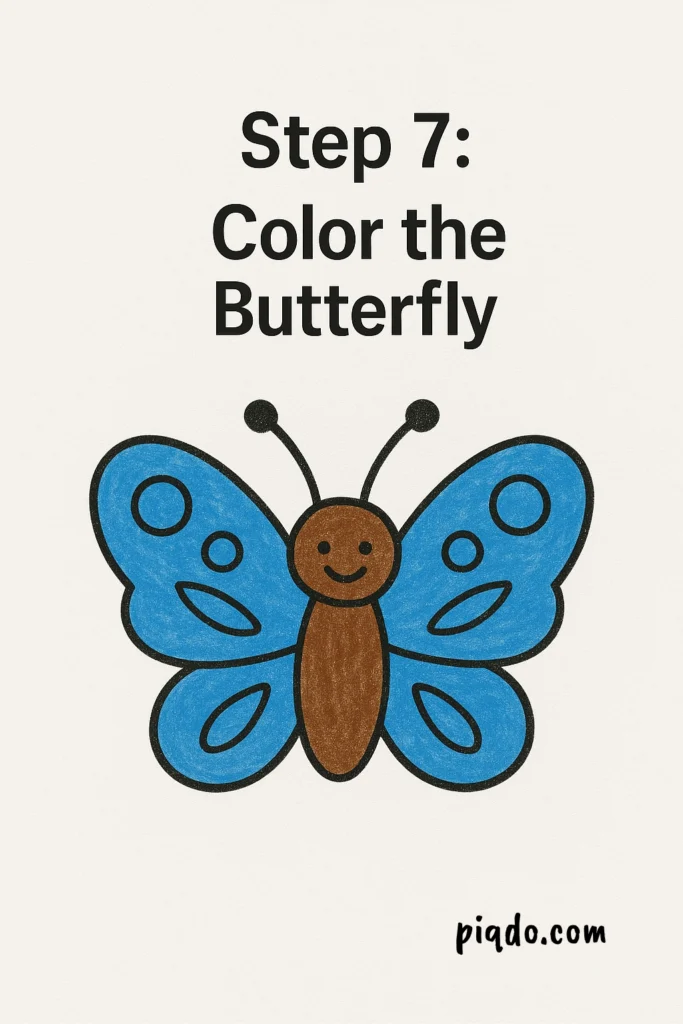
Step 7: Color Your Butterfly
Use bright, fun colors to fill in your butterfly. Make each wing section stand out by blending or contrasting shades.
🎨 Bonus Tips
- Use reference images of real butterflies for color ideas.
- Mix crayons and markers for texture variety.
- Encourage kids to name their butterflies—makes it extra fun!
✅ Final Thoughts
Learning how to draw a butterfly step-by-step is a joyful way to improve your drawing skills and express your creativity. Every butterfly is unique—just like your art. Don’t worry about making it perfect. Enjoy the process, and let your imagination fly!