Learn to Sketch a Cool Car with Ease!
Drawing a car might seem difficult at first, but with the right steps, it’s actually fun and simple. In this beginner-friendly tutorial, you’ll learn how to draw a basic car in just a few steps. Whether you’re a young artist or just starting out, this guide is perfect for you!
Let’s grab your supplies and get started! 🖍️
🧰 Materials Needed
Here’s what you’ll need to follow along:
- ✏️ Pencil
- 🧽 Eraser
- 🖊️ Black pen or marker
- 📄 Drawing paper
- 🎨 Coloring tools (colored pencils, crayons, or markers)
✍️ Step-by-Step Instructions
Step 1: Draw the Car’s Body
Start with a long horizontal rectangle near the middle of your paper. This will be the main body of the car. Make sure it’s wider than it is tall.

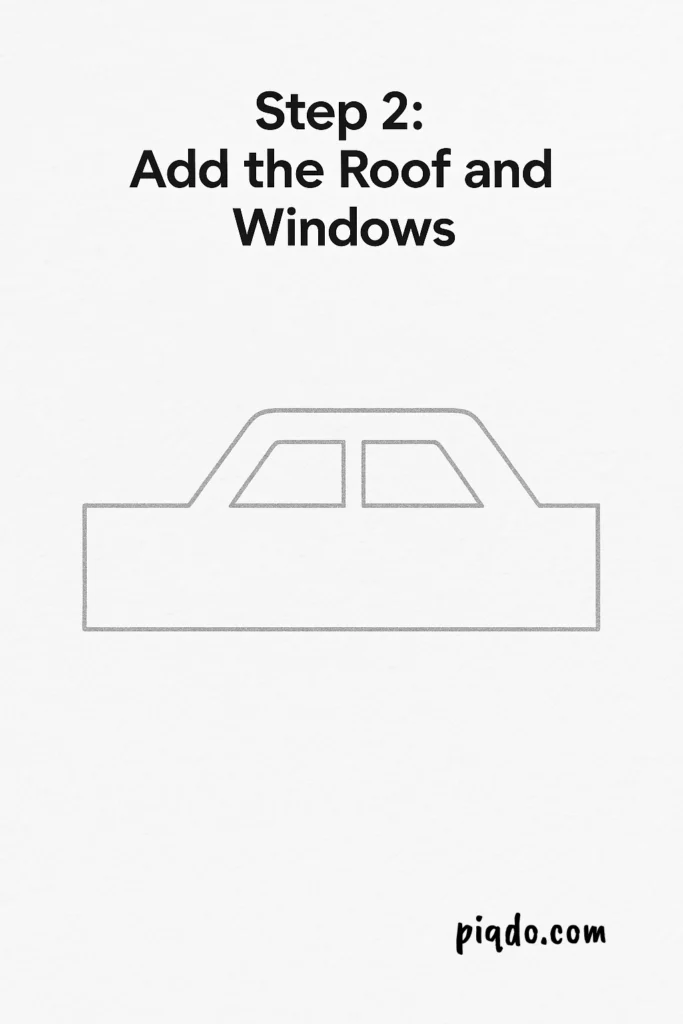
Step 2: Add the Roof and Windows
On top of the body, draw a smaller trapezoid or rectangle to form the roof. Inside the roof shape, add two vertical rectangles for the windows. You can curve the corners slightly for a smoother look.
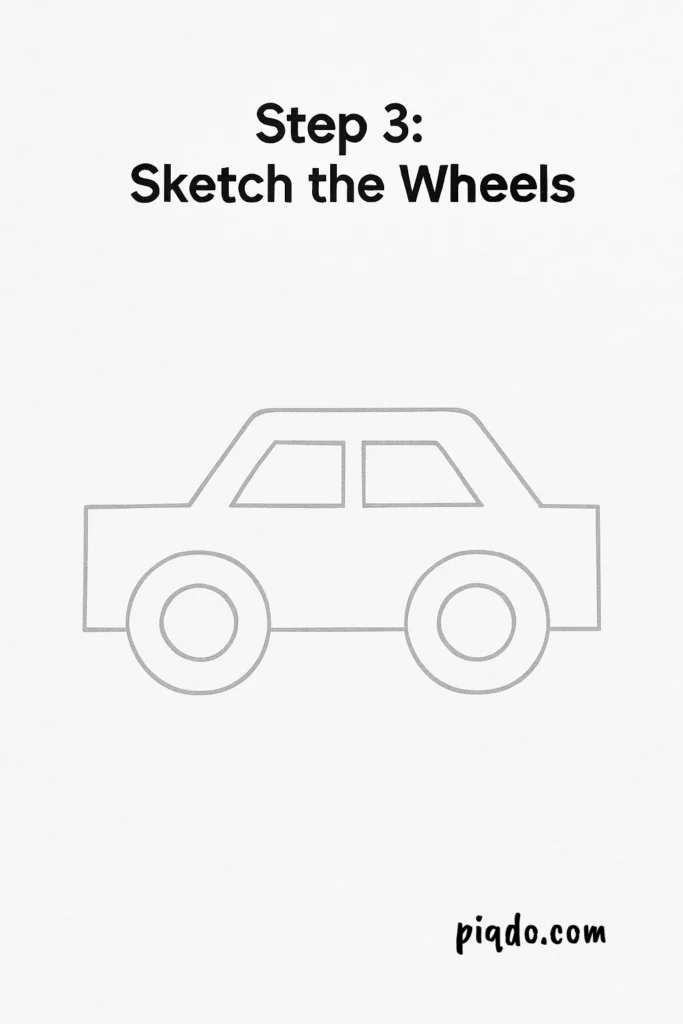
Step 3: Sketch the Wheels
Under the car, draw two big circles — one near the front and one near the back. These are your car’s wheels. Inside each circle, draw a smaller one to represent the hubcaps.
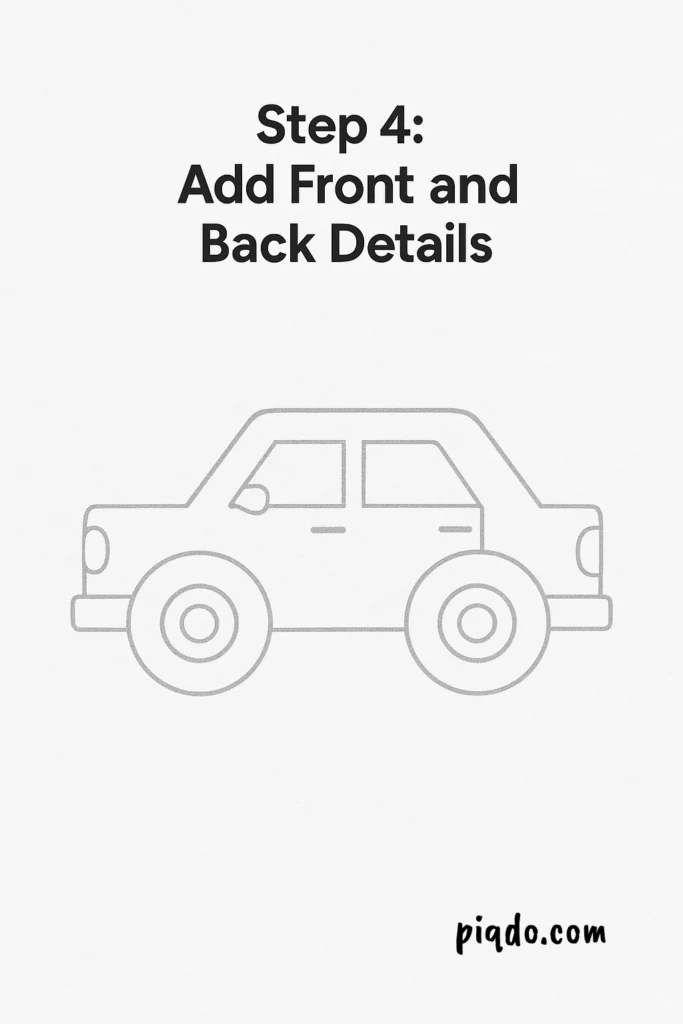
Step 4: Add Front and Back Details
Give your car character by drawing the headlights, taillights, bumper, and license plate. You can even sketch a small door handle and side mirrors.
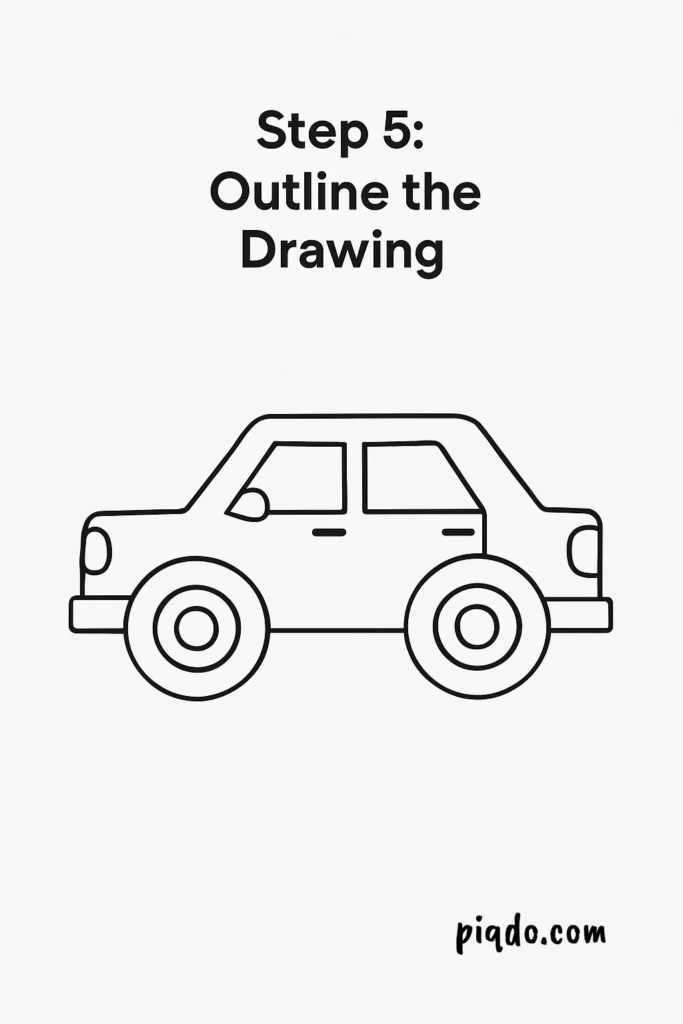
Step 5: Outline the Drawing
Once you’re happy with your pencil sketch, go over it with a black pen or marker. This will make your lines bold and clean. Wait a moment for the ink to dry before moving on.
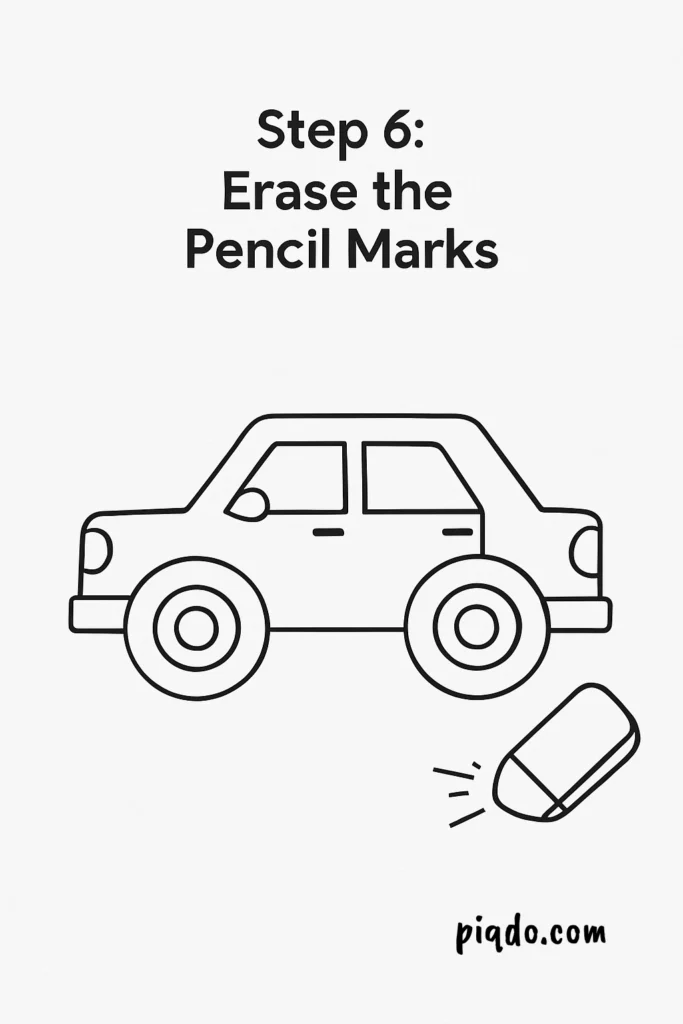
Step 6: Erase the Pencil Marks
After outlining, gently erase all the leftover pencil lines. Your car should now have a polished look!
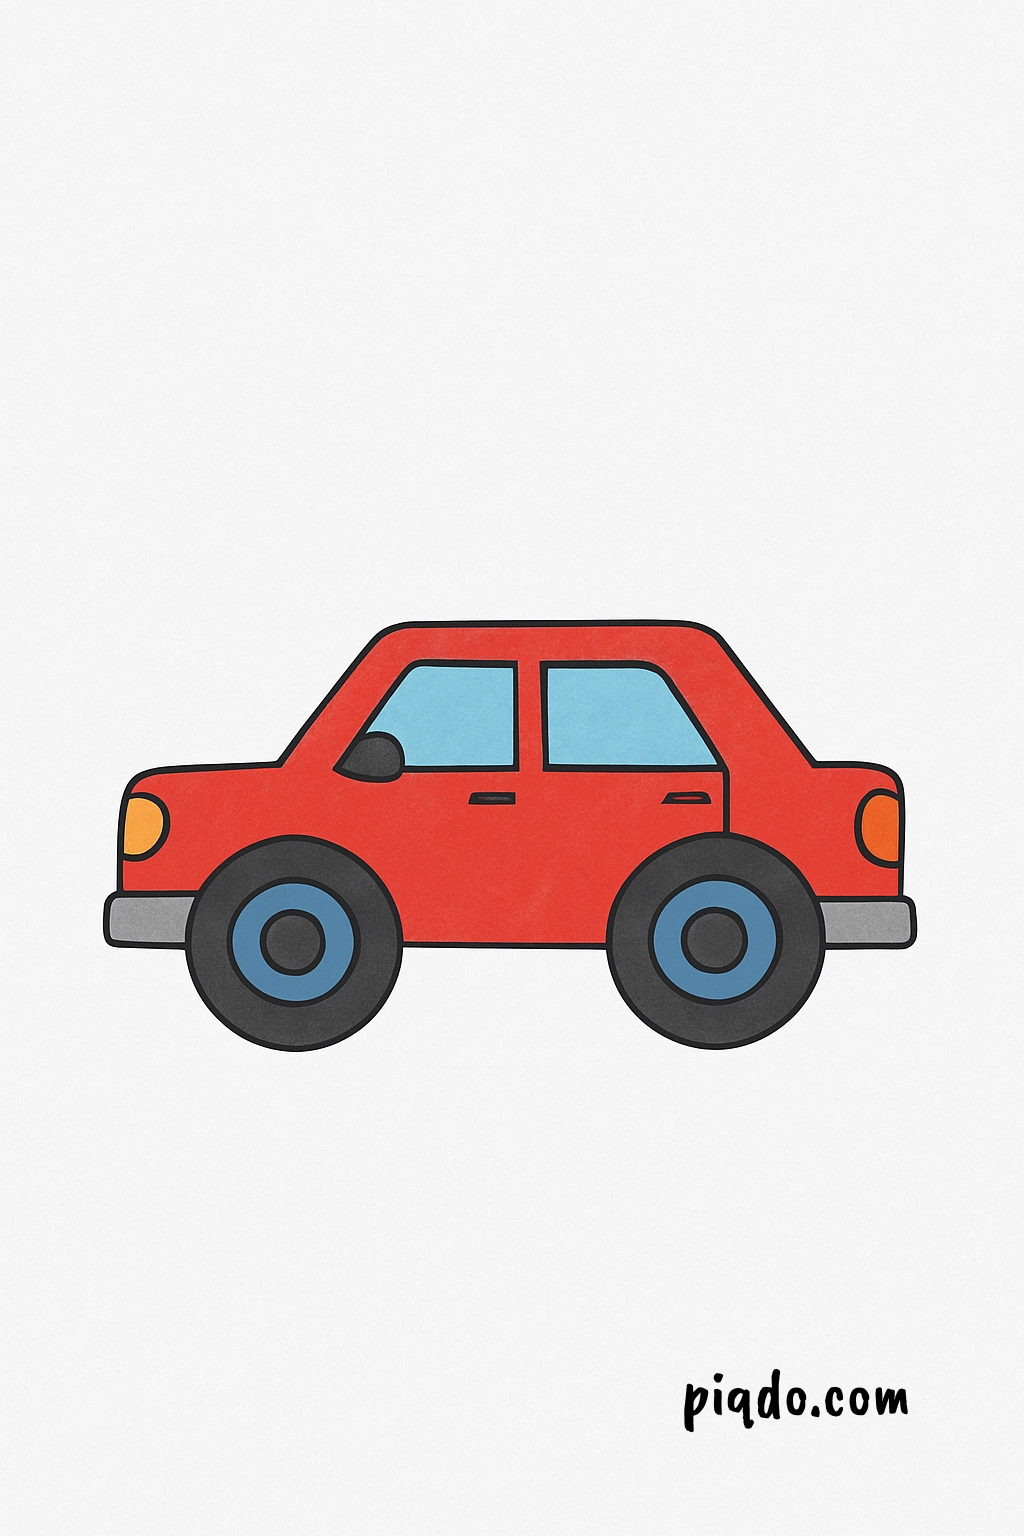
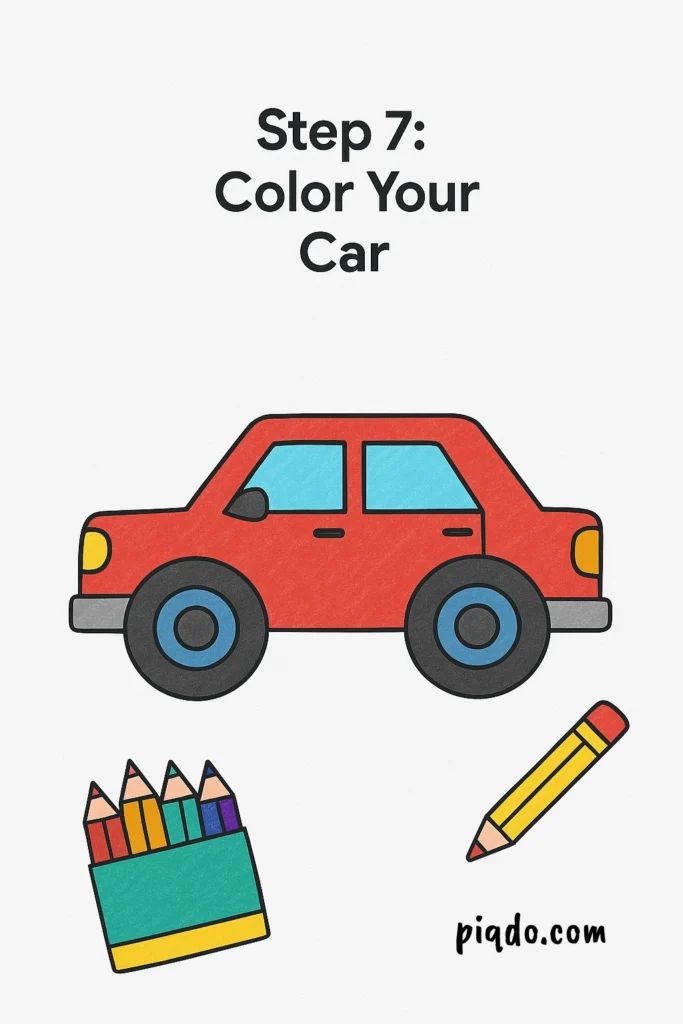
Step 7: Color Your Car
Bring your car to life with color! Use your favorite shades to fill in the car’s body, wheels, windows, and lights. Want to get creative? Try adding racing stripes, flames, or fun decals! 🔥
🎉 You Did It!
Congratulations — you just learned how to draw a car! 🚗👏 Keep practicing and try drawing cars in different styles: sporty, vintage, or even futuristic. The more you draw, the better you’ll get!
🏁 Drawing Tips
- Use reference images to explore different car shapes.
- Start with light pencil strokes so it’s easier to erase.
- Practice drawing wheels in the same size for balance.
- Try shading for more depth and realism.
📌 Final Thoughts
Drawing is a great way to relax, be creative, and learn new skills. This easy car tutorial is just the beginning. Who knows? Maybe you’ll start designing your very own dream car! 🚘